
Coconut Sunset Cake
Coconut… Ah, the possibilities! One of my favourite flavours as it is, but think about it… what doesn’t it go with?
When designing this cake I knew I wanted coconut, and I knew what I wanted to do with the icing, but I could not decide on what to do with the filling! Coconut and mango (best gelati combo!), white chocolate and raspberries, or should I stick with pure coconut and make a coconut custard cream?
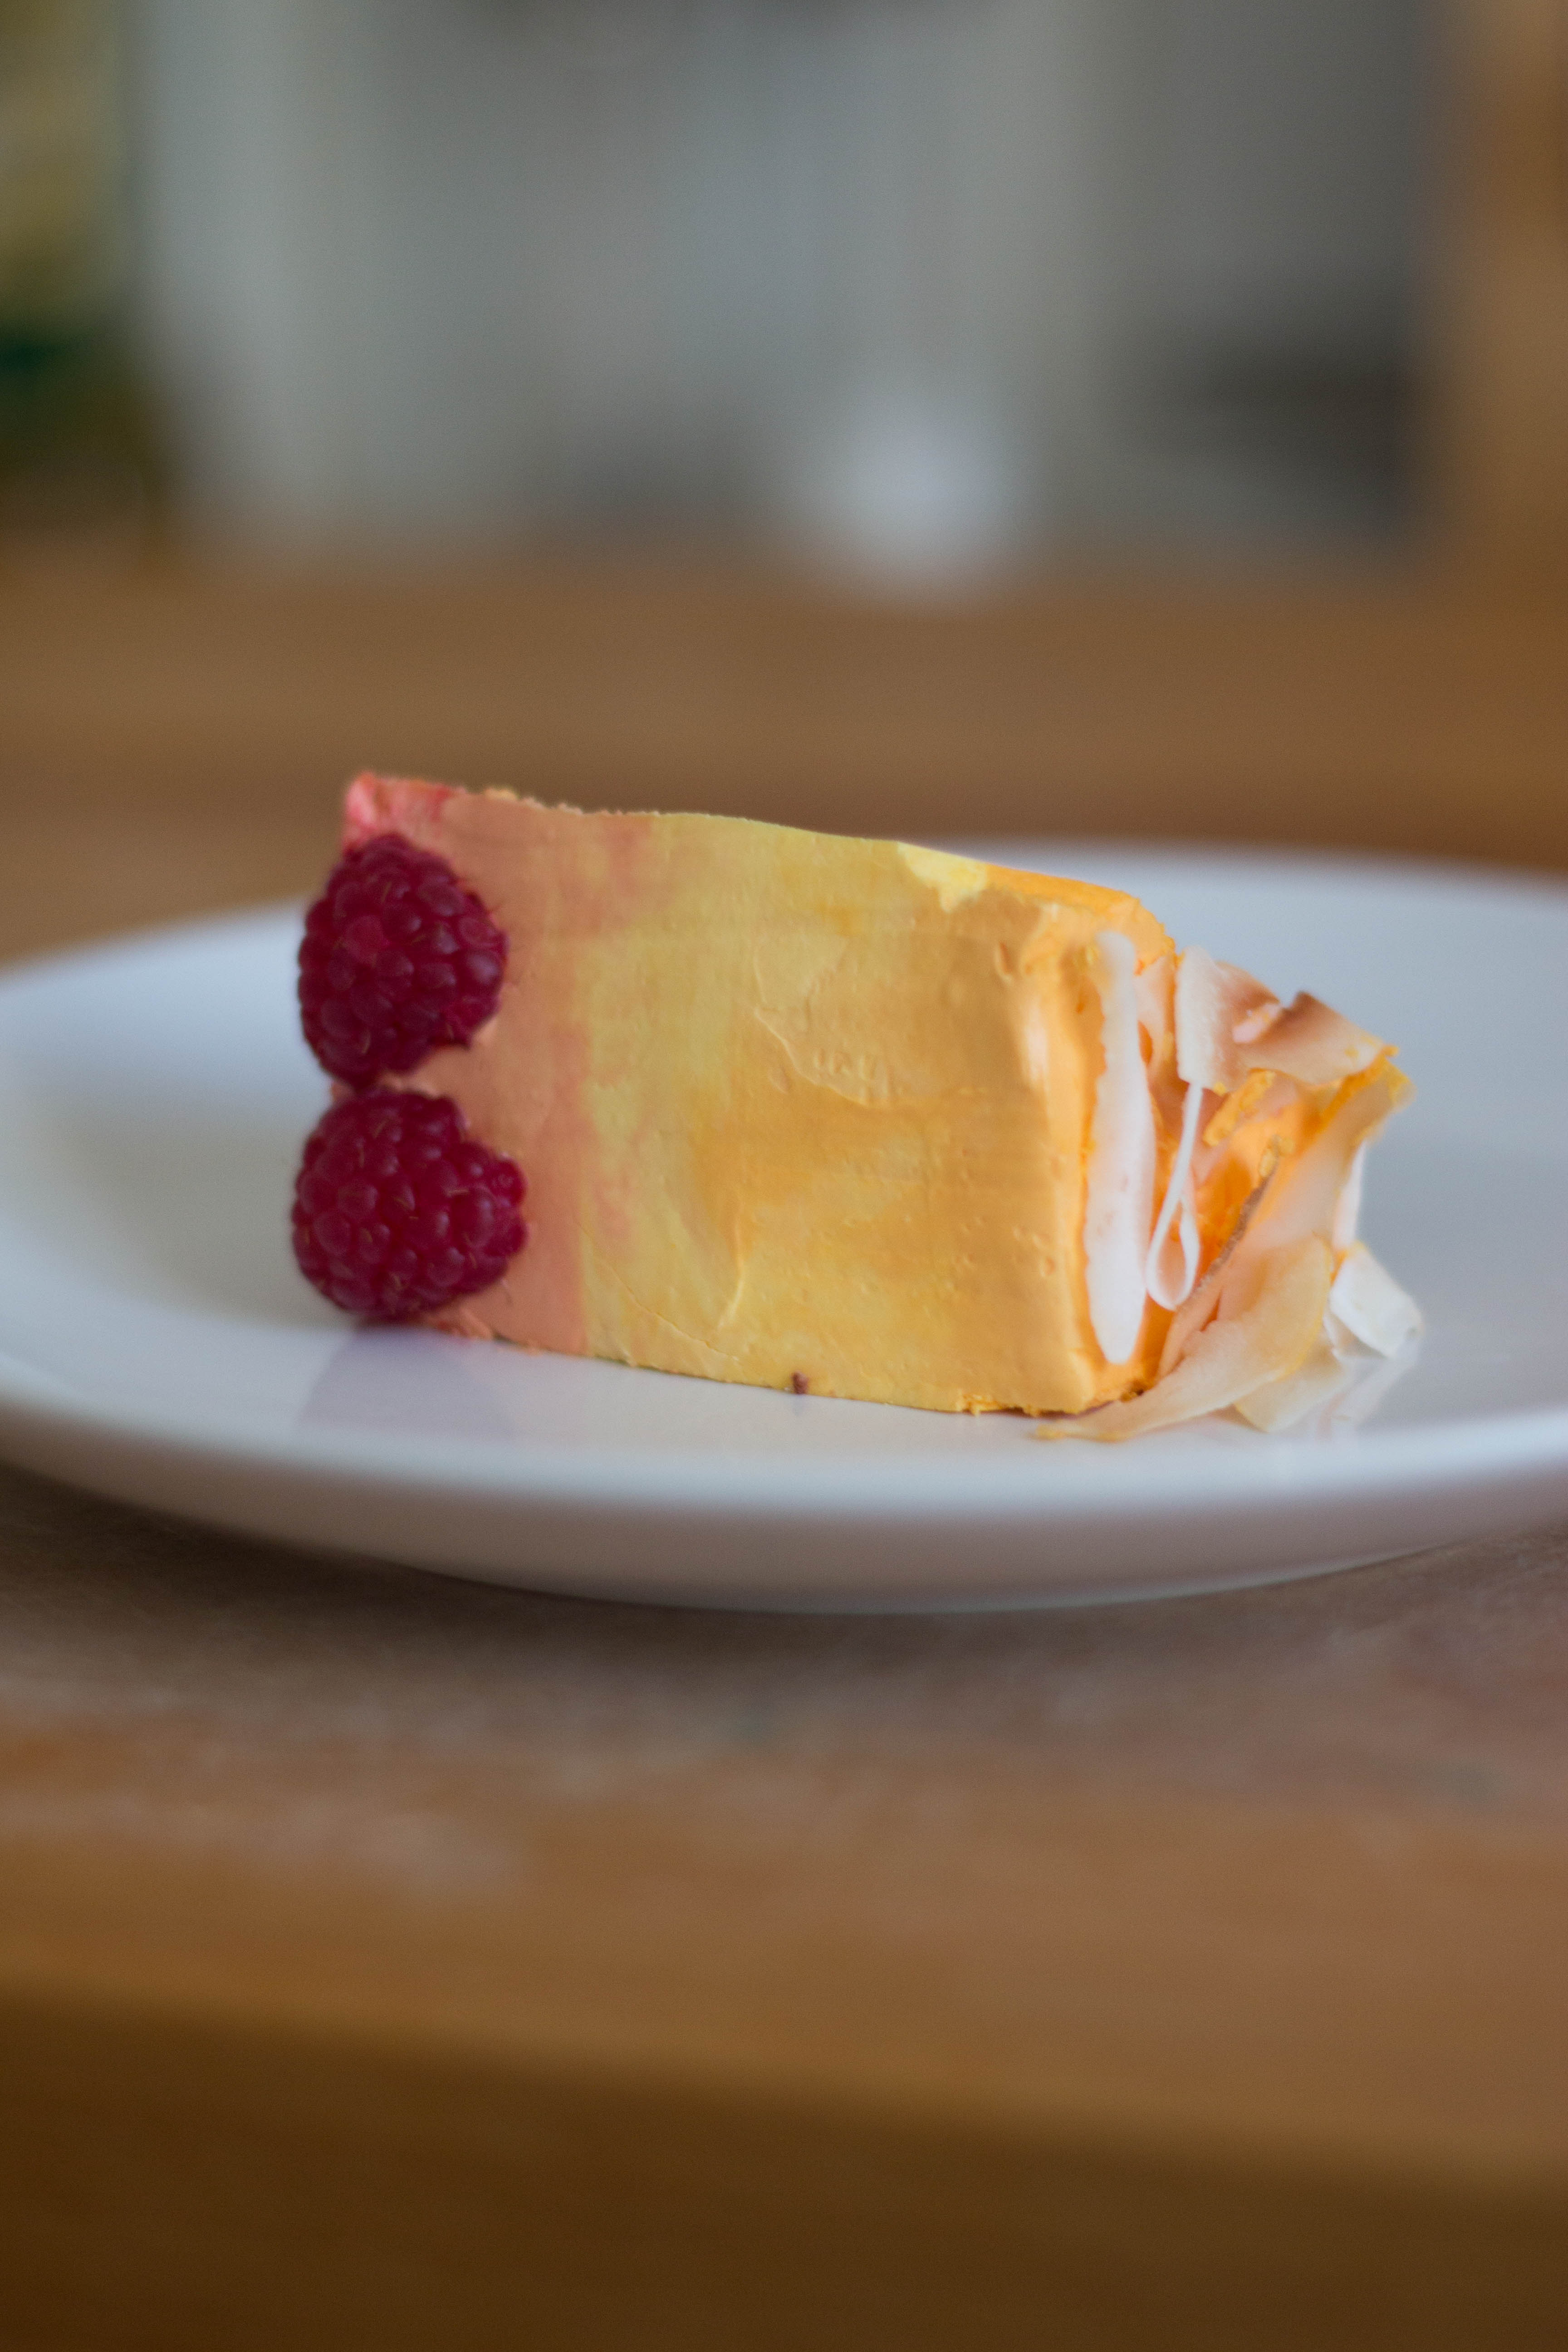
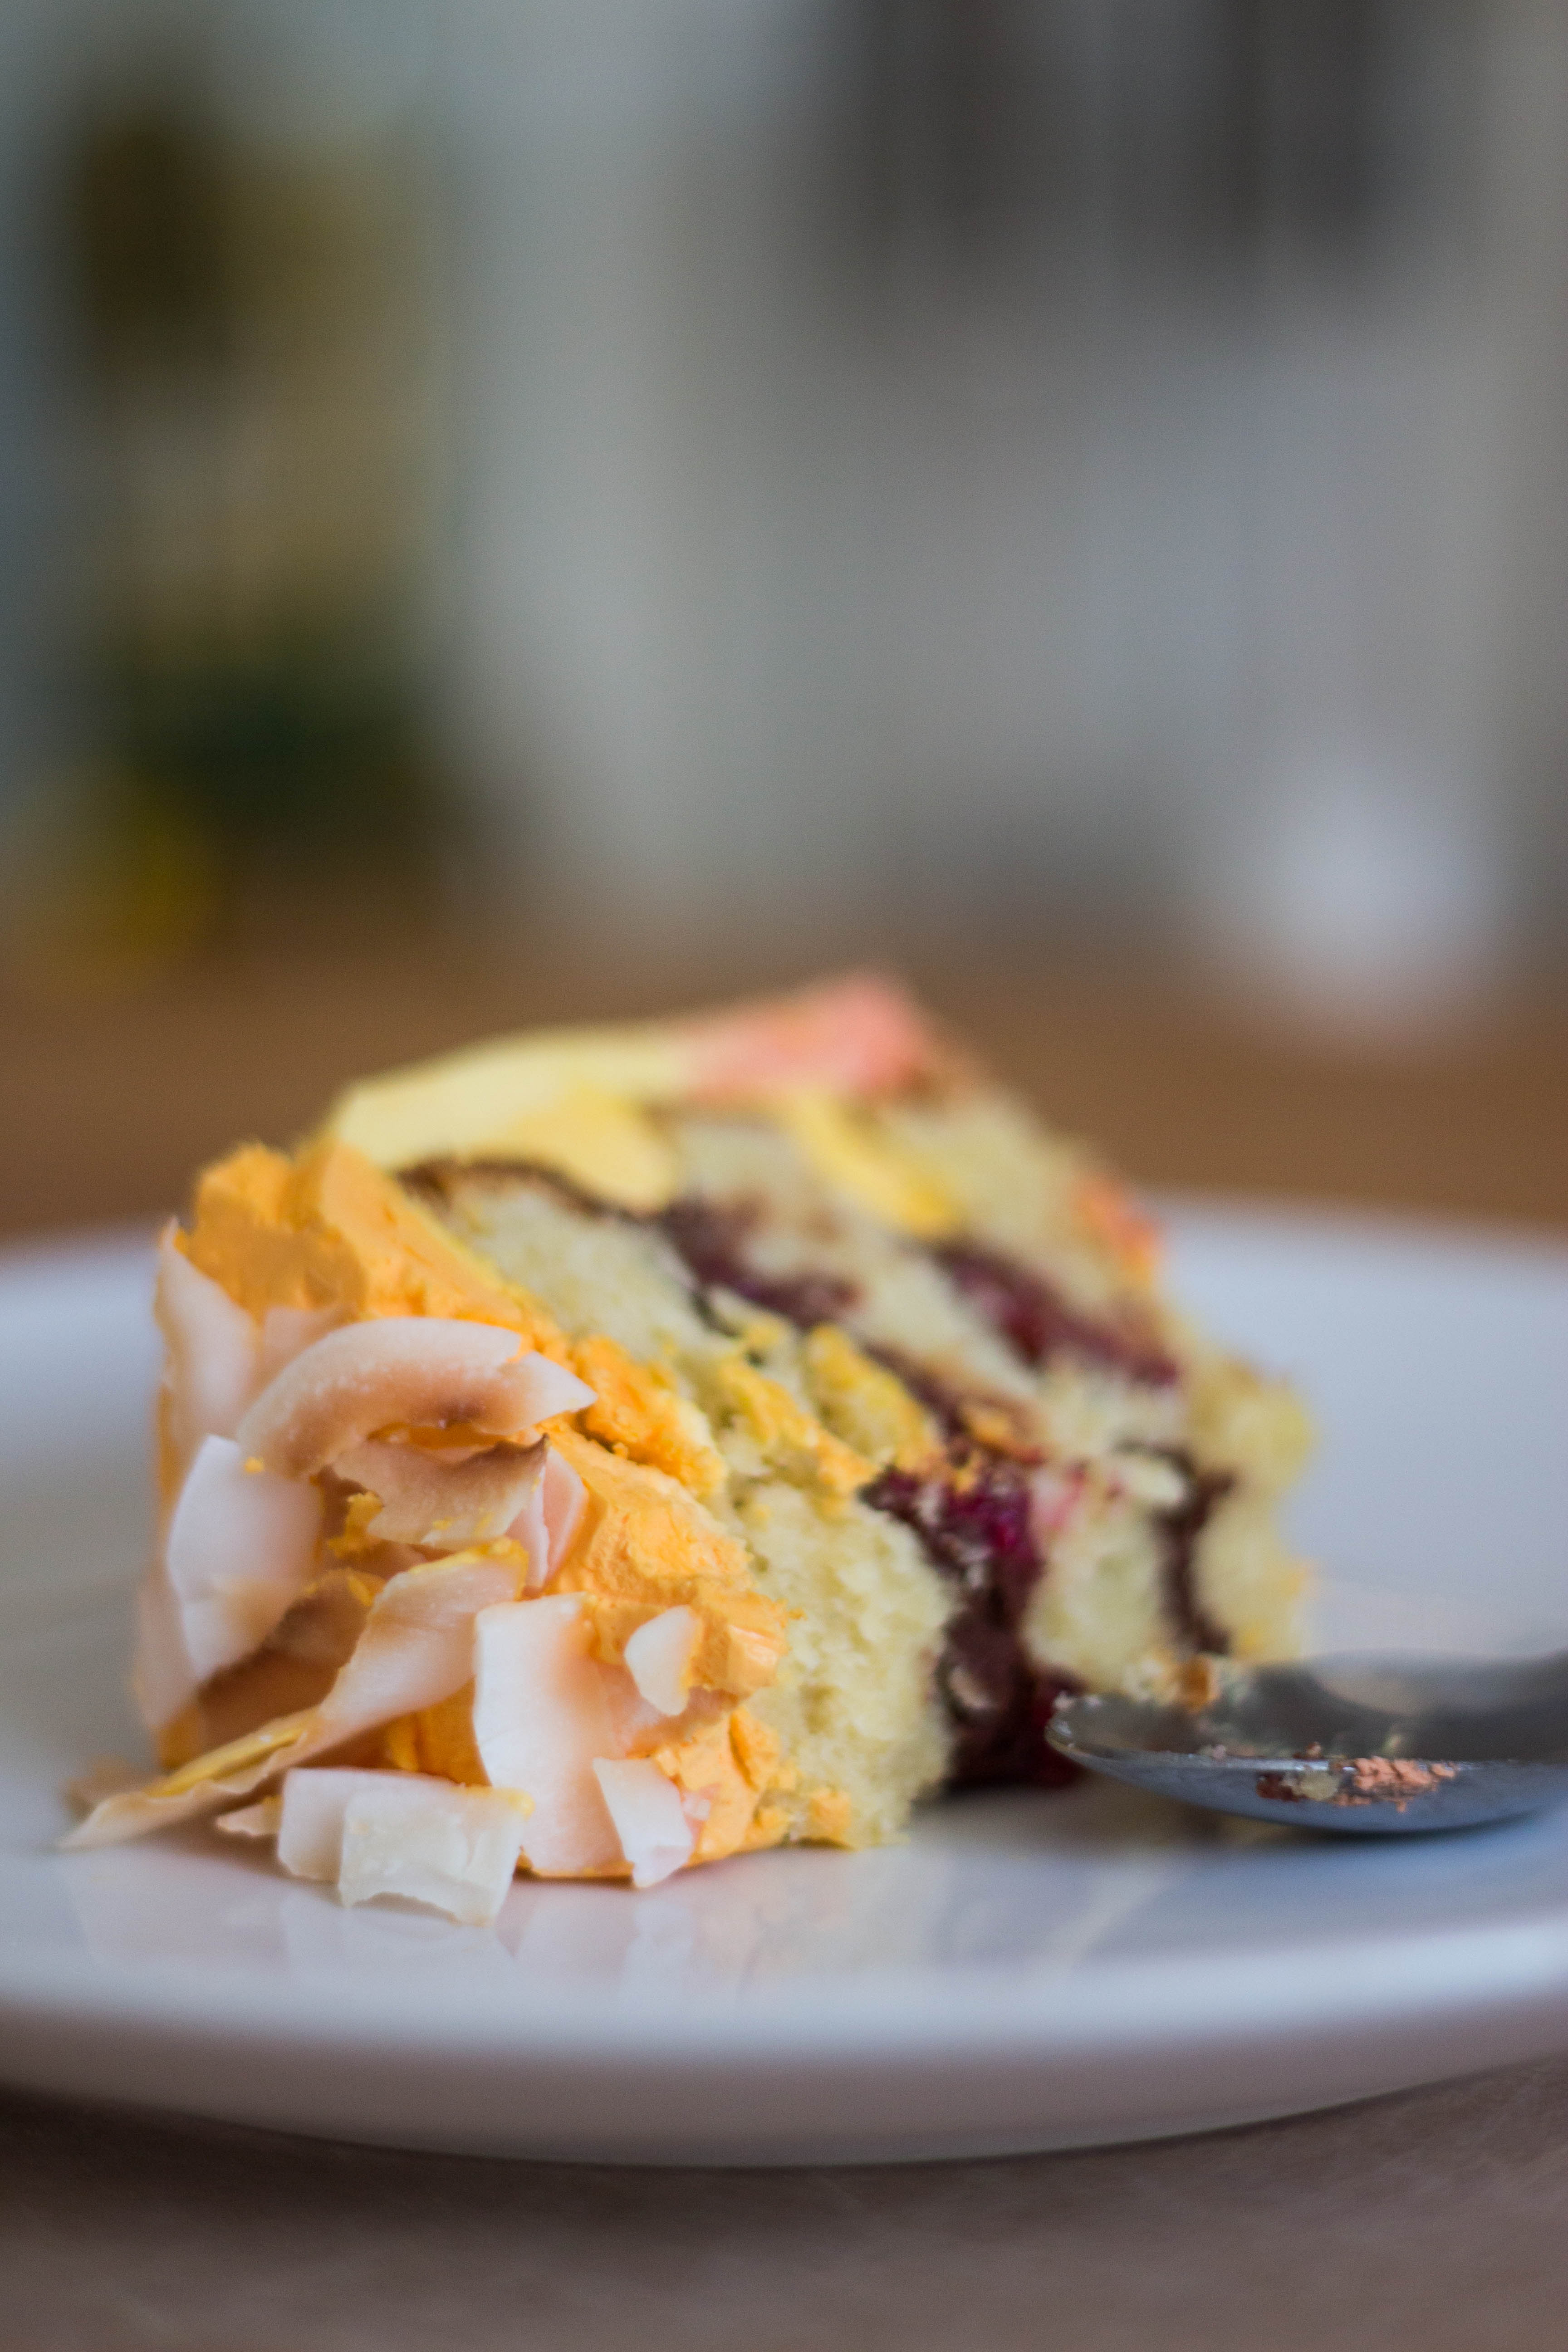
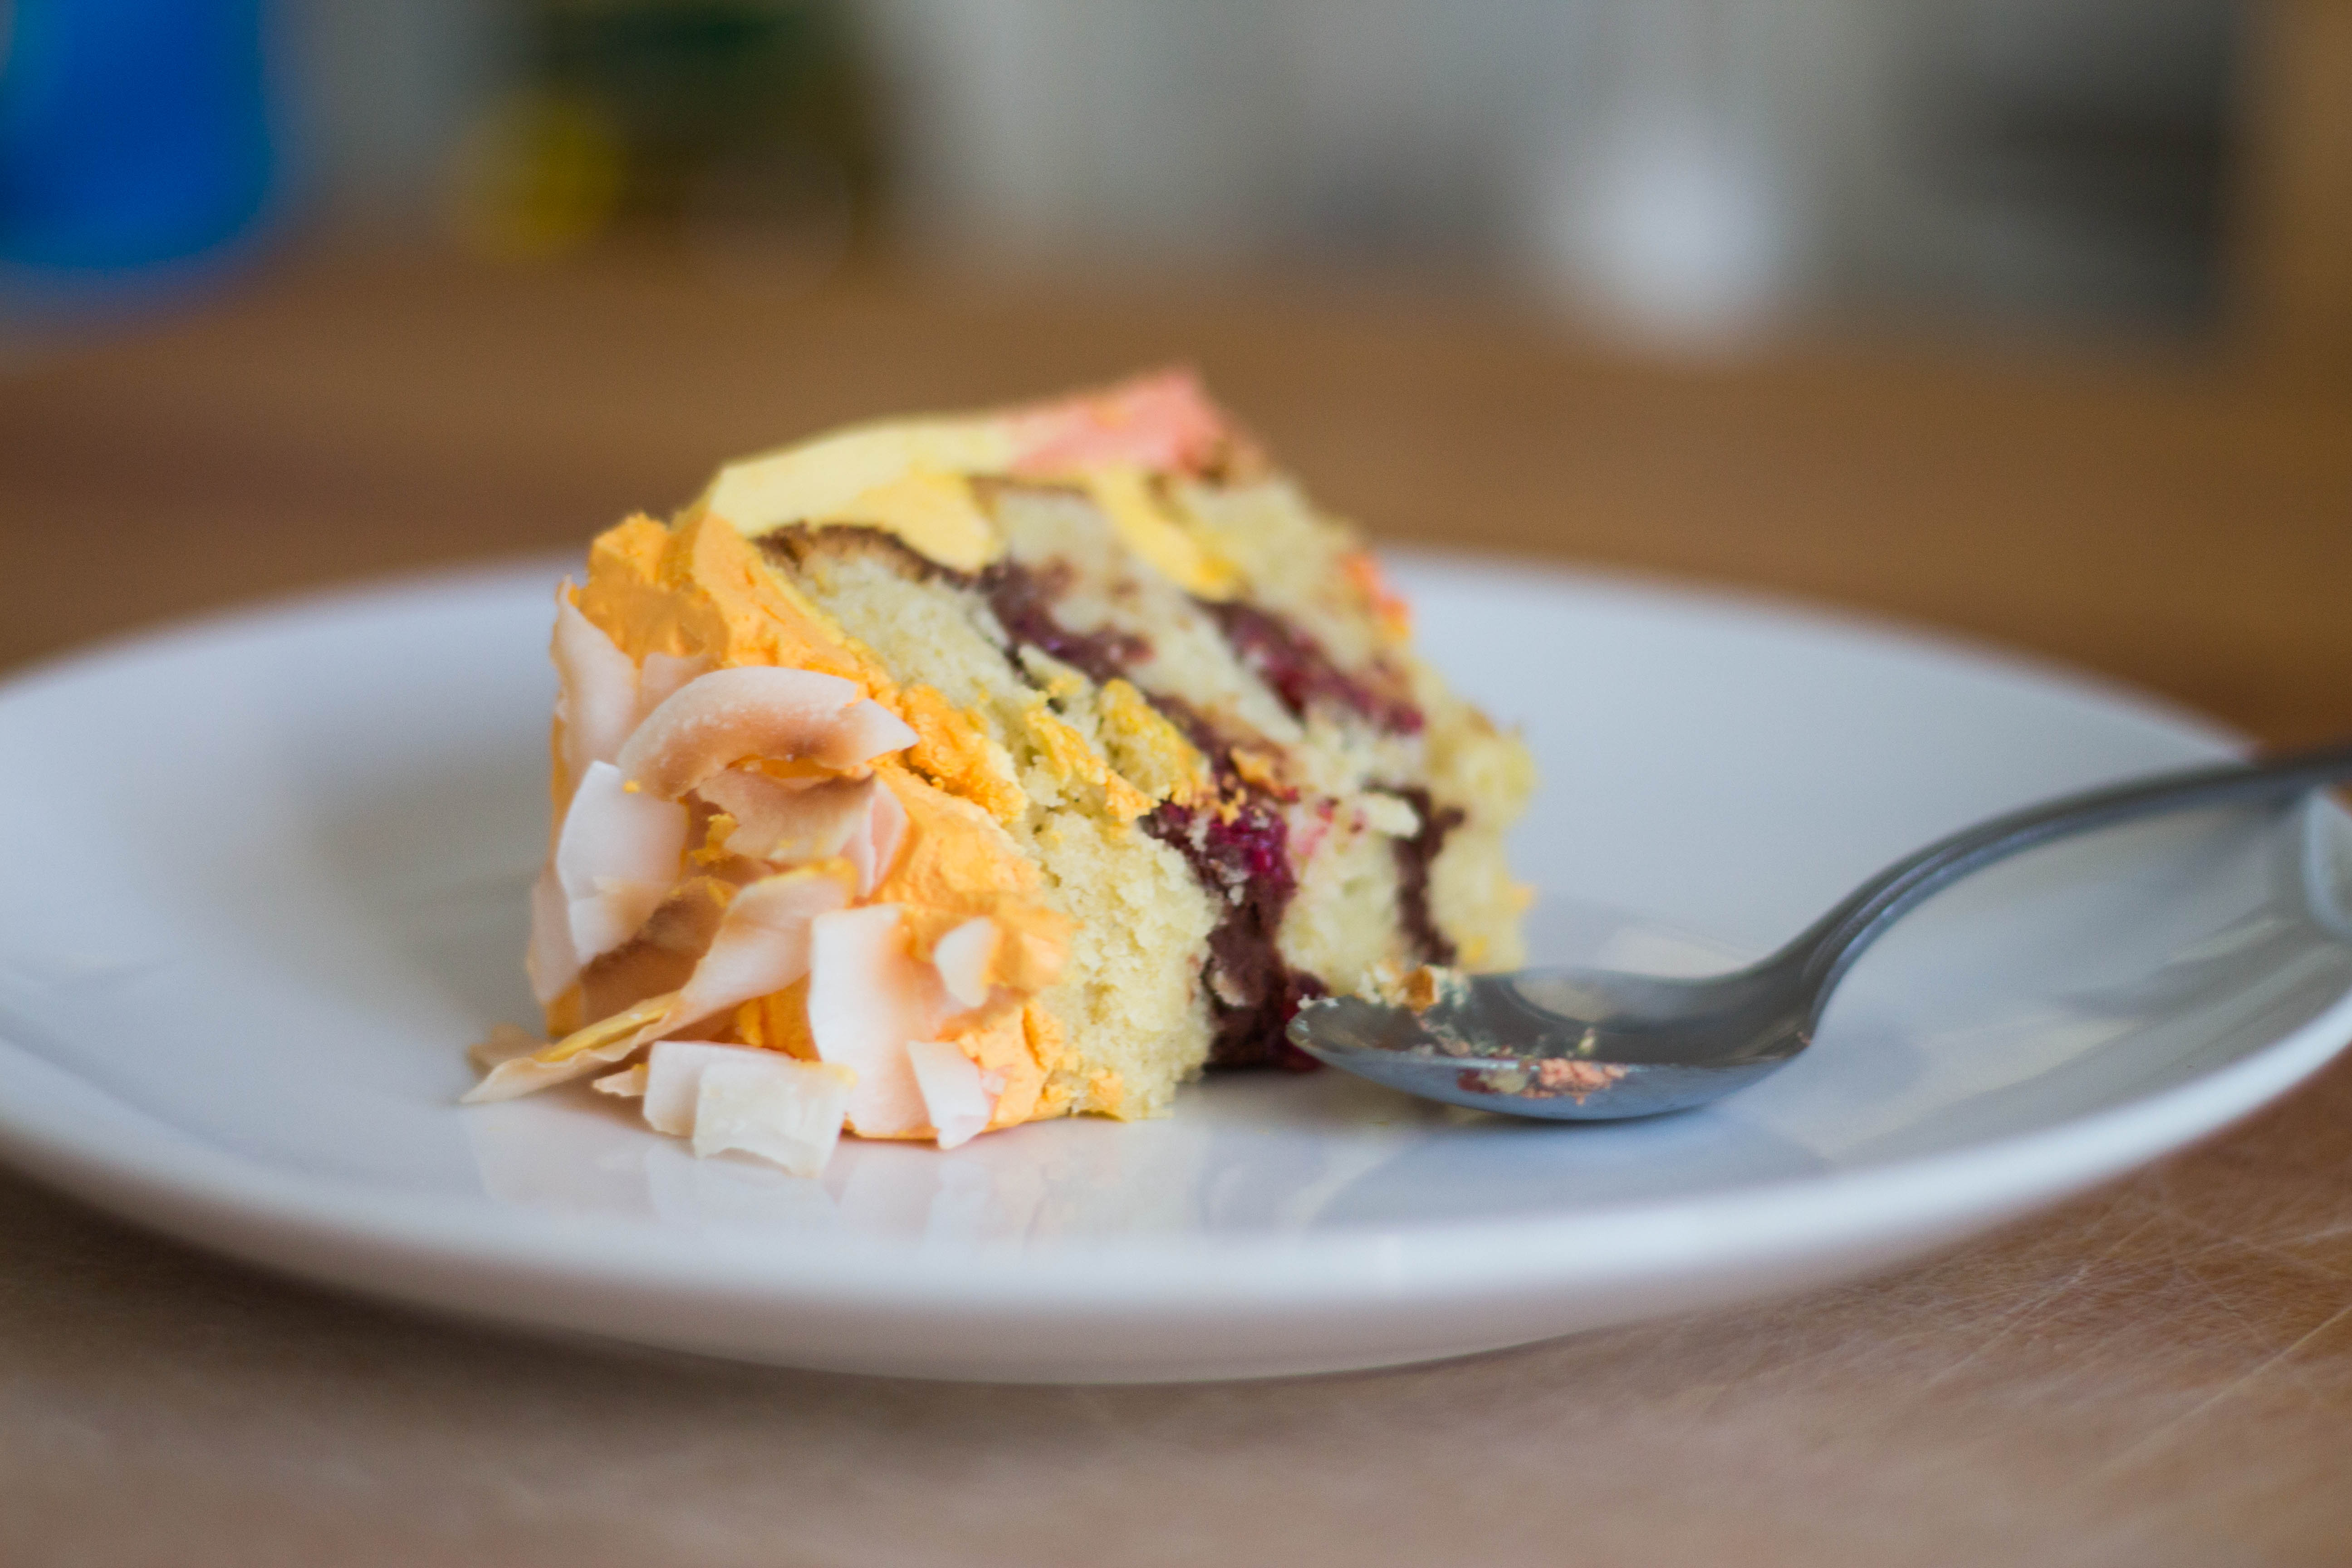
I eventually settled on a chocolate coconut cream with fresh raspberries… it was a good choice.

I really lucked out with my coconut milk for this recipe. I spent ages pouring over labels in the supermarkets and looking at different brands online, trying to find the tin that would produce the richest cream and most intense flavour. I wanted to use the cream for my filling, which meant I’d need to separate the water out of the cans. This is simply done by placing the cans in the fridge for a few hours and scooping the cream off the top, but I was worried about how well it would separate, and how much cream one can would yield.
In the end I went for Pride Coconut Milk from Sainsbury’s, as it had 75% coconut extract which was comparably high, and it was great! So thick and creamy, there was no water to separate out! Of course there were thickeners used, as in all tinned coconut milk, so although I was super happy with my choice I would like to look for some more natural options. I plan to make my own coconut rum syrup with the left over coconut water… yum!
Coconut Sunset Cake
Ingredients
290g (1 1/4 cup) sugar
170g unsalted butter
3 eggs (separated)
1 tsp intense coconut extract
1 tsp vanilla bean paste
250g (1 3/4 cup) plain flour
12.5g (2.5 tsp) baking powder
6g (1 tsp) salt
35g (1/2 cup) dessicated coconut
240ml coconut milk/cream
Method
Preheat oven to 180°C/350° F/Gas Mark 4, and grease an 8 inch cake tin.
Cream butter and 1 cup of the sugar in a large bowl until pale and creamy, then beat in the egg yolks and add in the extracts.
Sift all dry ingredients into a bowl and stir to combine.
Scoop the cream off the top of your coconut milk, leaving the water behind – you will need 240ml of the cream.
Tip: Put your coconut milk tins in the fridge the night before you plan to use them, this will make separating the cream much easier!
Add the dry ingredients and the coconut milk to the creamed mixture a little at a time, starting and finishing with the dry.
Beat your egg whites with the remaining sugar until nice firm peaks are formed, then fold your egg whites into the cake mixture until just combined.

Tip: When beating egg whites, be sure to use a very clean, dry bowl and beaters. I always rewash my bowl and beaters before I start cooking when I know the recipe calls for beaten egg whites, drying them with a fresh clean tea towel to be extra sure! A stainless steel or glass bowl will work best.
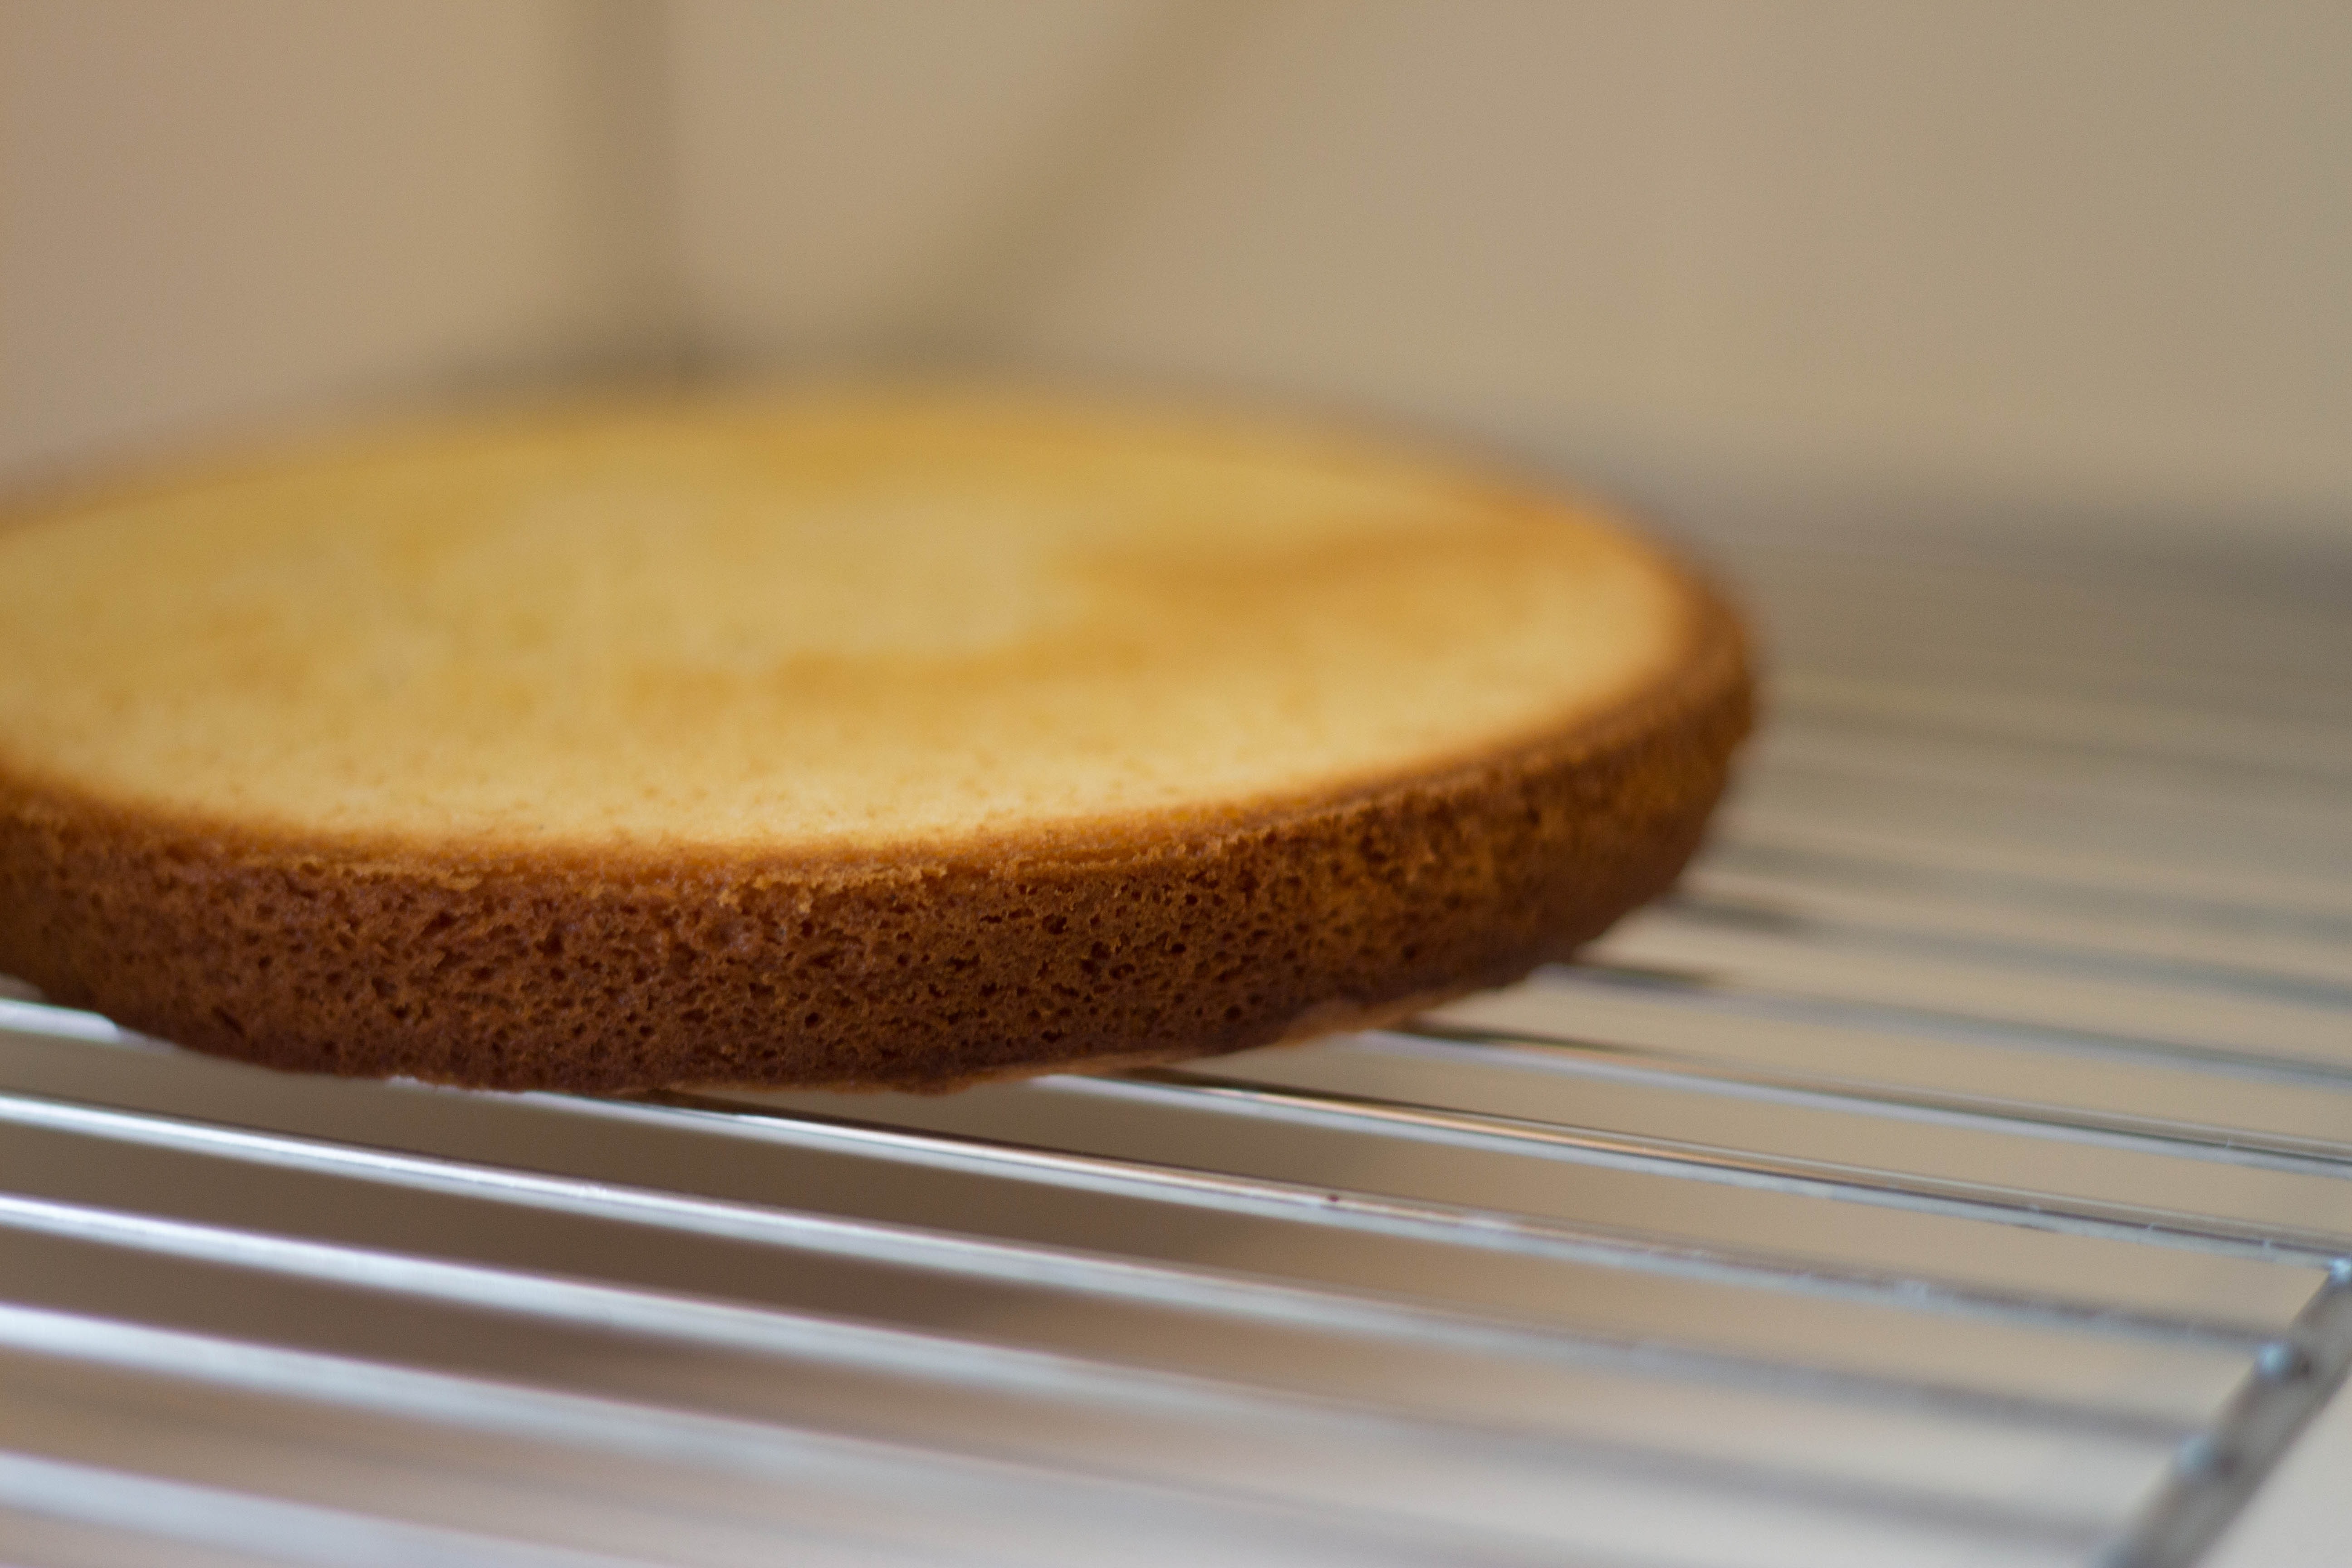
Separate your mixture into three even quantities, about 360g each, and bake each layer for about 20 minutes (or until your cake skewer comes out clean!)
Chocolate Coconut Cream Filling
Ingredients
50g dark chocolate
1 Tbsp cream
180ml Coconut Cream
1 gelatin leaf
8g (1/2 Tbsp) cocoa powder
30g (1/4 cup) icing sugar
Method
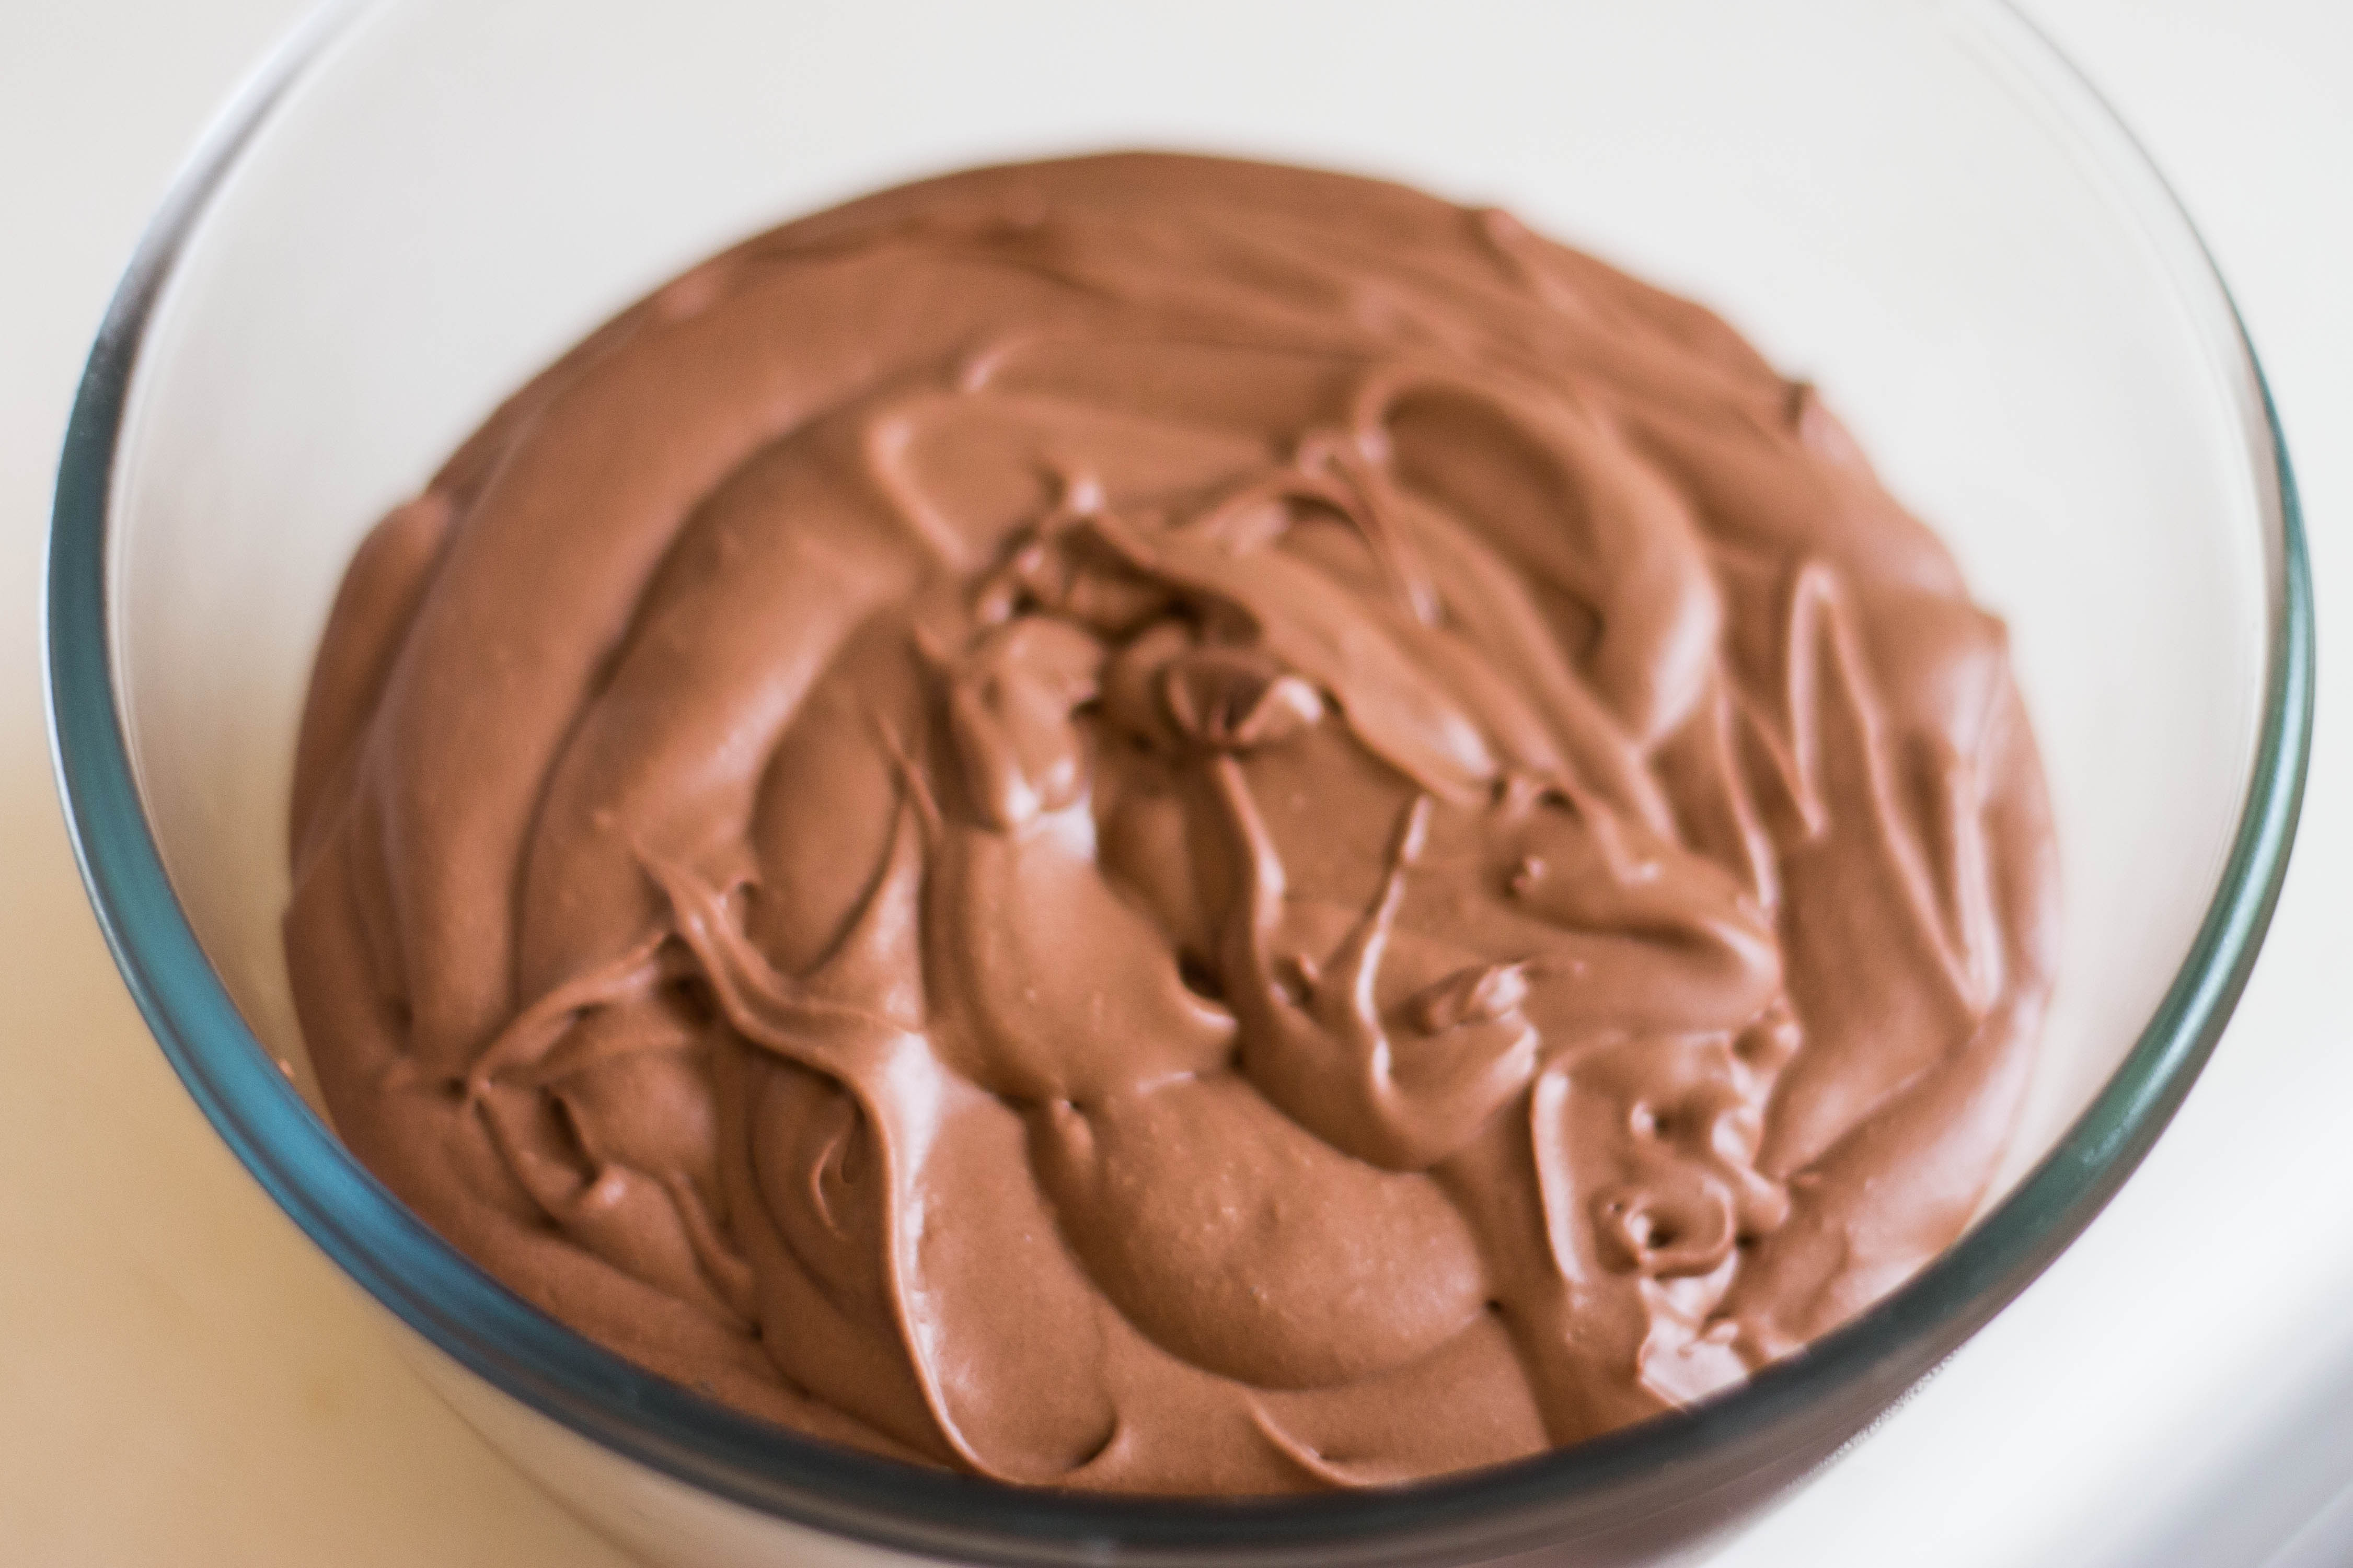
Gently melt the chocolate with the cream until smooth, then set aside to cool.
Place your gelatin leaf in a bowl of cold water to soak, then take about 1/3 of the coconut milk and heat this in a saucepan on low heat.
Once your coconut milk is gently simmering, shake the excess water from you gelatin leaf and add it to the saucepan. Stir over the heat for a few more minutes until the gelatin has completely dissolved, then place the mixture in the fridge to cool. We don’t want the coconut milk to set, so keep an eye on it, stirring occasionally.
Whip up the remaining coconut milk, adding in the icing sugar and cocoa powder. Once the chocolate is cool, add this in a little at a time.
Tip: Taste it! If it’s not chocolatey enough for you, add some more cocoa.
Take your cooled, slightly thickened coconut milk from the fridge and beat this into your chocolate coconut mixture a little at a time.
Refrigerate until ready to use.
Coconut Italian Meringue Buttercream
I think I have mentioned before that cream cheese frosting is my absolute favourite tasting frosting… but SMBC is just so amazingly good to frost with! Since I discovered SMBC it’s all I’ve used, and I keep saying I’m going to do something different, but then I think of the prettyness and go back to the SMBC.
Well, not this time! I decided to brave the IMBC… without a candy thermometer! Actually, it was easier than the SMBC, or rather, it seemed to come together more easily.
Bear this in mind: A lot of people online will say that they would not even try SMBC or IMBC without a stand mixer. Both these recipes call for a whisk, a k-beater, and various speeds of beating. I have a handheld beater with one attachment and the choice of fast, faster and super fast… it still does the job! And OK, you will need to have one hand holding the beater at all times, but the second one is free to multitask!
So my message here, don’t let other people’s warnings deter you – with a bit of practice and perseverance you will get there!
I guess I should mention that IMBC is A-mazing! I’ve only made it once, so will have to try it a few times before I can say that it kicks SMBC’s butt, but this batch seriously did! So much smoother, and lighter, and I also found it to be more stable.
Ingredients
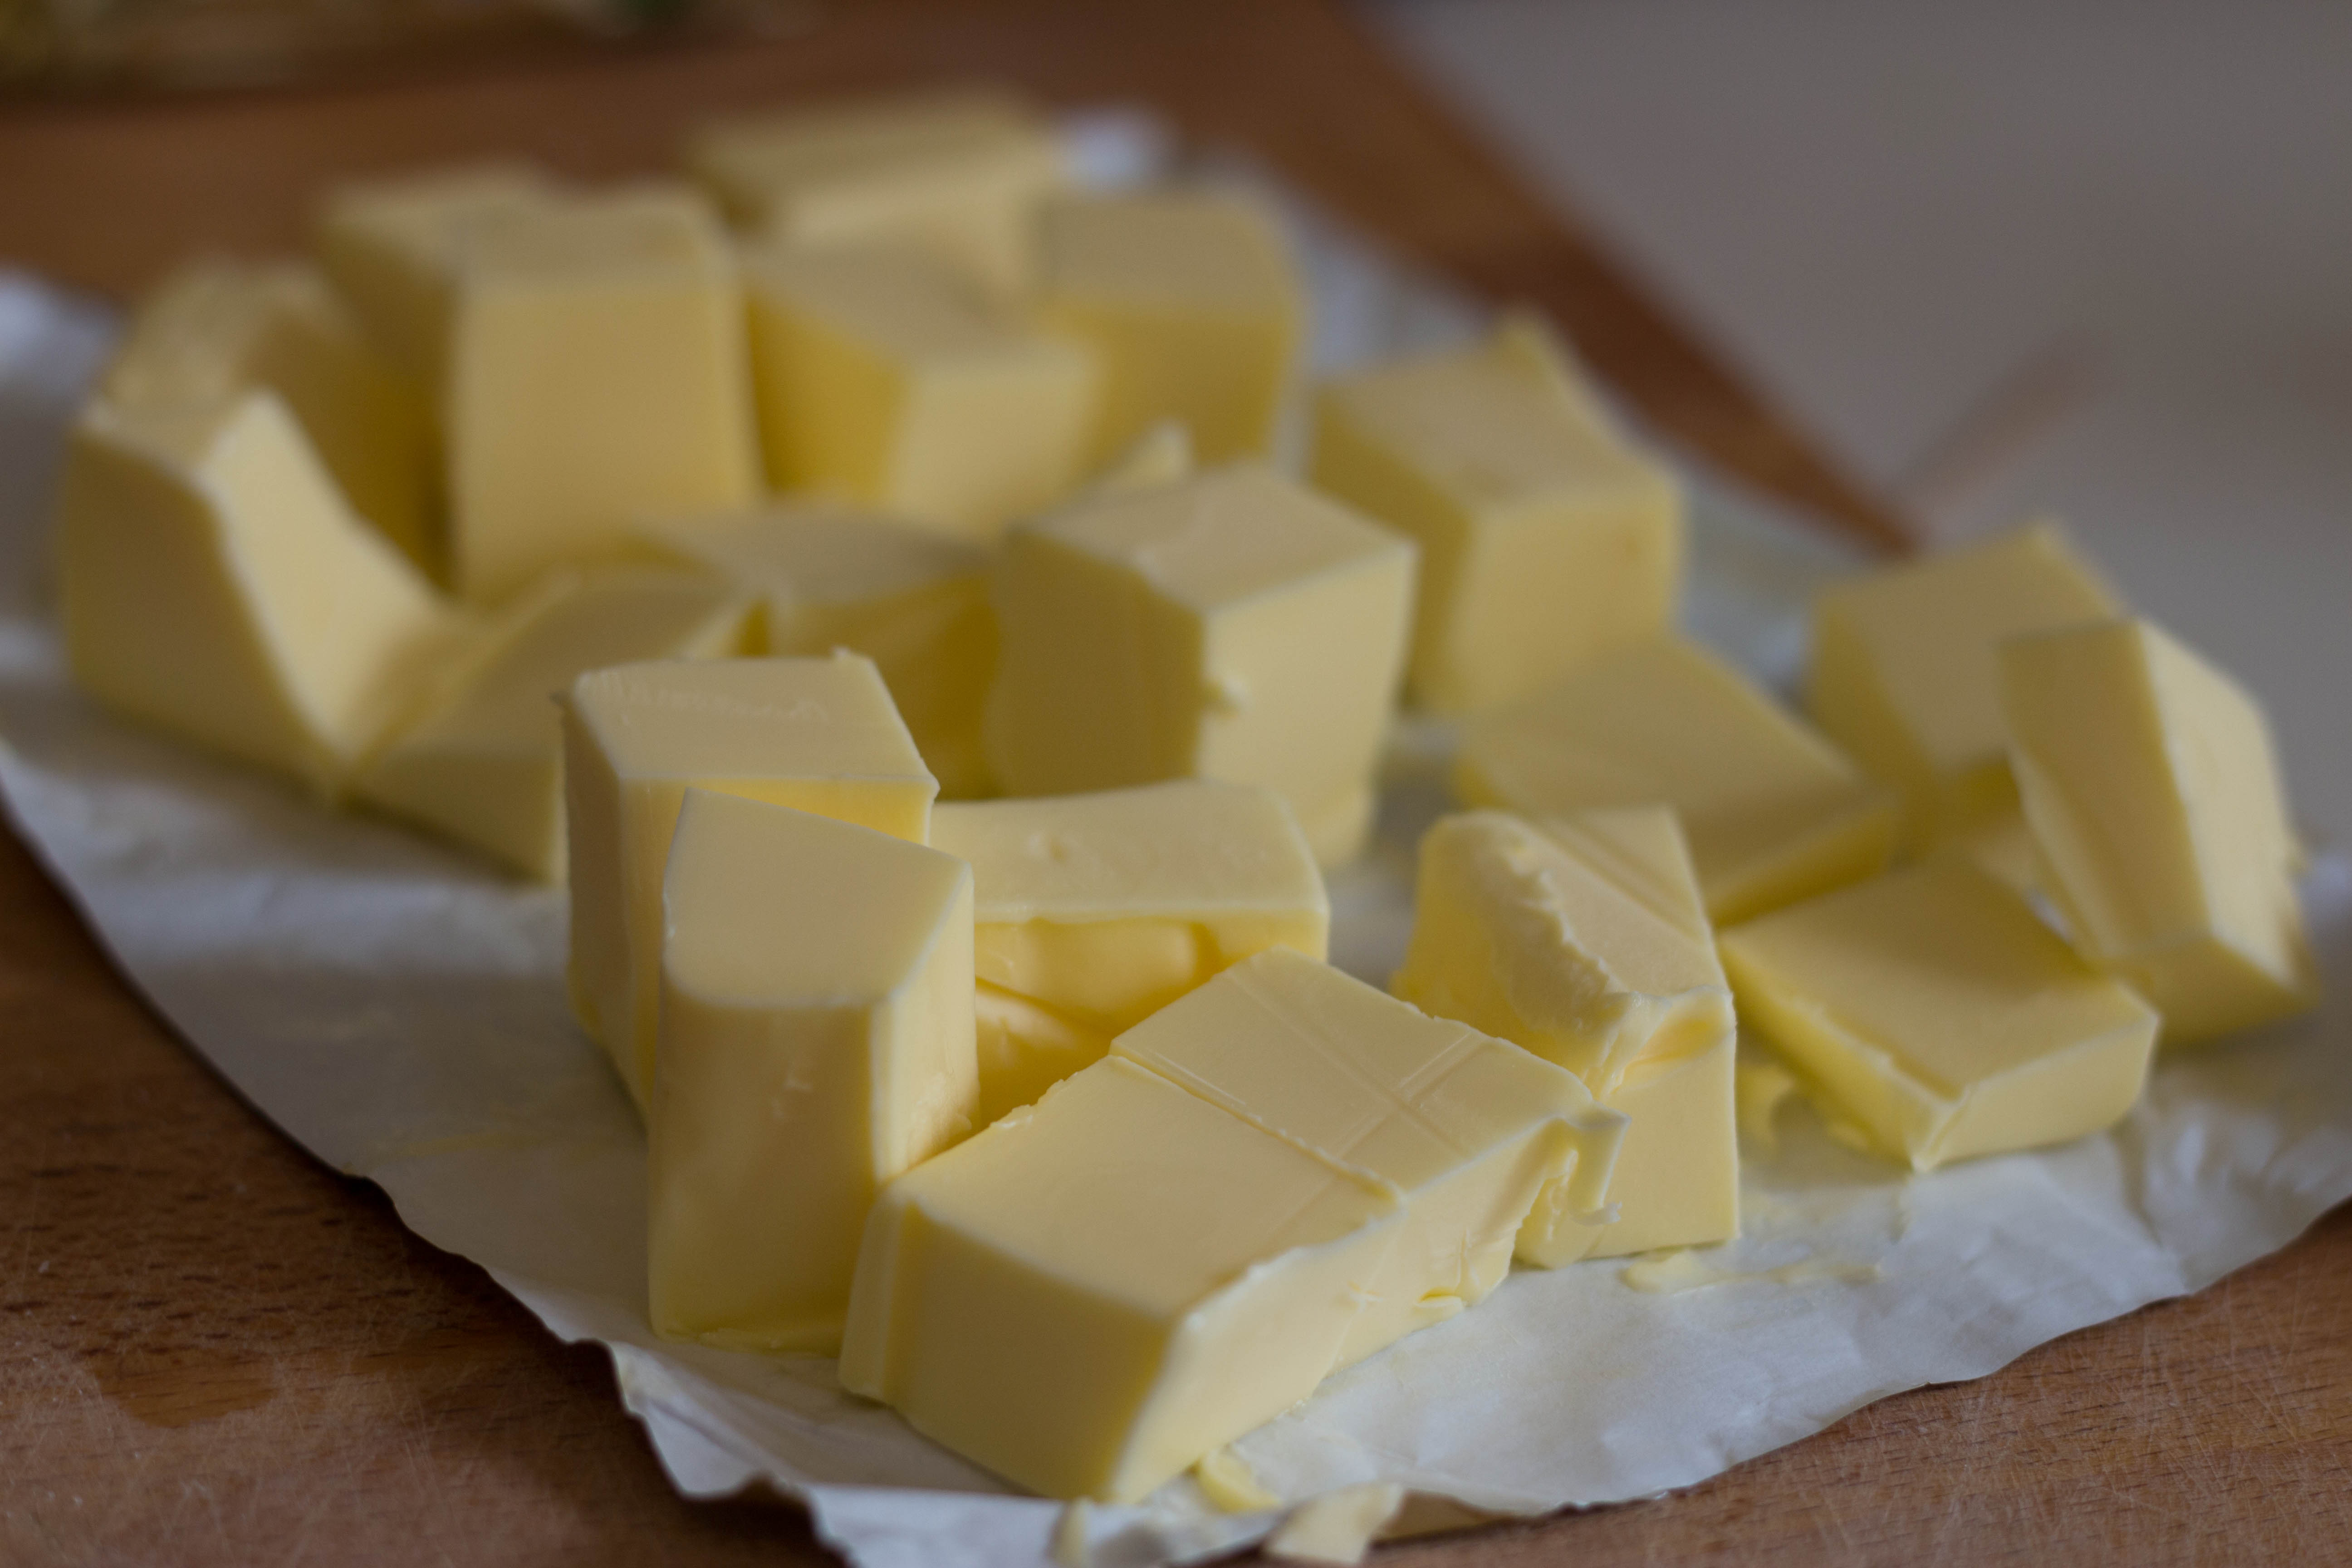
320g butter, room temperature and chopped into cubes
3 large egg whites
165g (3/4 cup) sugar
60ml water
1 tsp intense coconut extract
Method
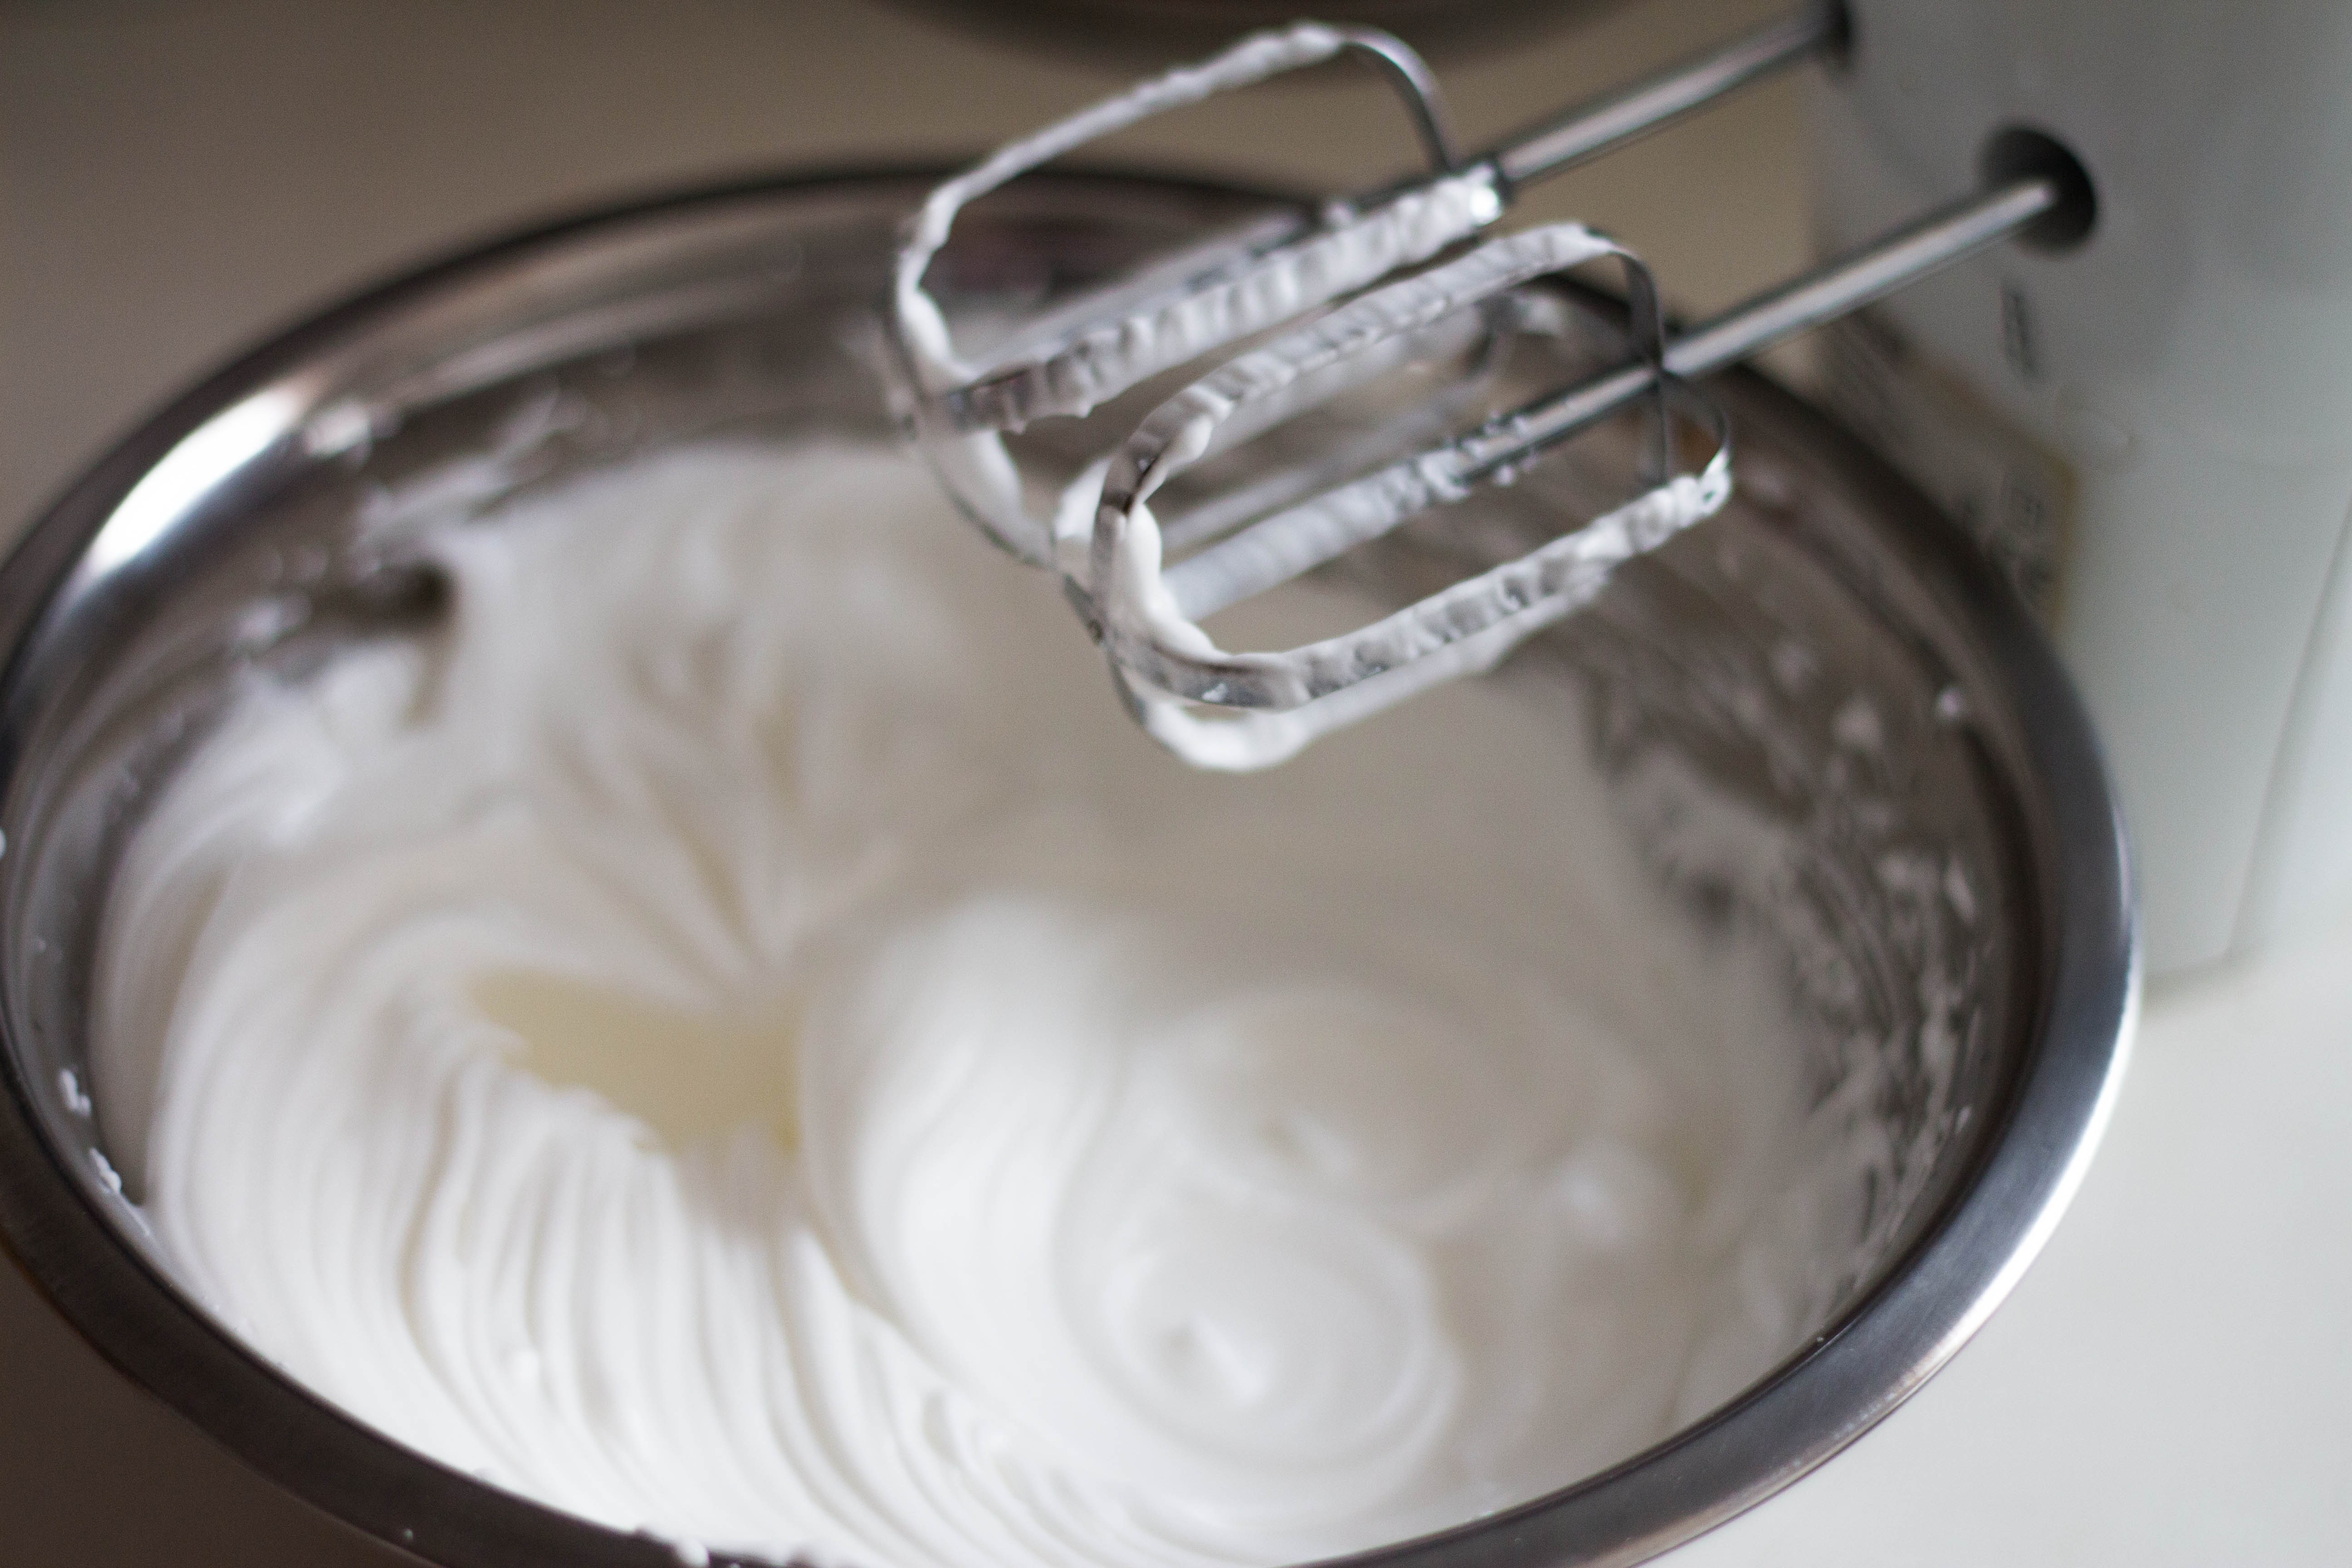
Separate your eggs, breaking the egg whites into a very clean, dry stainless steel or glass bowl.
Take 1/2 cup of your sugar and gently heat this in a saucepan with the water. Once the syrup begins to bubble around the edges, start beating your egg whites. When your egg whites start to foam add in the remaining sugar and continue to beat.
Once your syrup is bubbling in the centre, take it off the heat and add it to your egg whites in a slow stream, beating continuously. And keep beating.
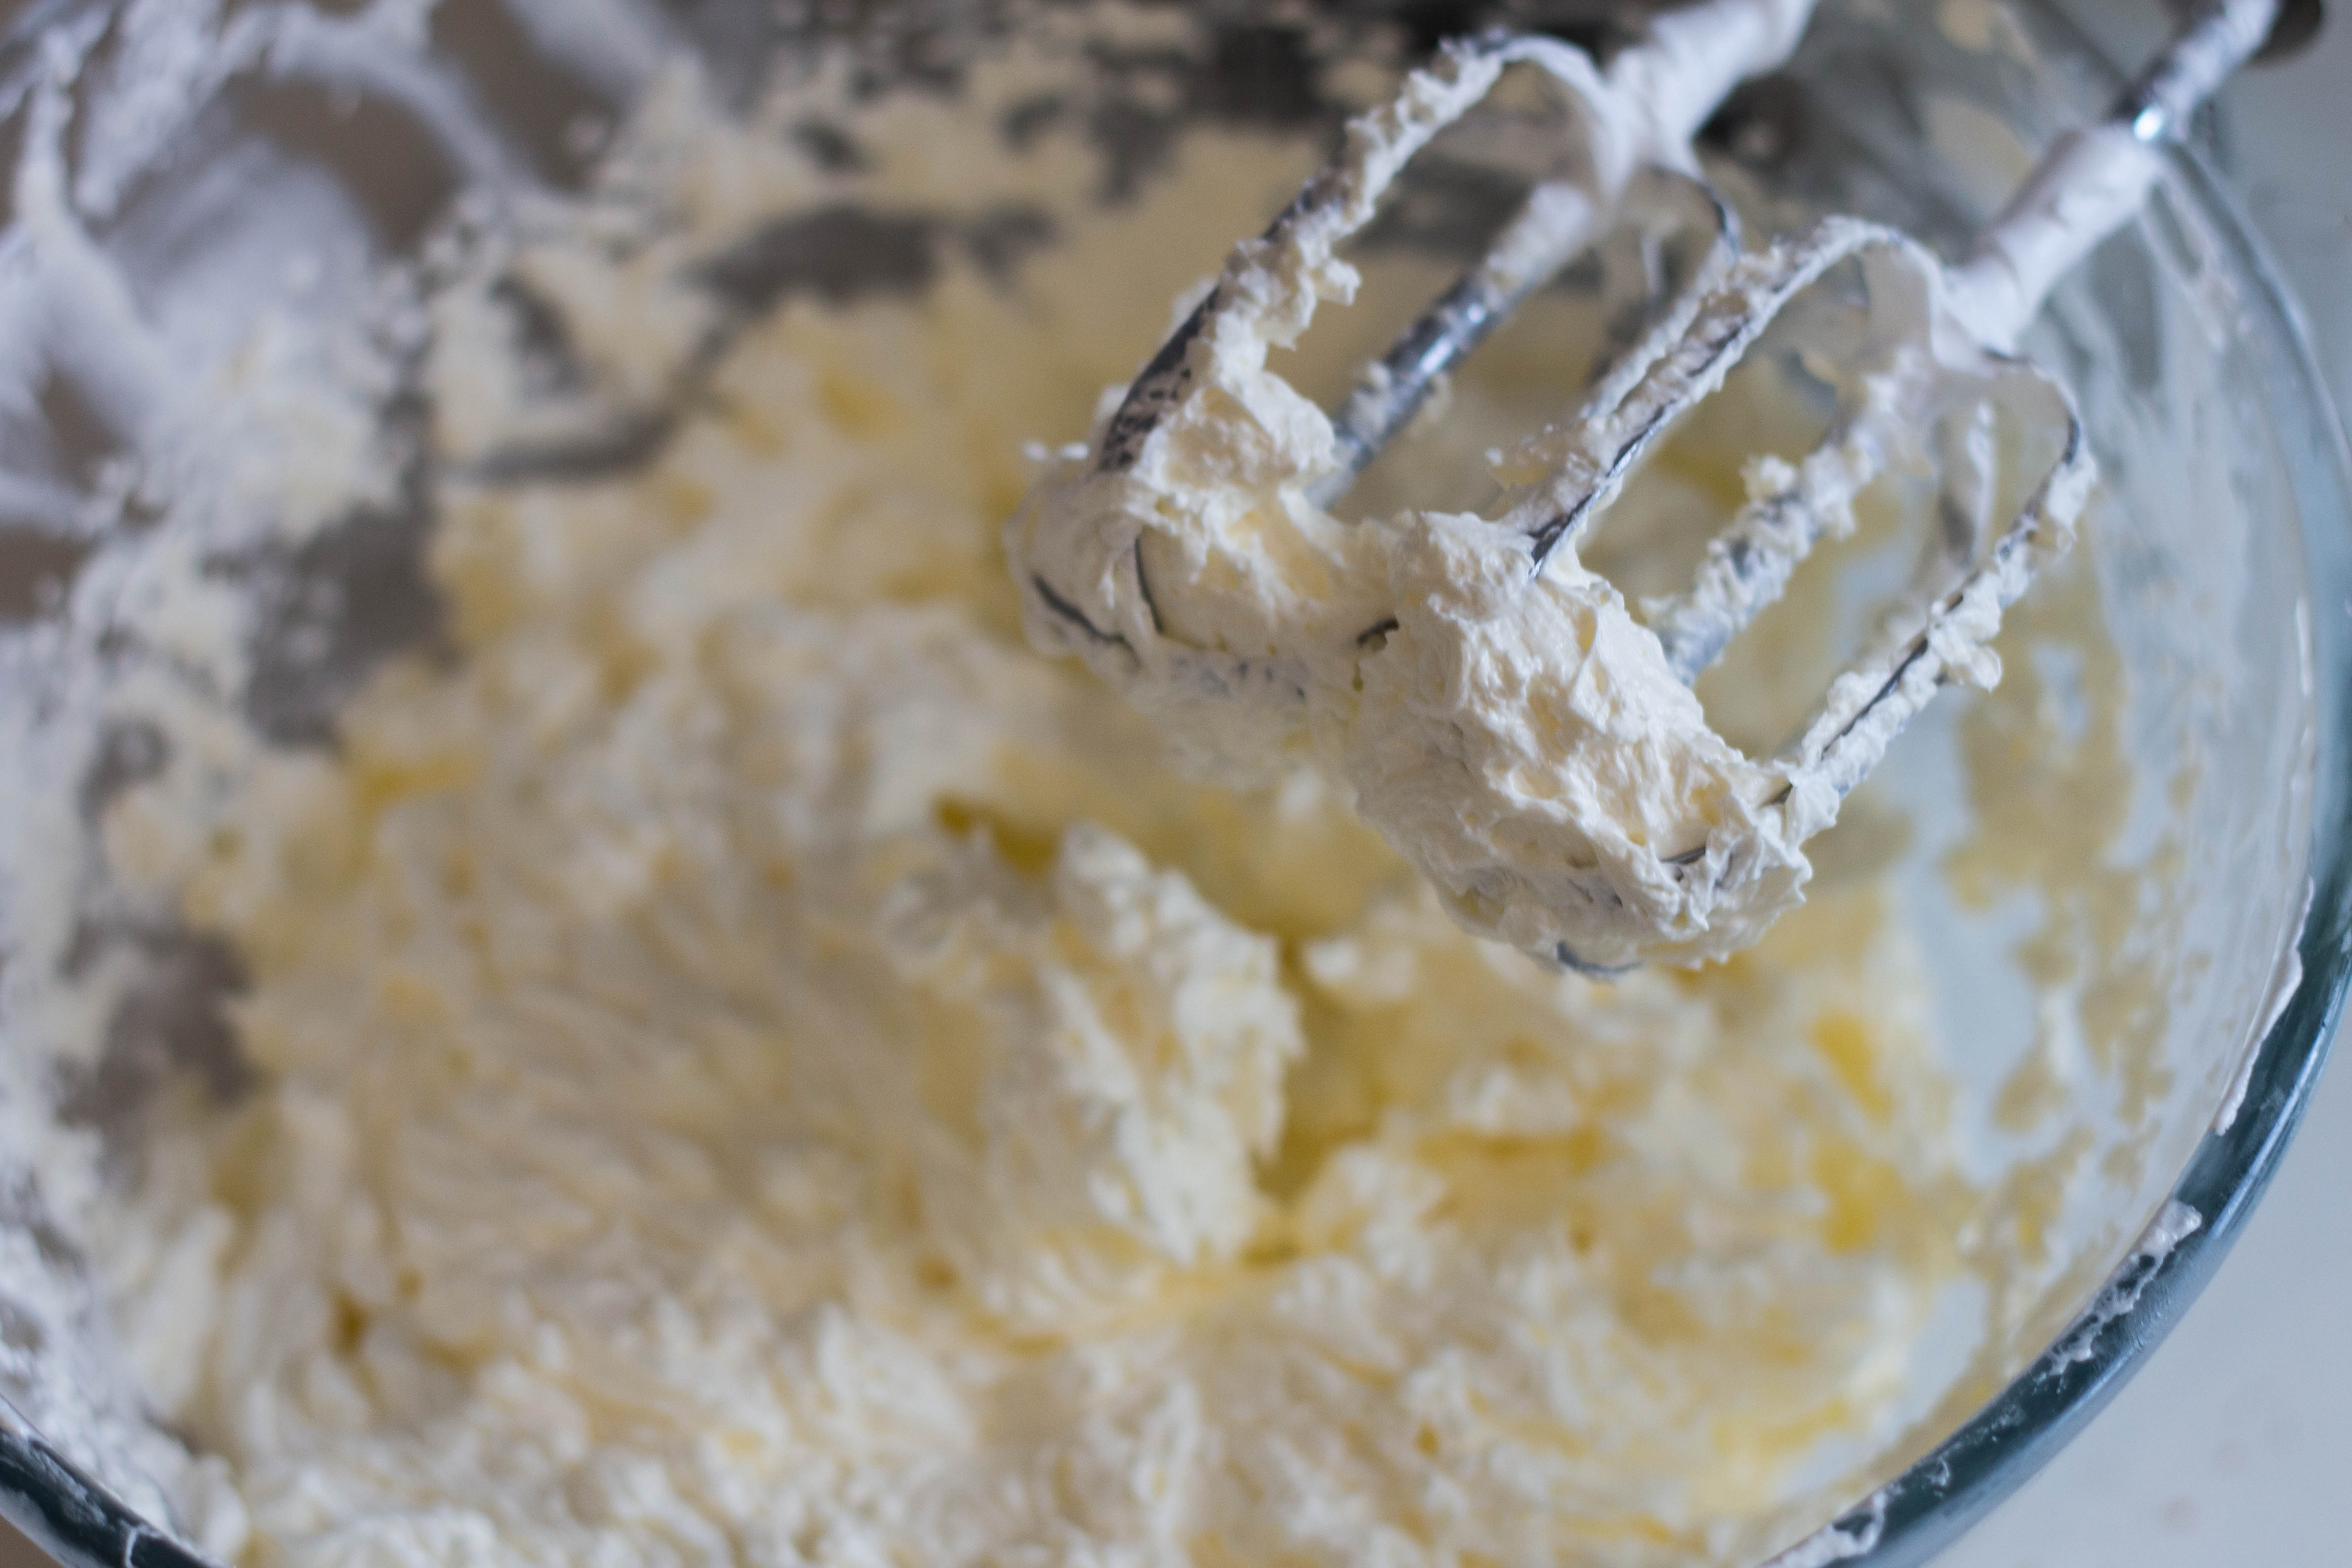
Your egg white will become lovely and thick, mine gets so thick I can feel my beaters groaning! It should look something like this.
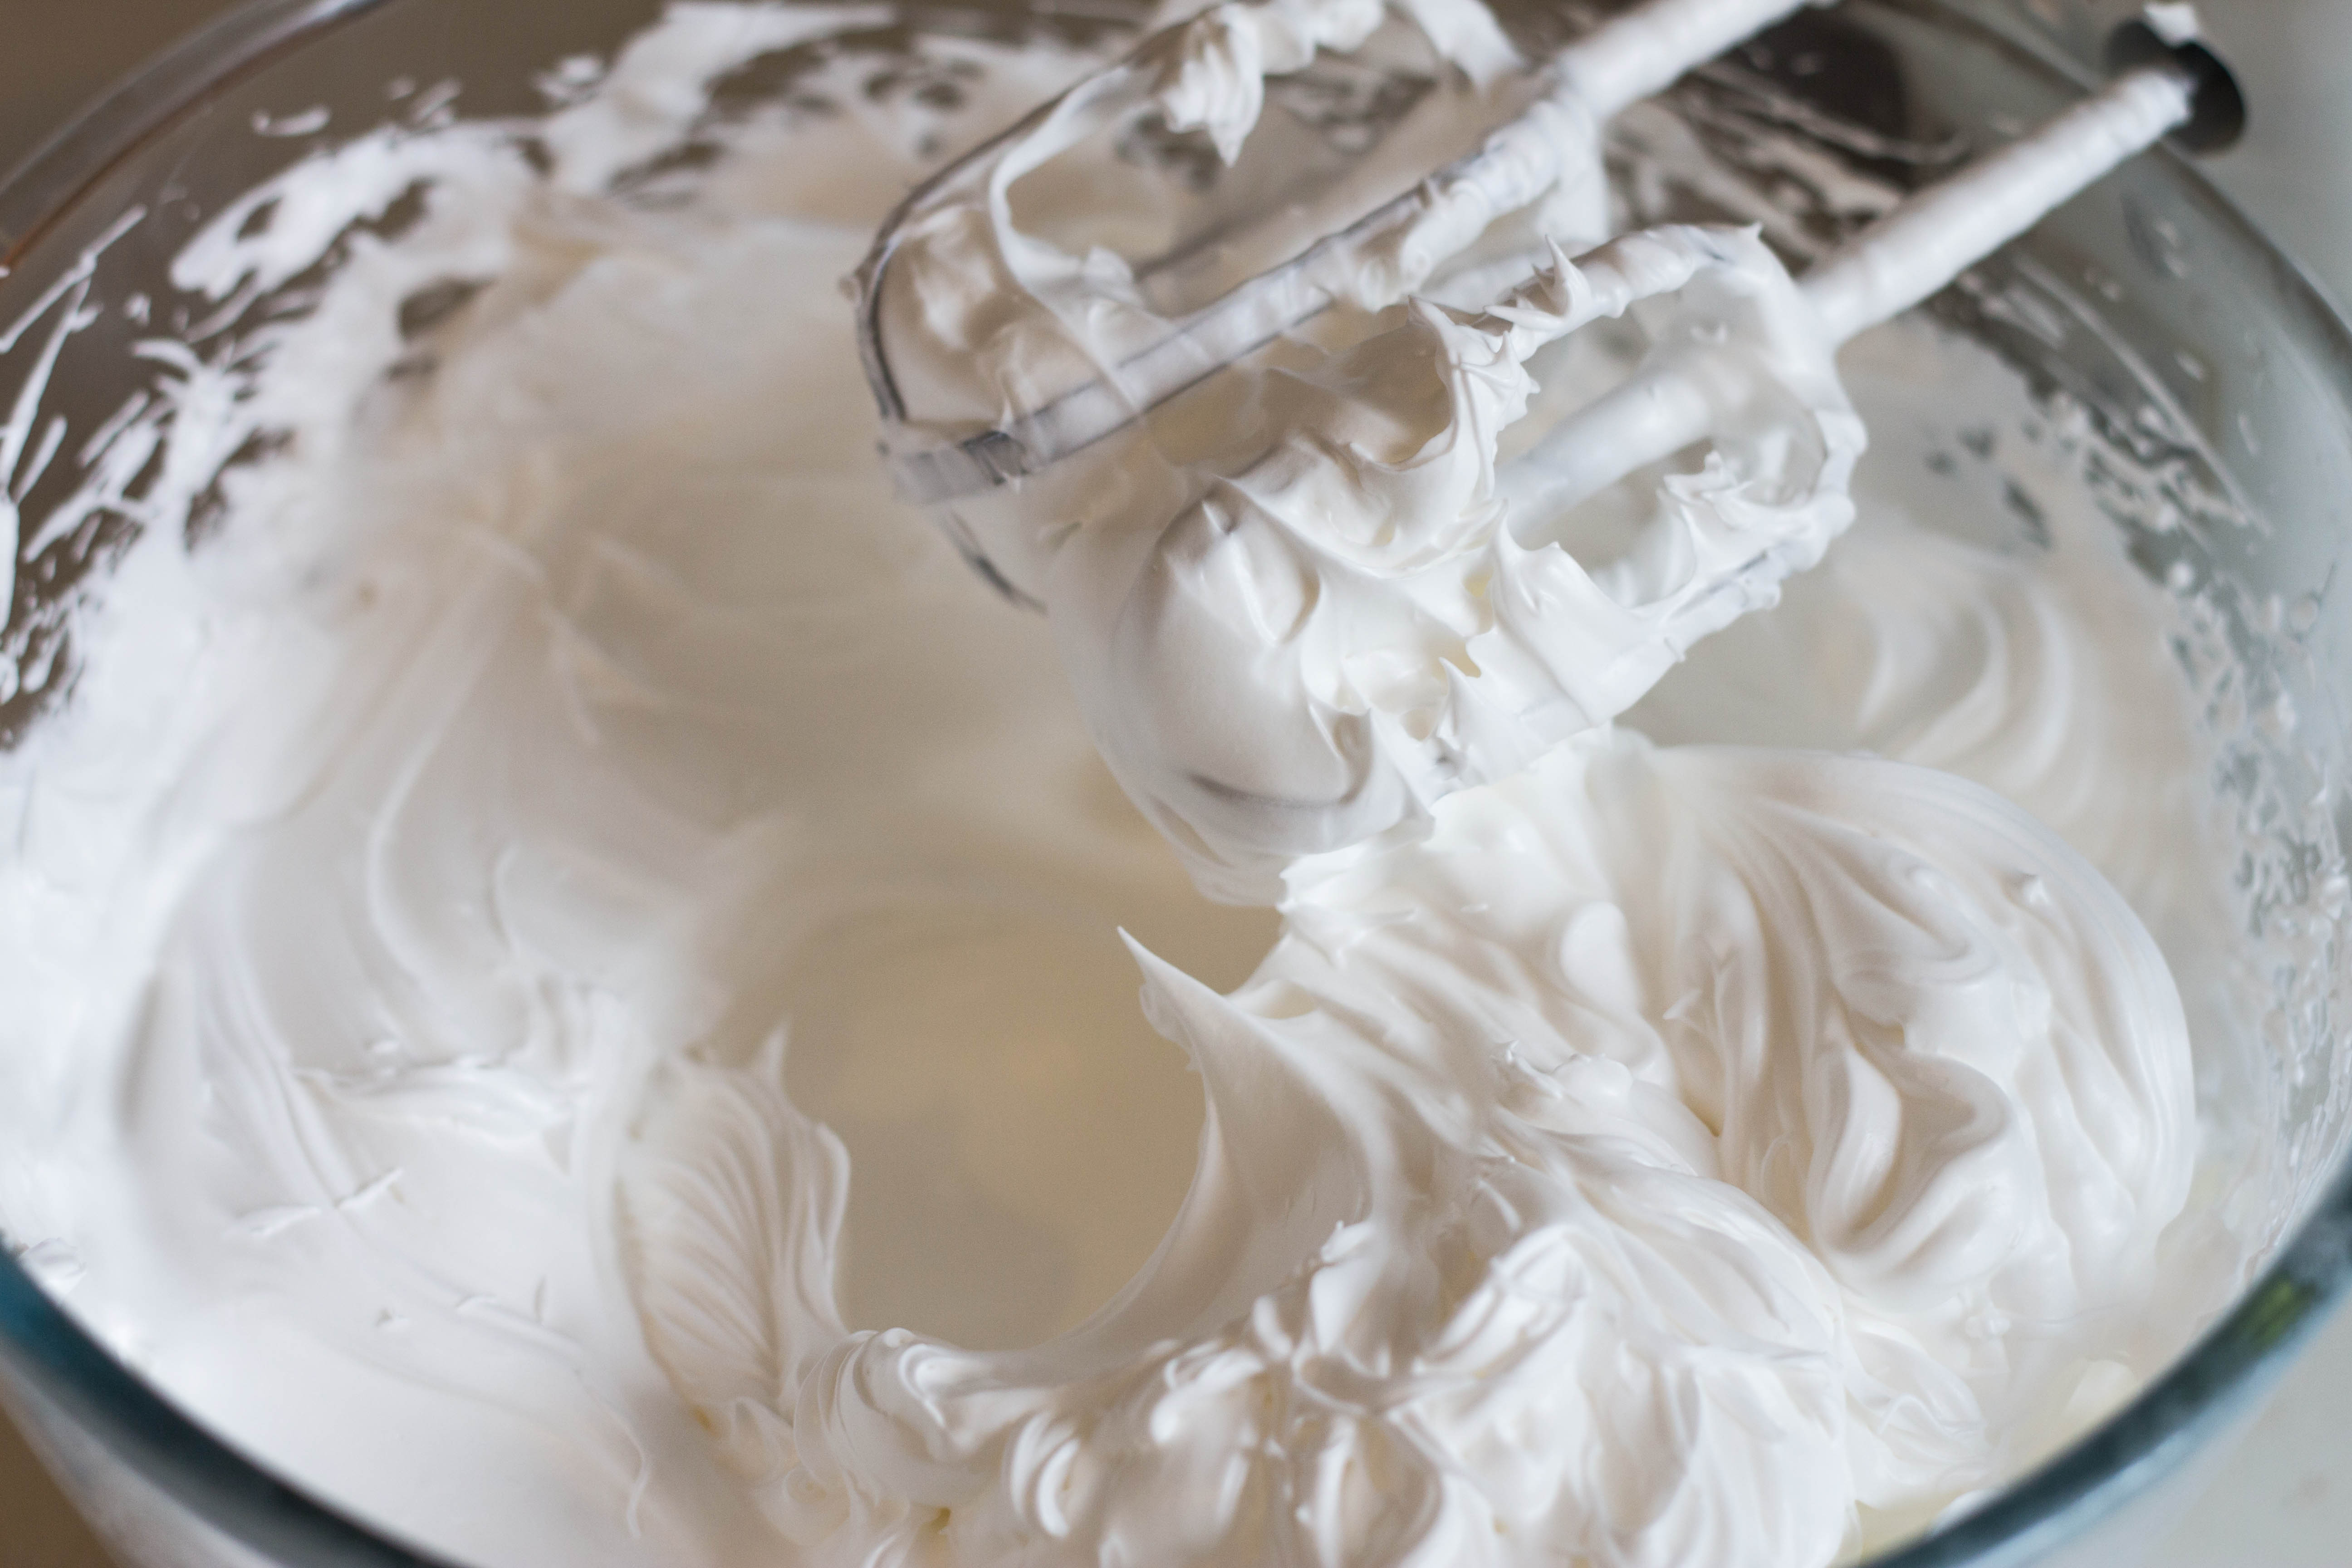
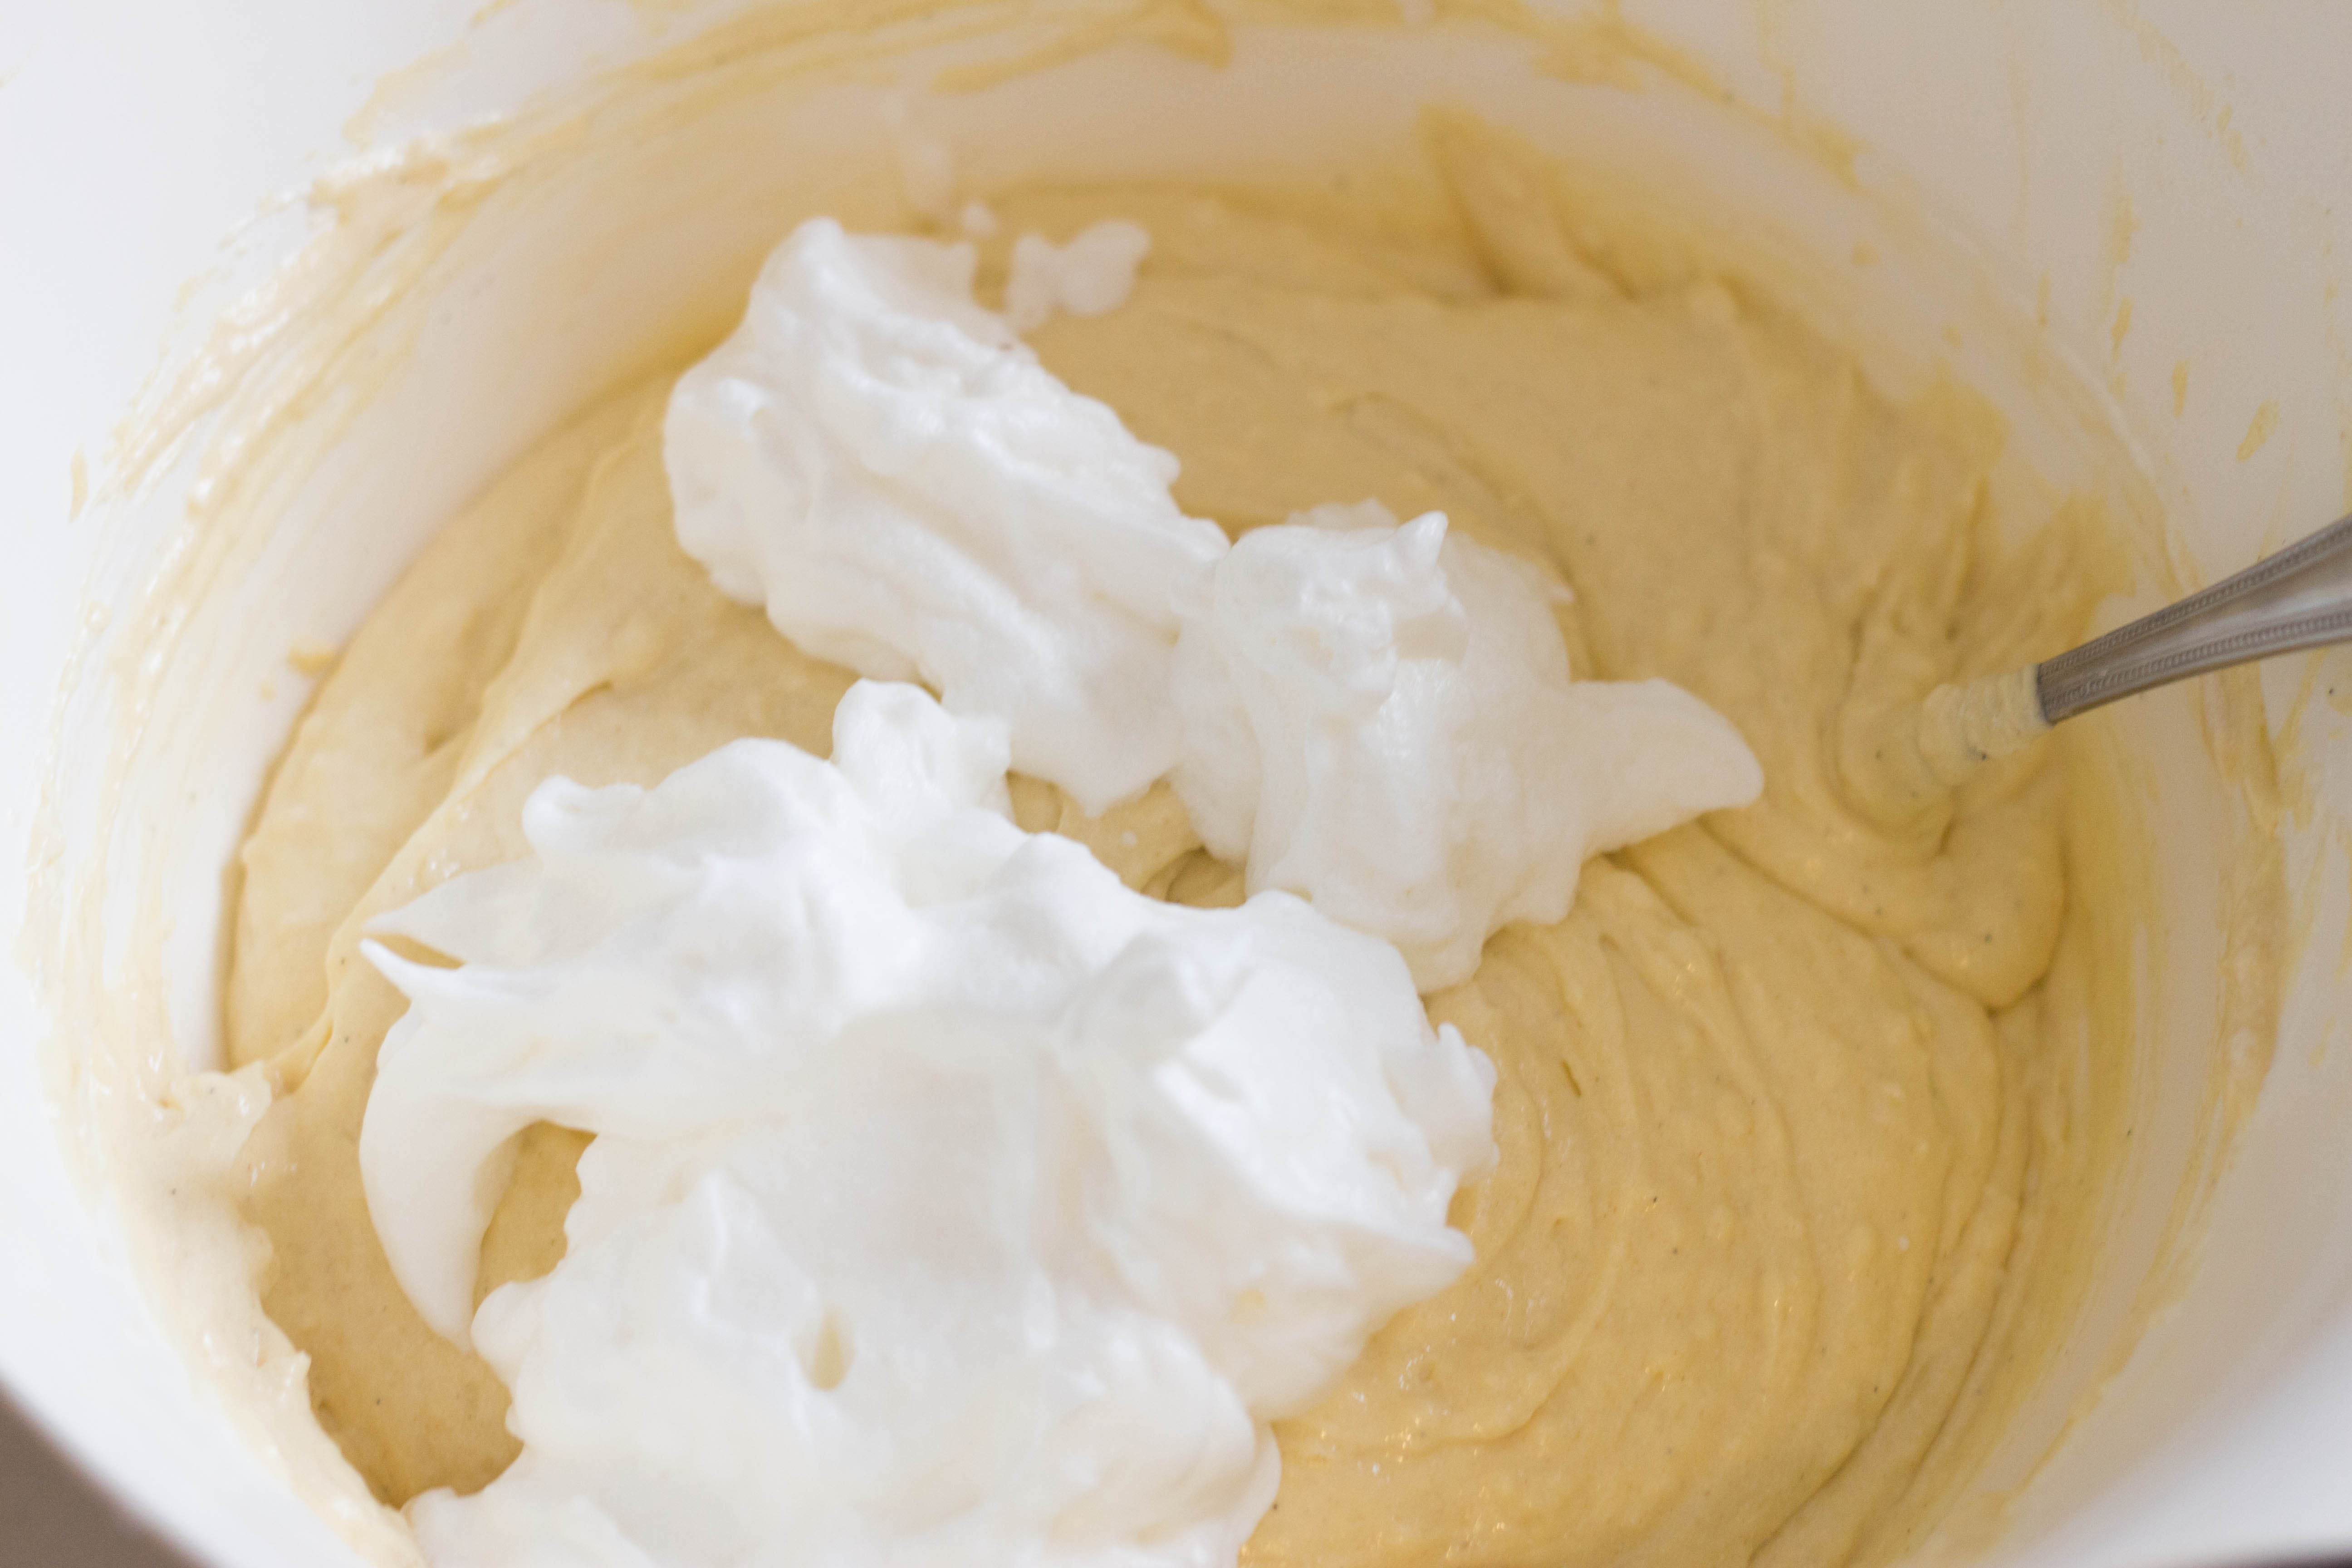
Once your bowl and egg whites have cooled to room temperature you are ready to add the butter, but don’t stop beating! Add the butter a few cubes at a time, and don’t worry if your egg whites appear to sink. My mixture did not go as soupy as it usually does with SMBC, so don’t be too worried if your mixture is thinner than this!
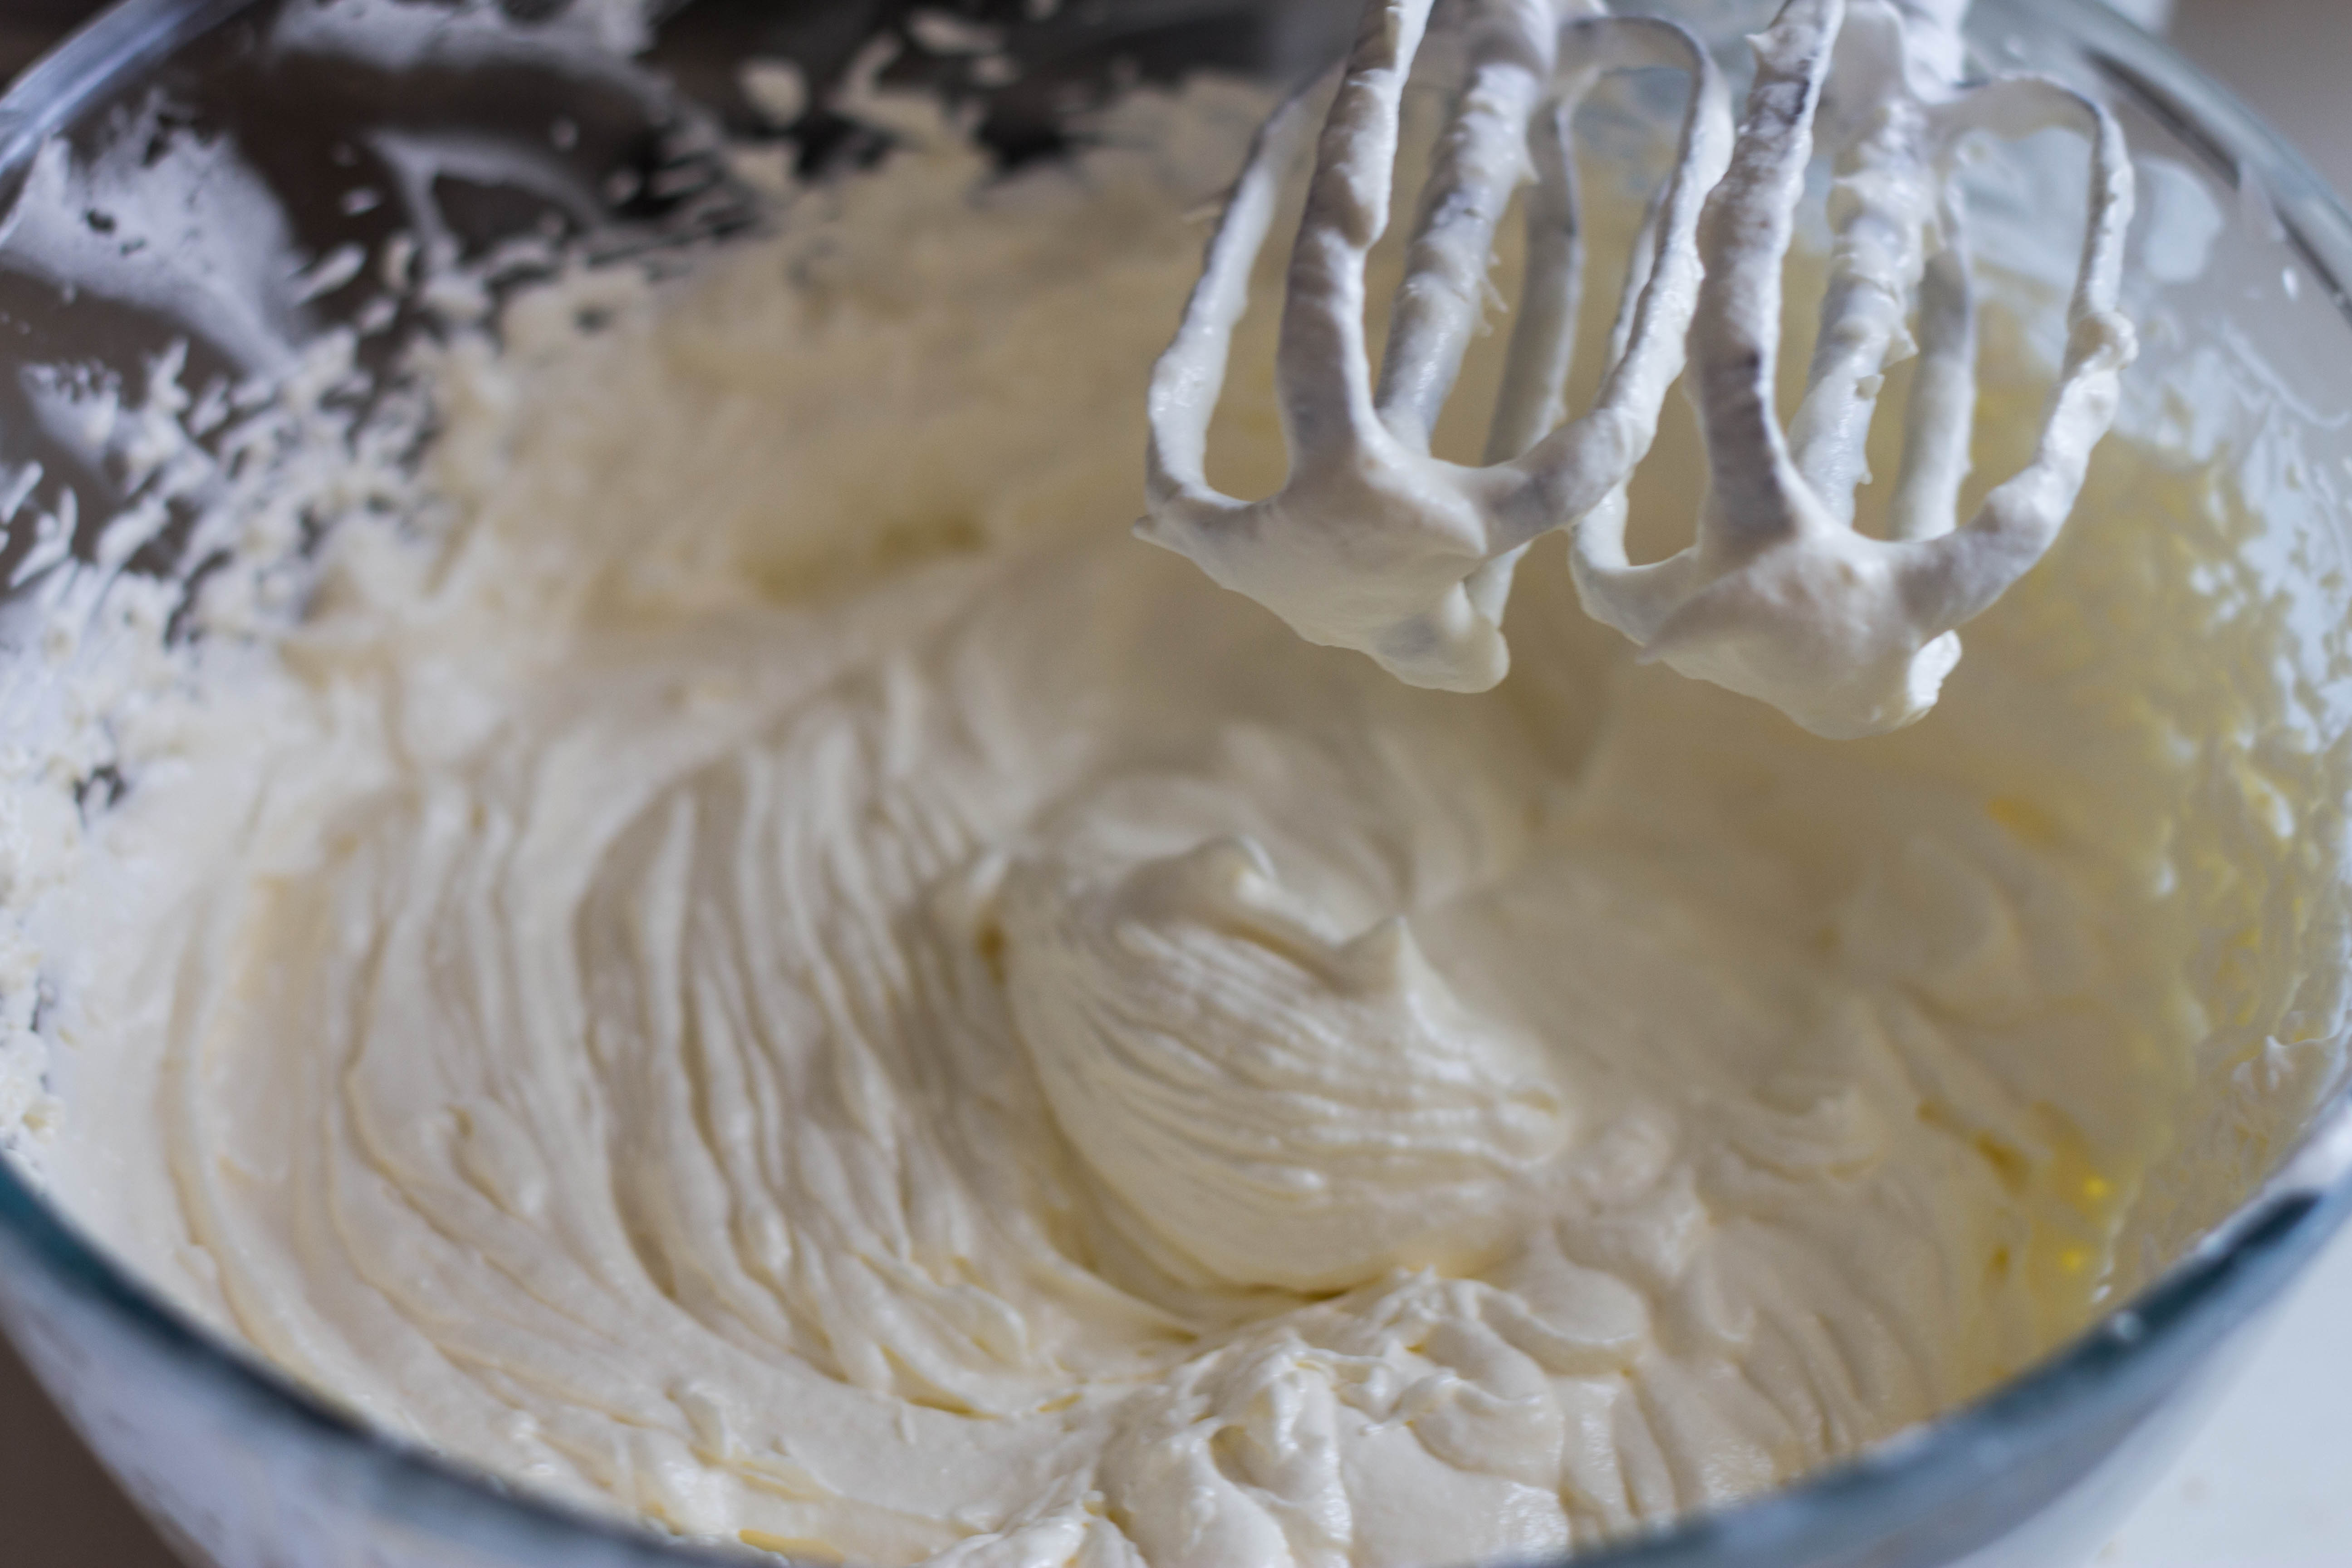
Keep beating and when it looks like it’s curdling you’re almost there!
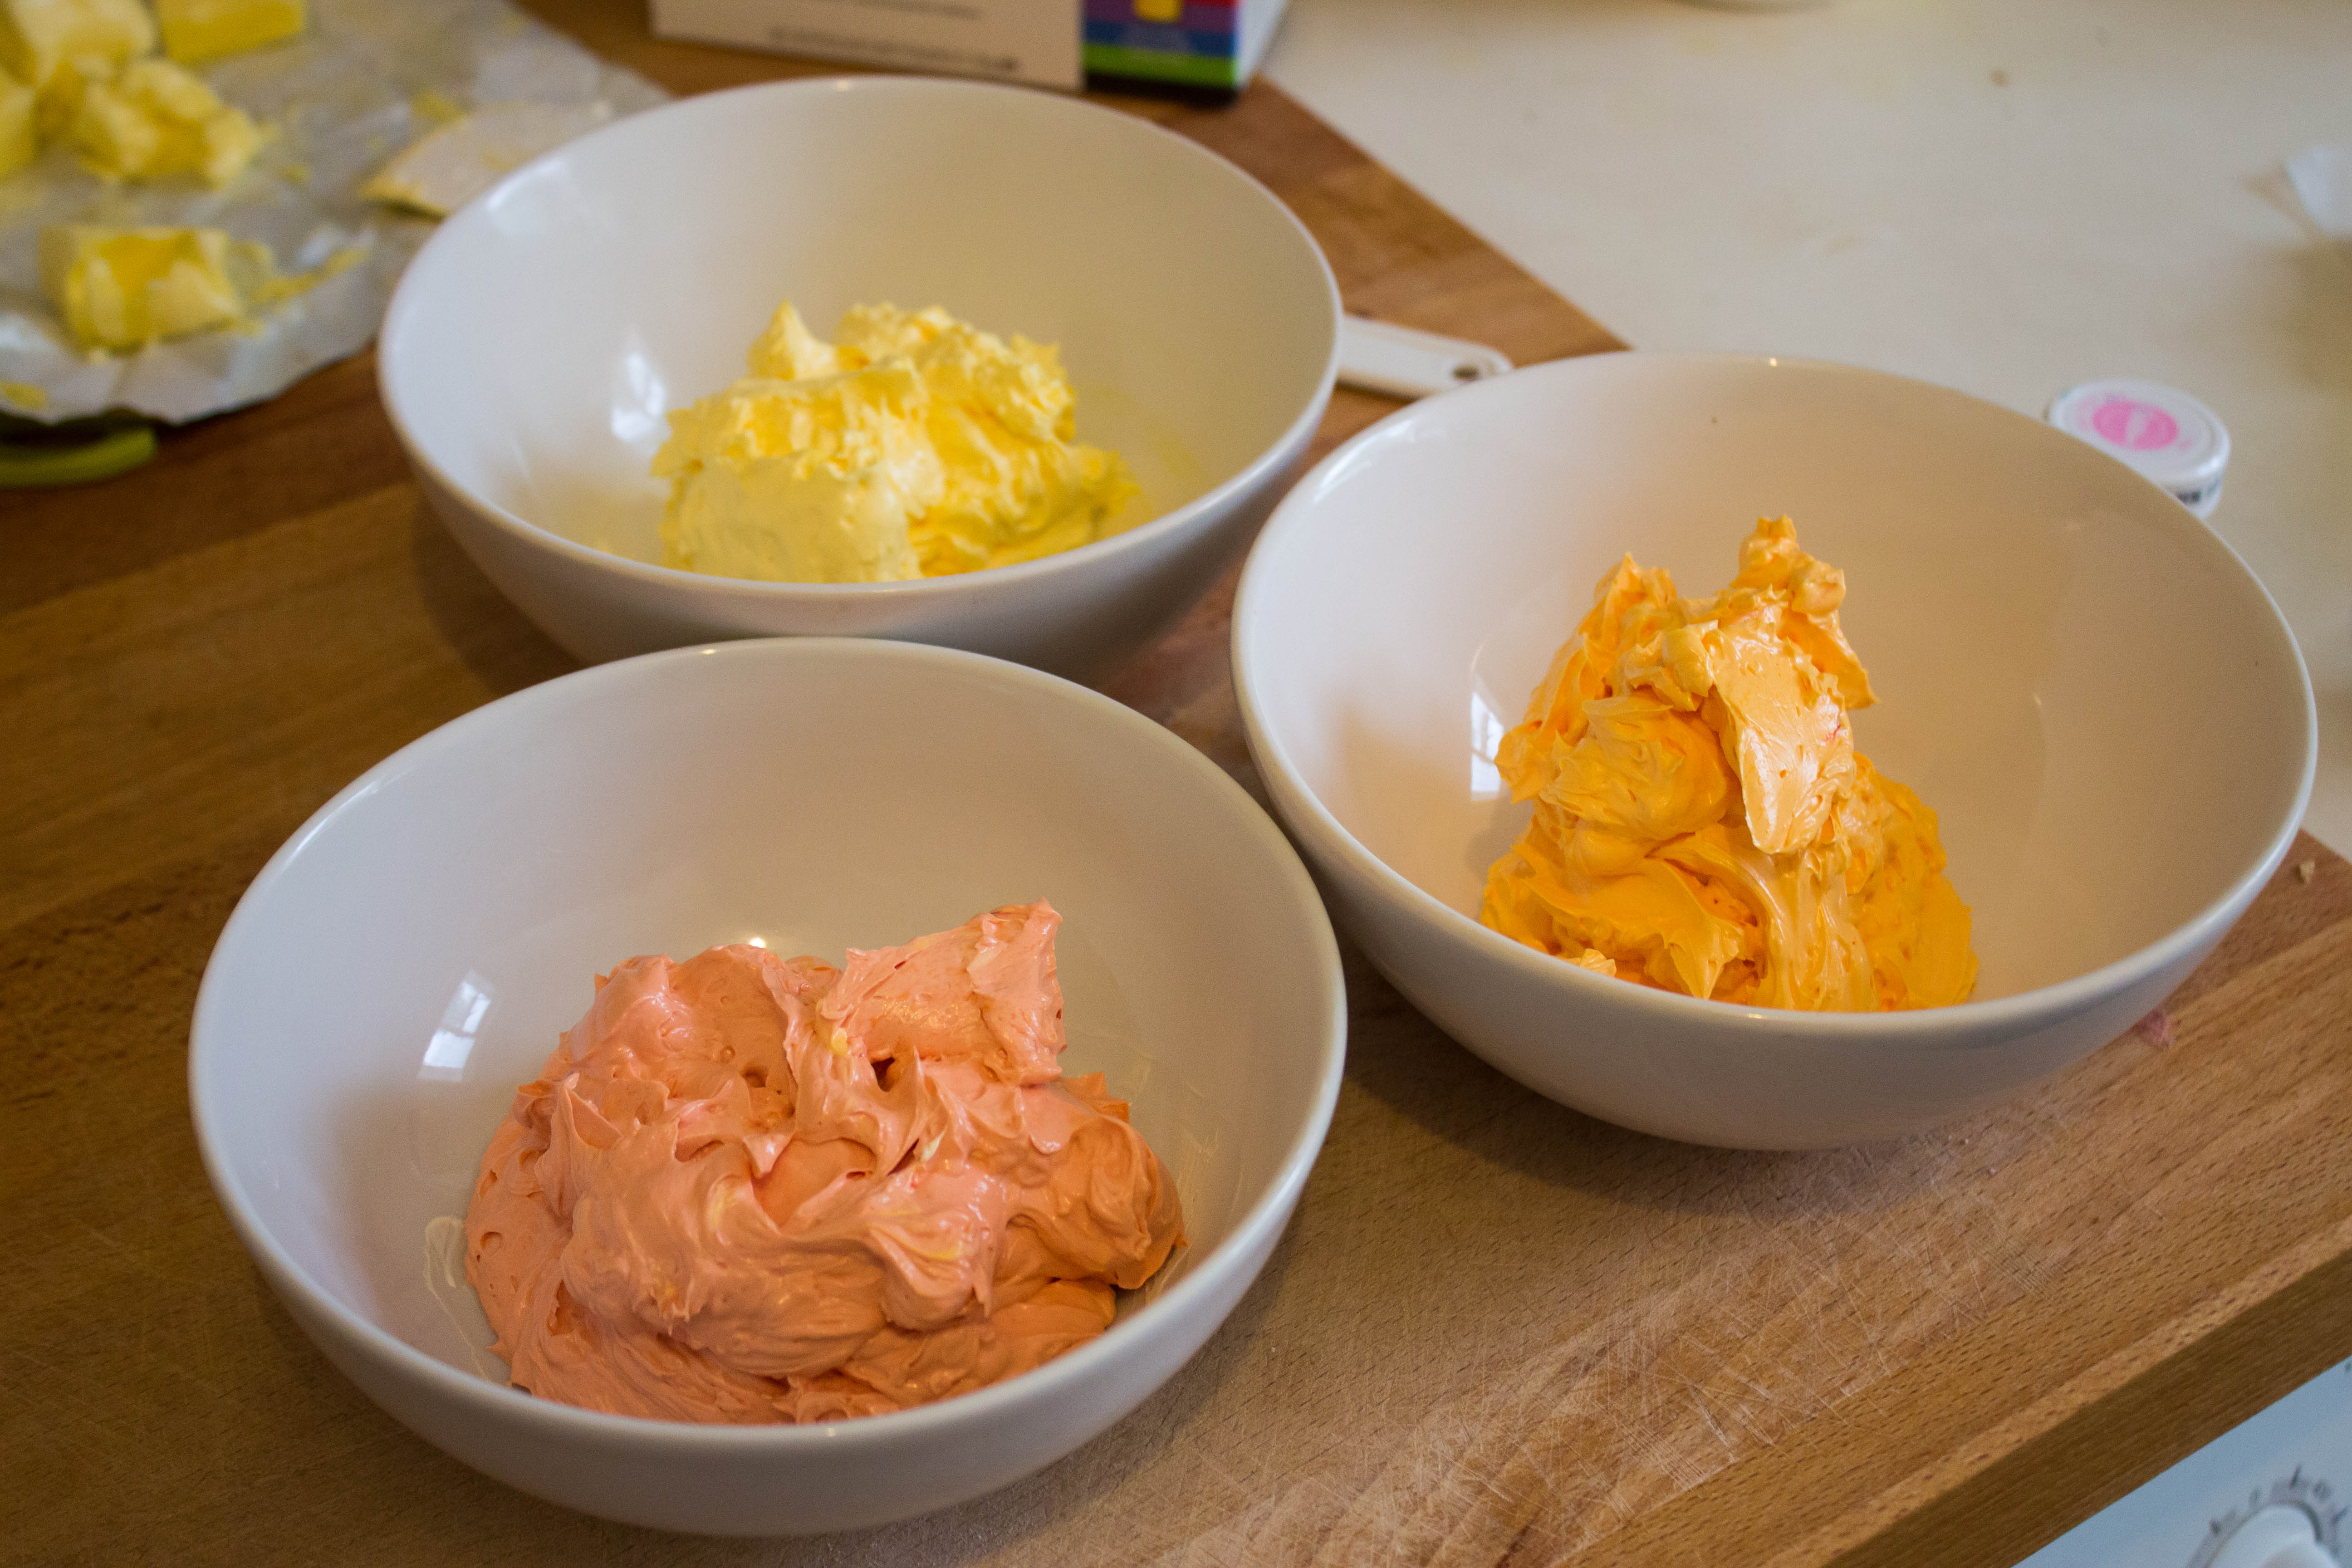
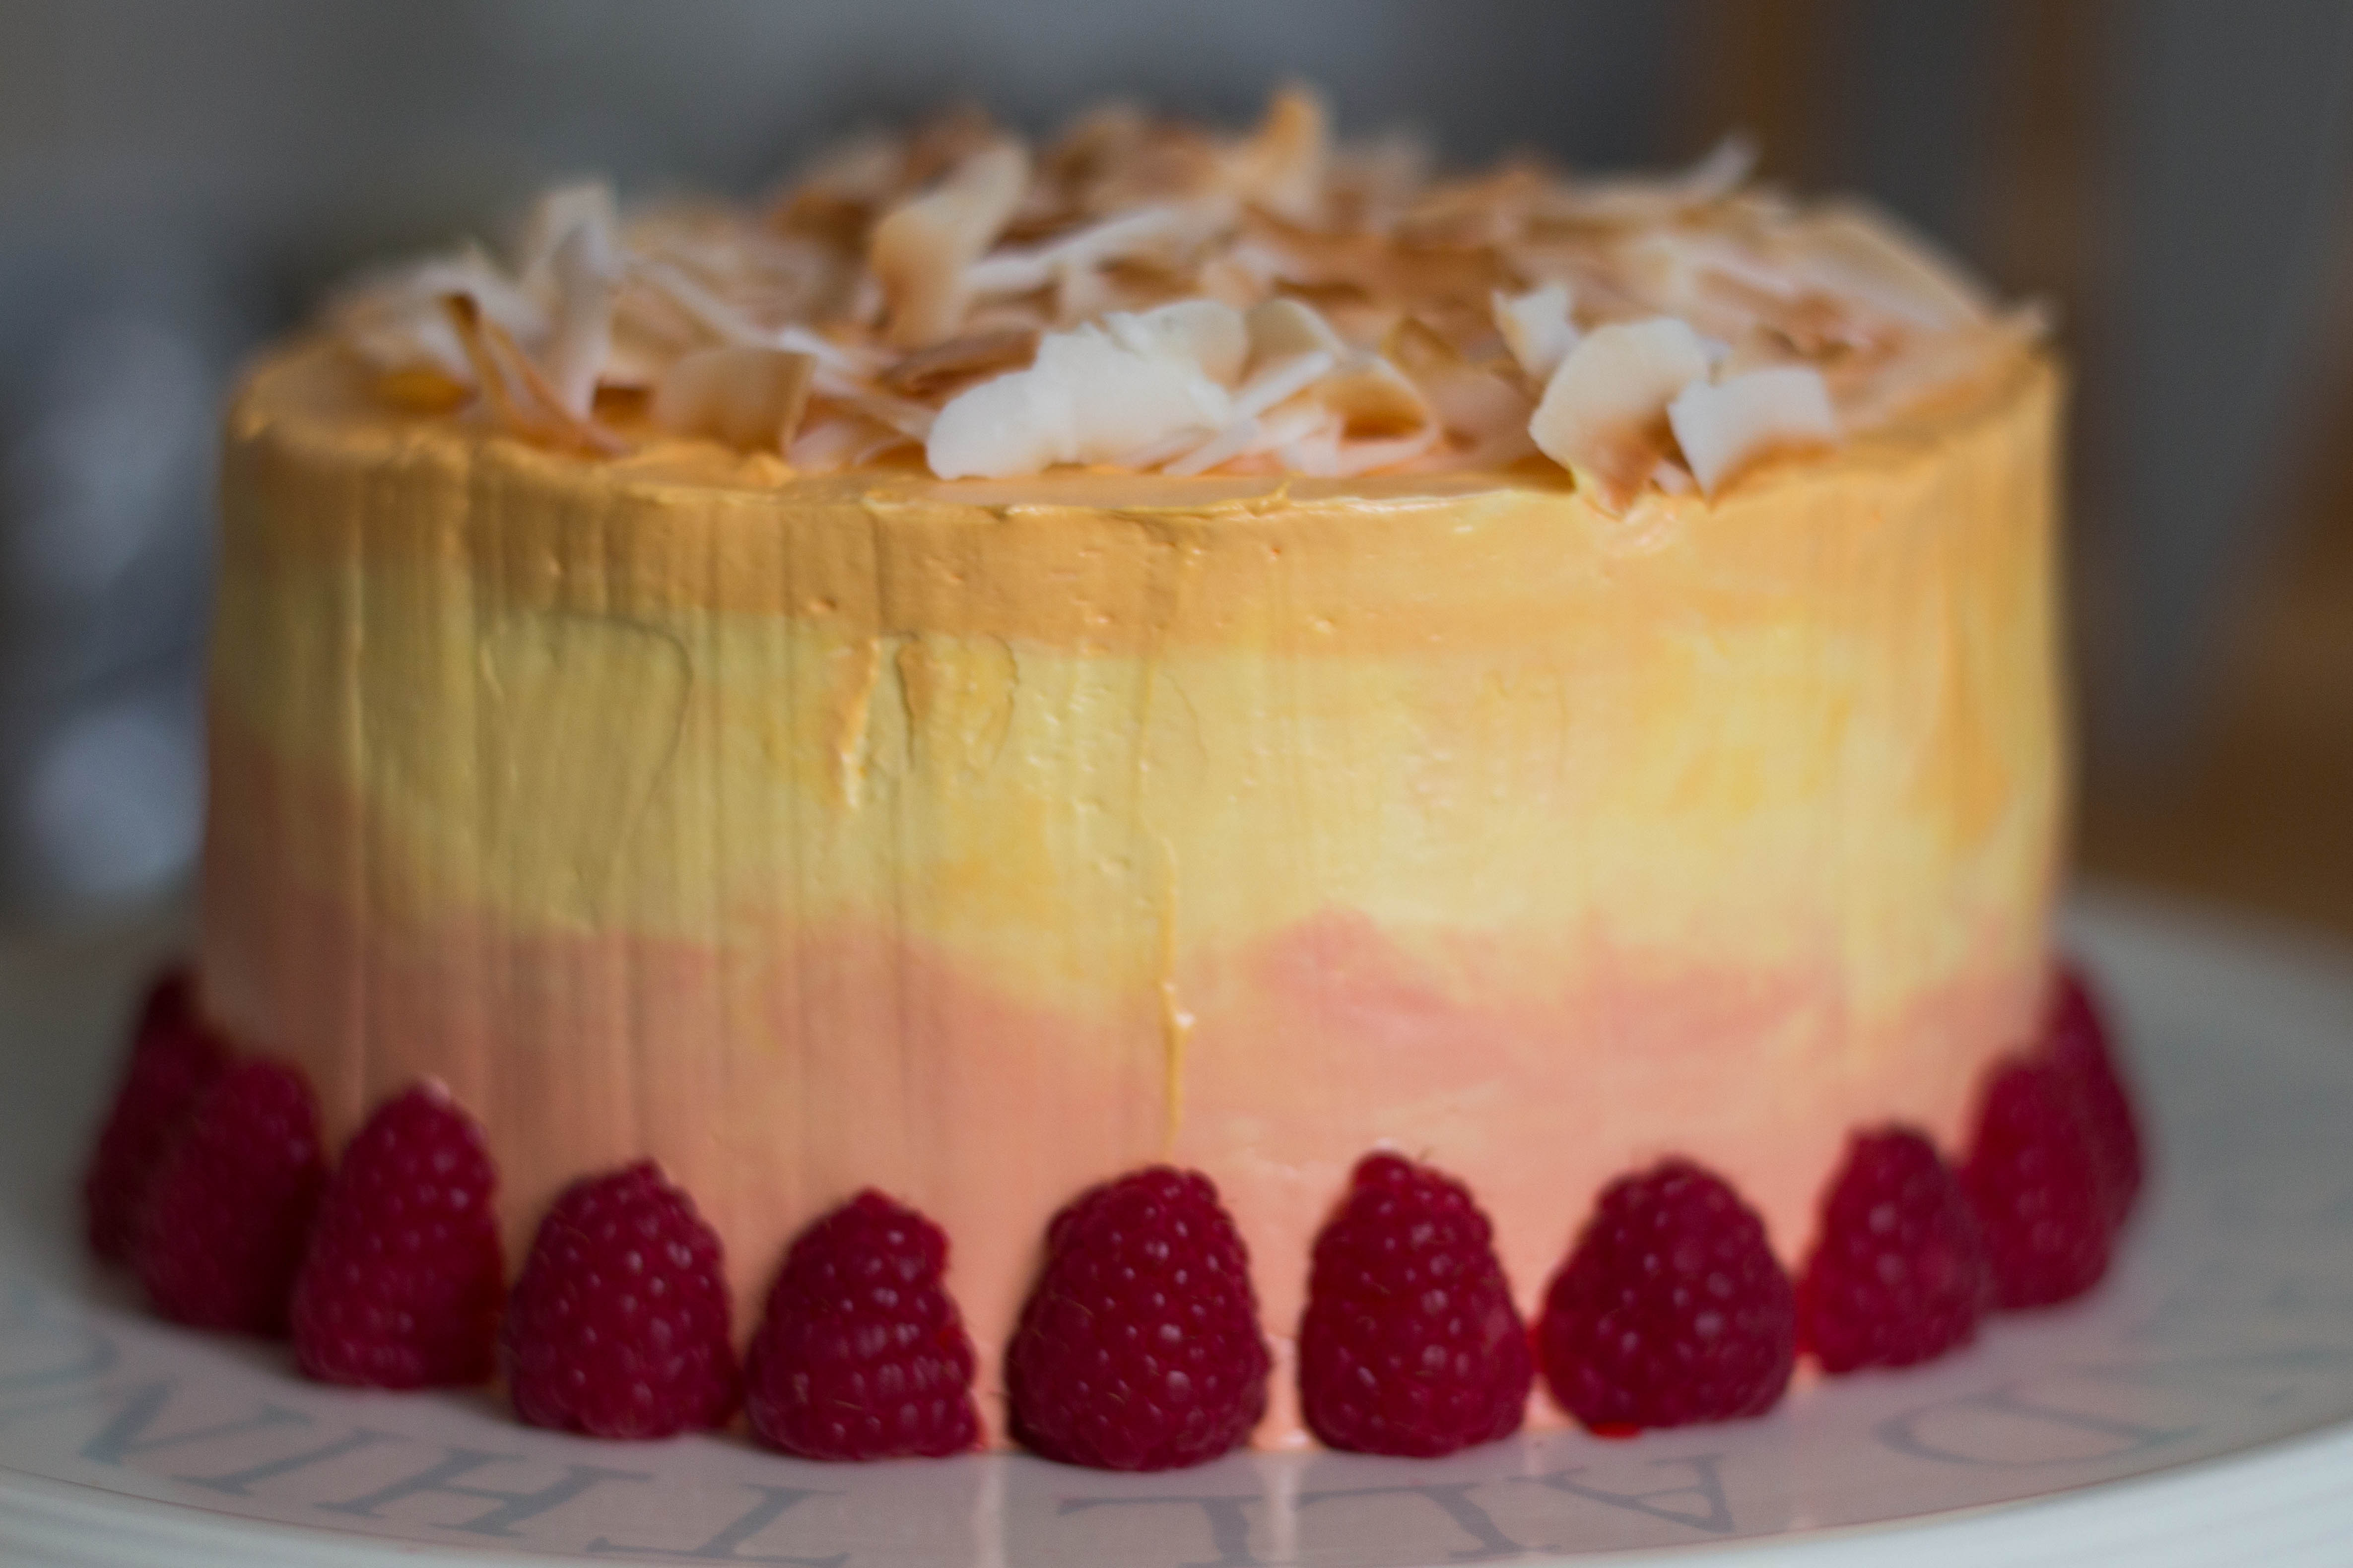
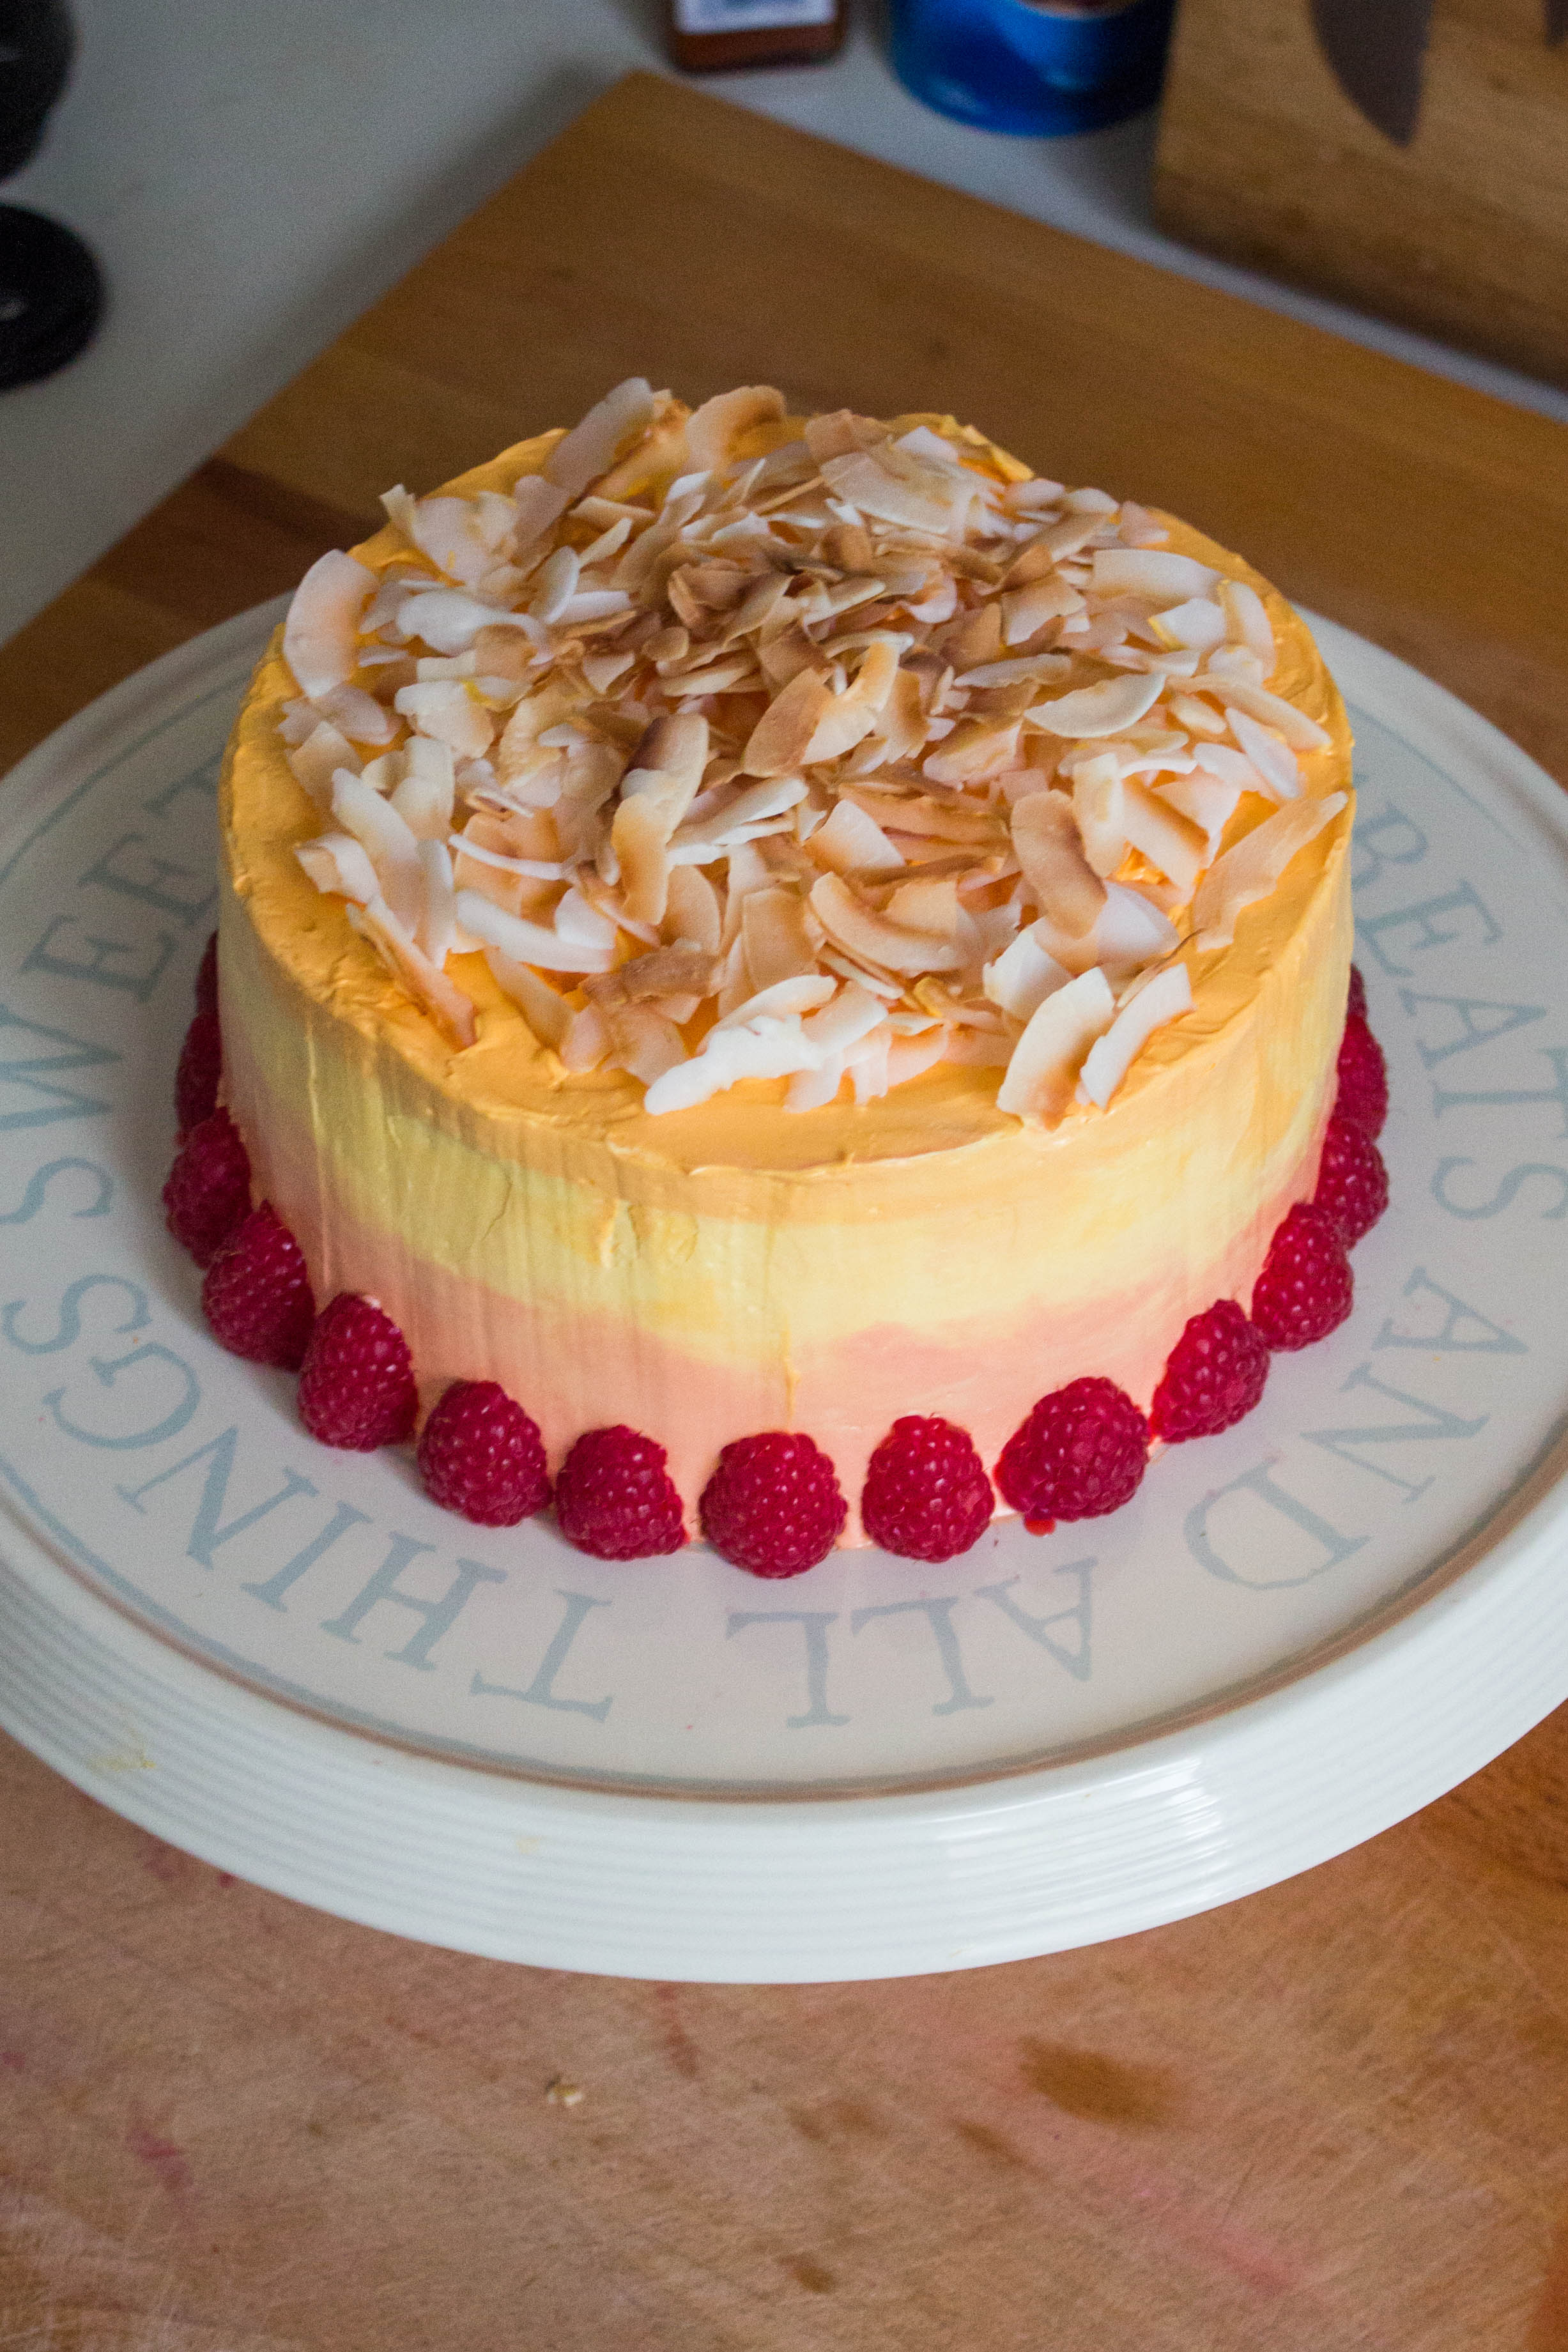
Once you’ve got your perfect IMBC you’re ready to add in your extracts and colours. Colour 1/2 of your buttercream pale yellow, 1/4 pale pink, and 1/4 pale orange.
Assembling Your Cake
What you will need:
Buttercream
Chocolate coconut filling
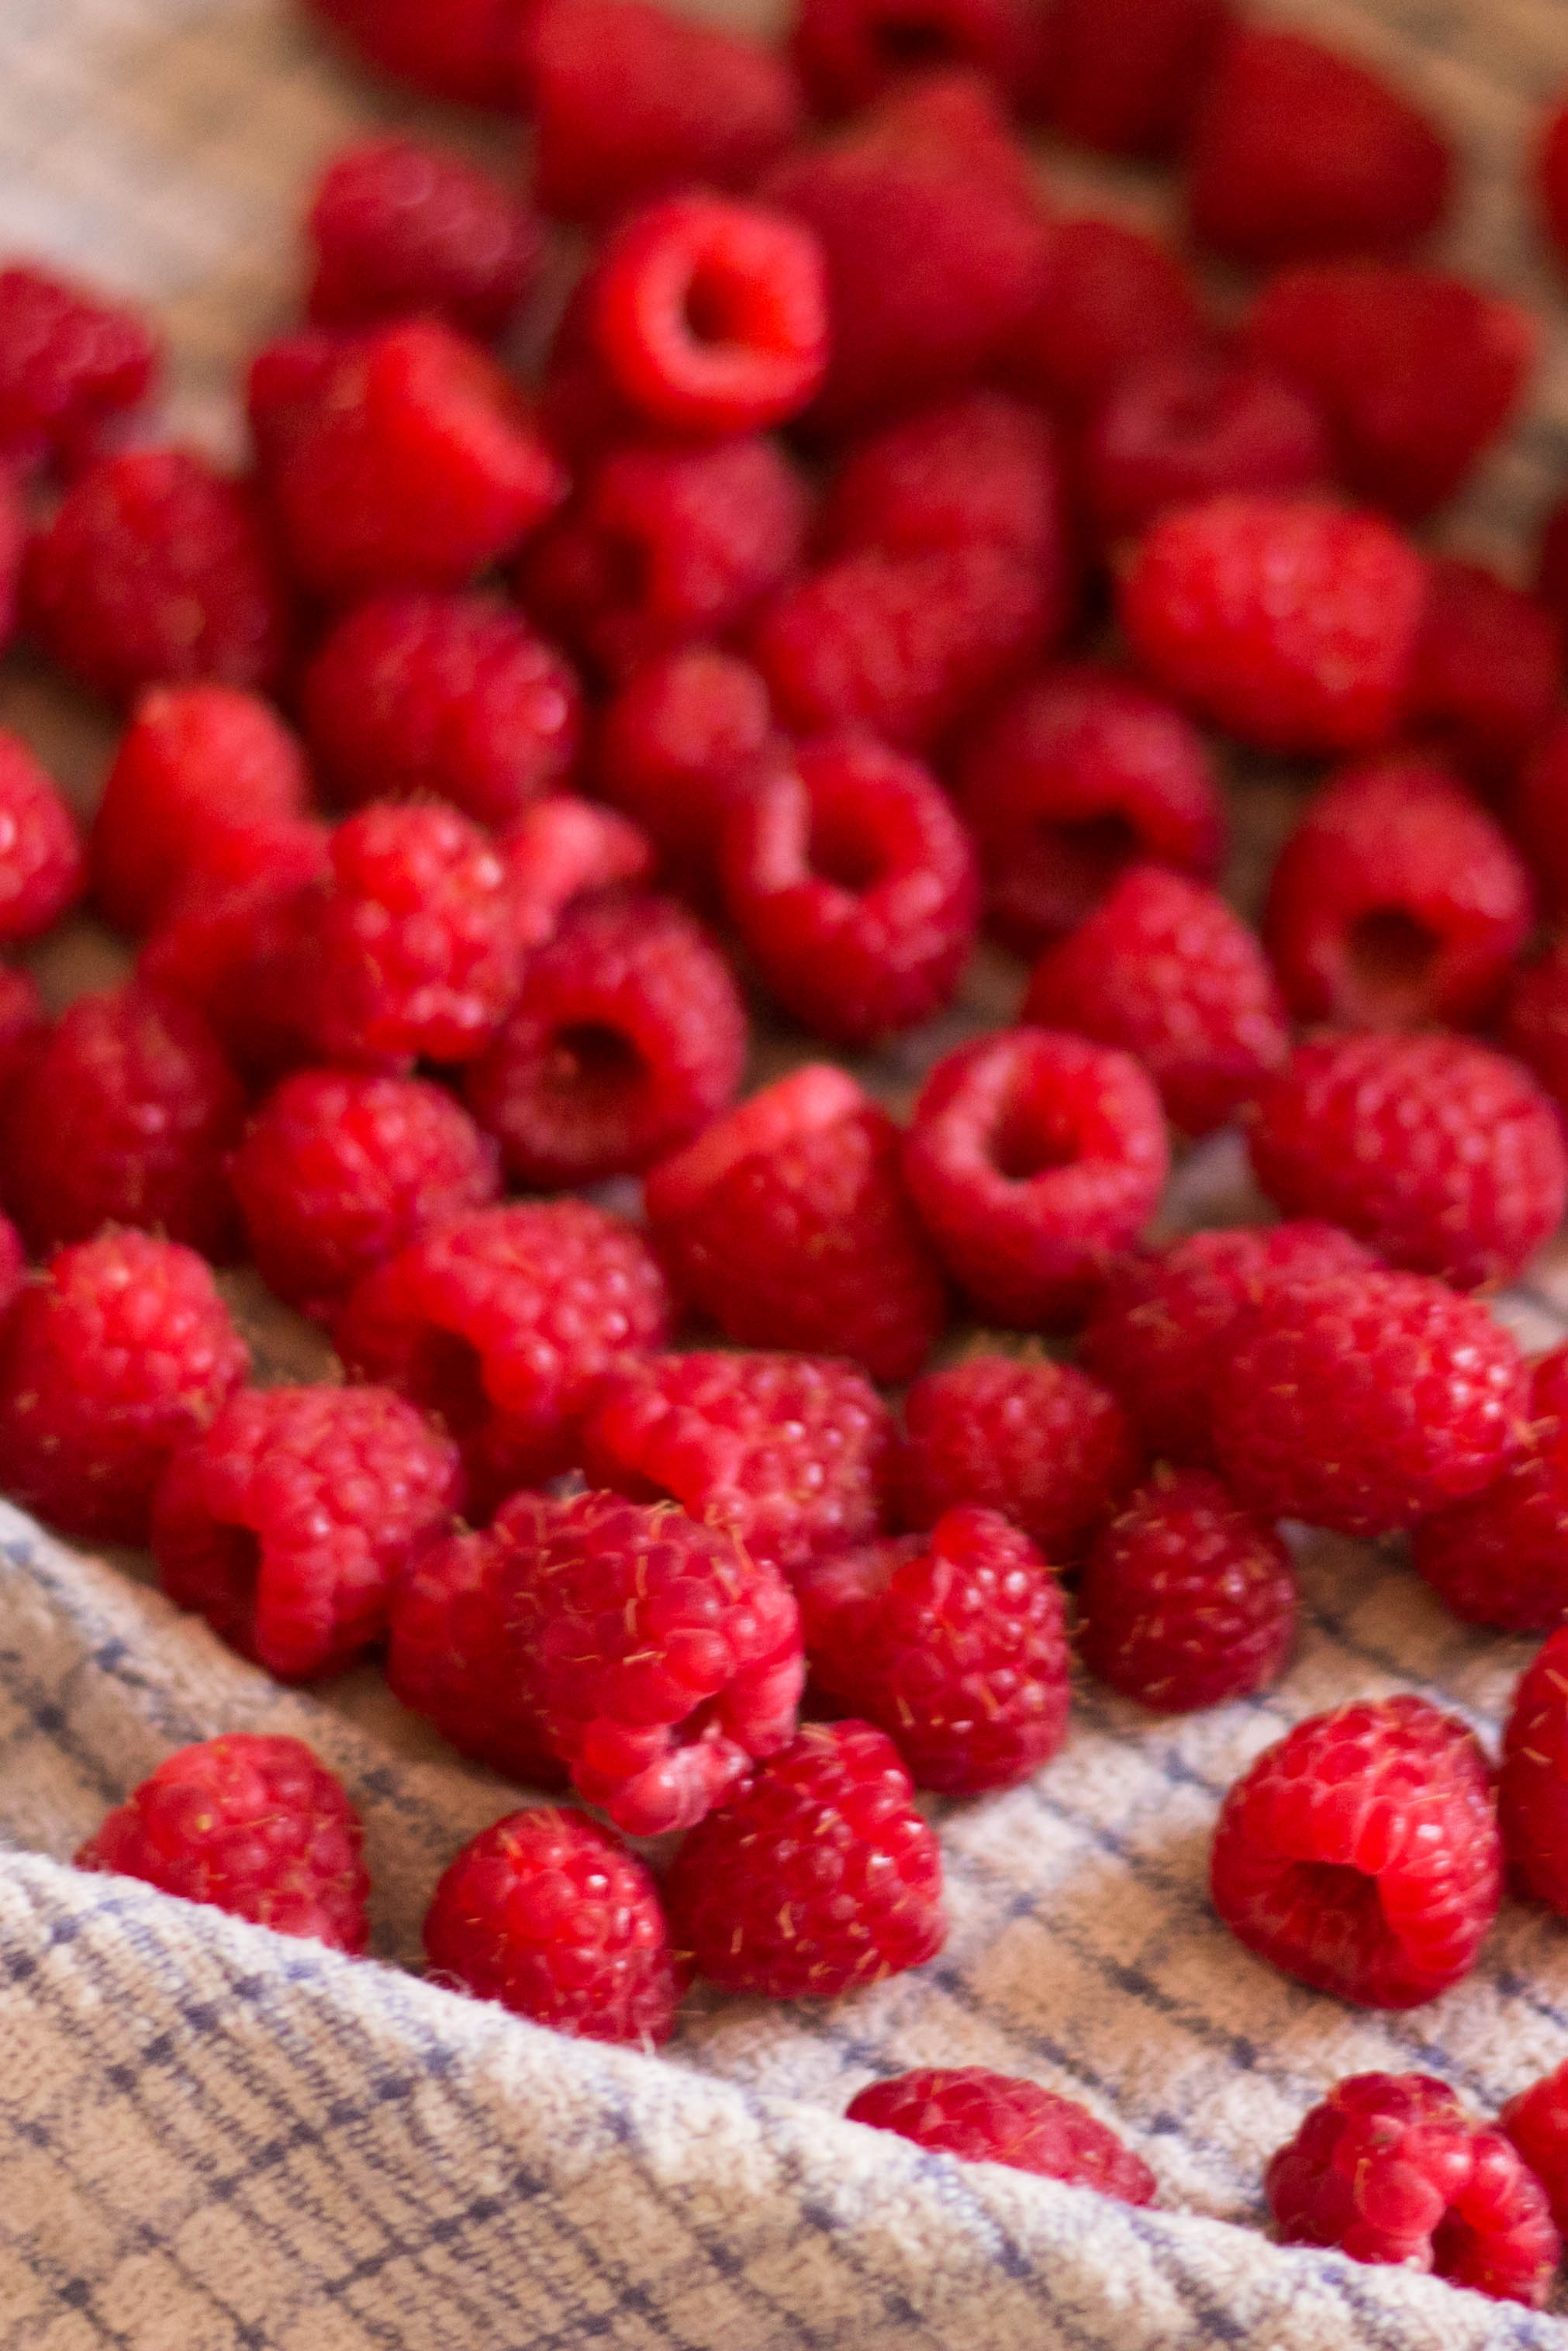
Fresh raspberries
Shredded coconut, toasted
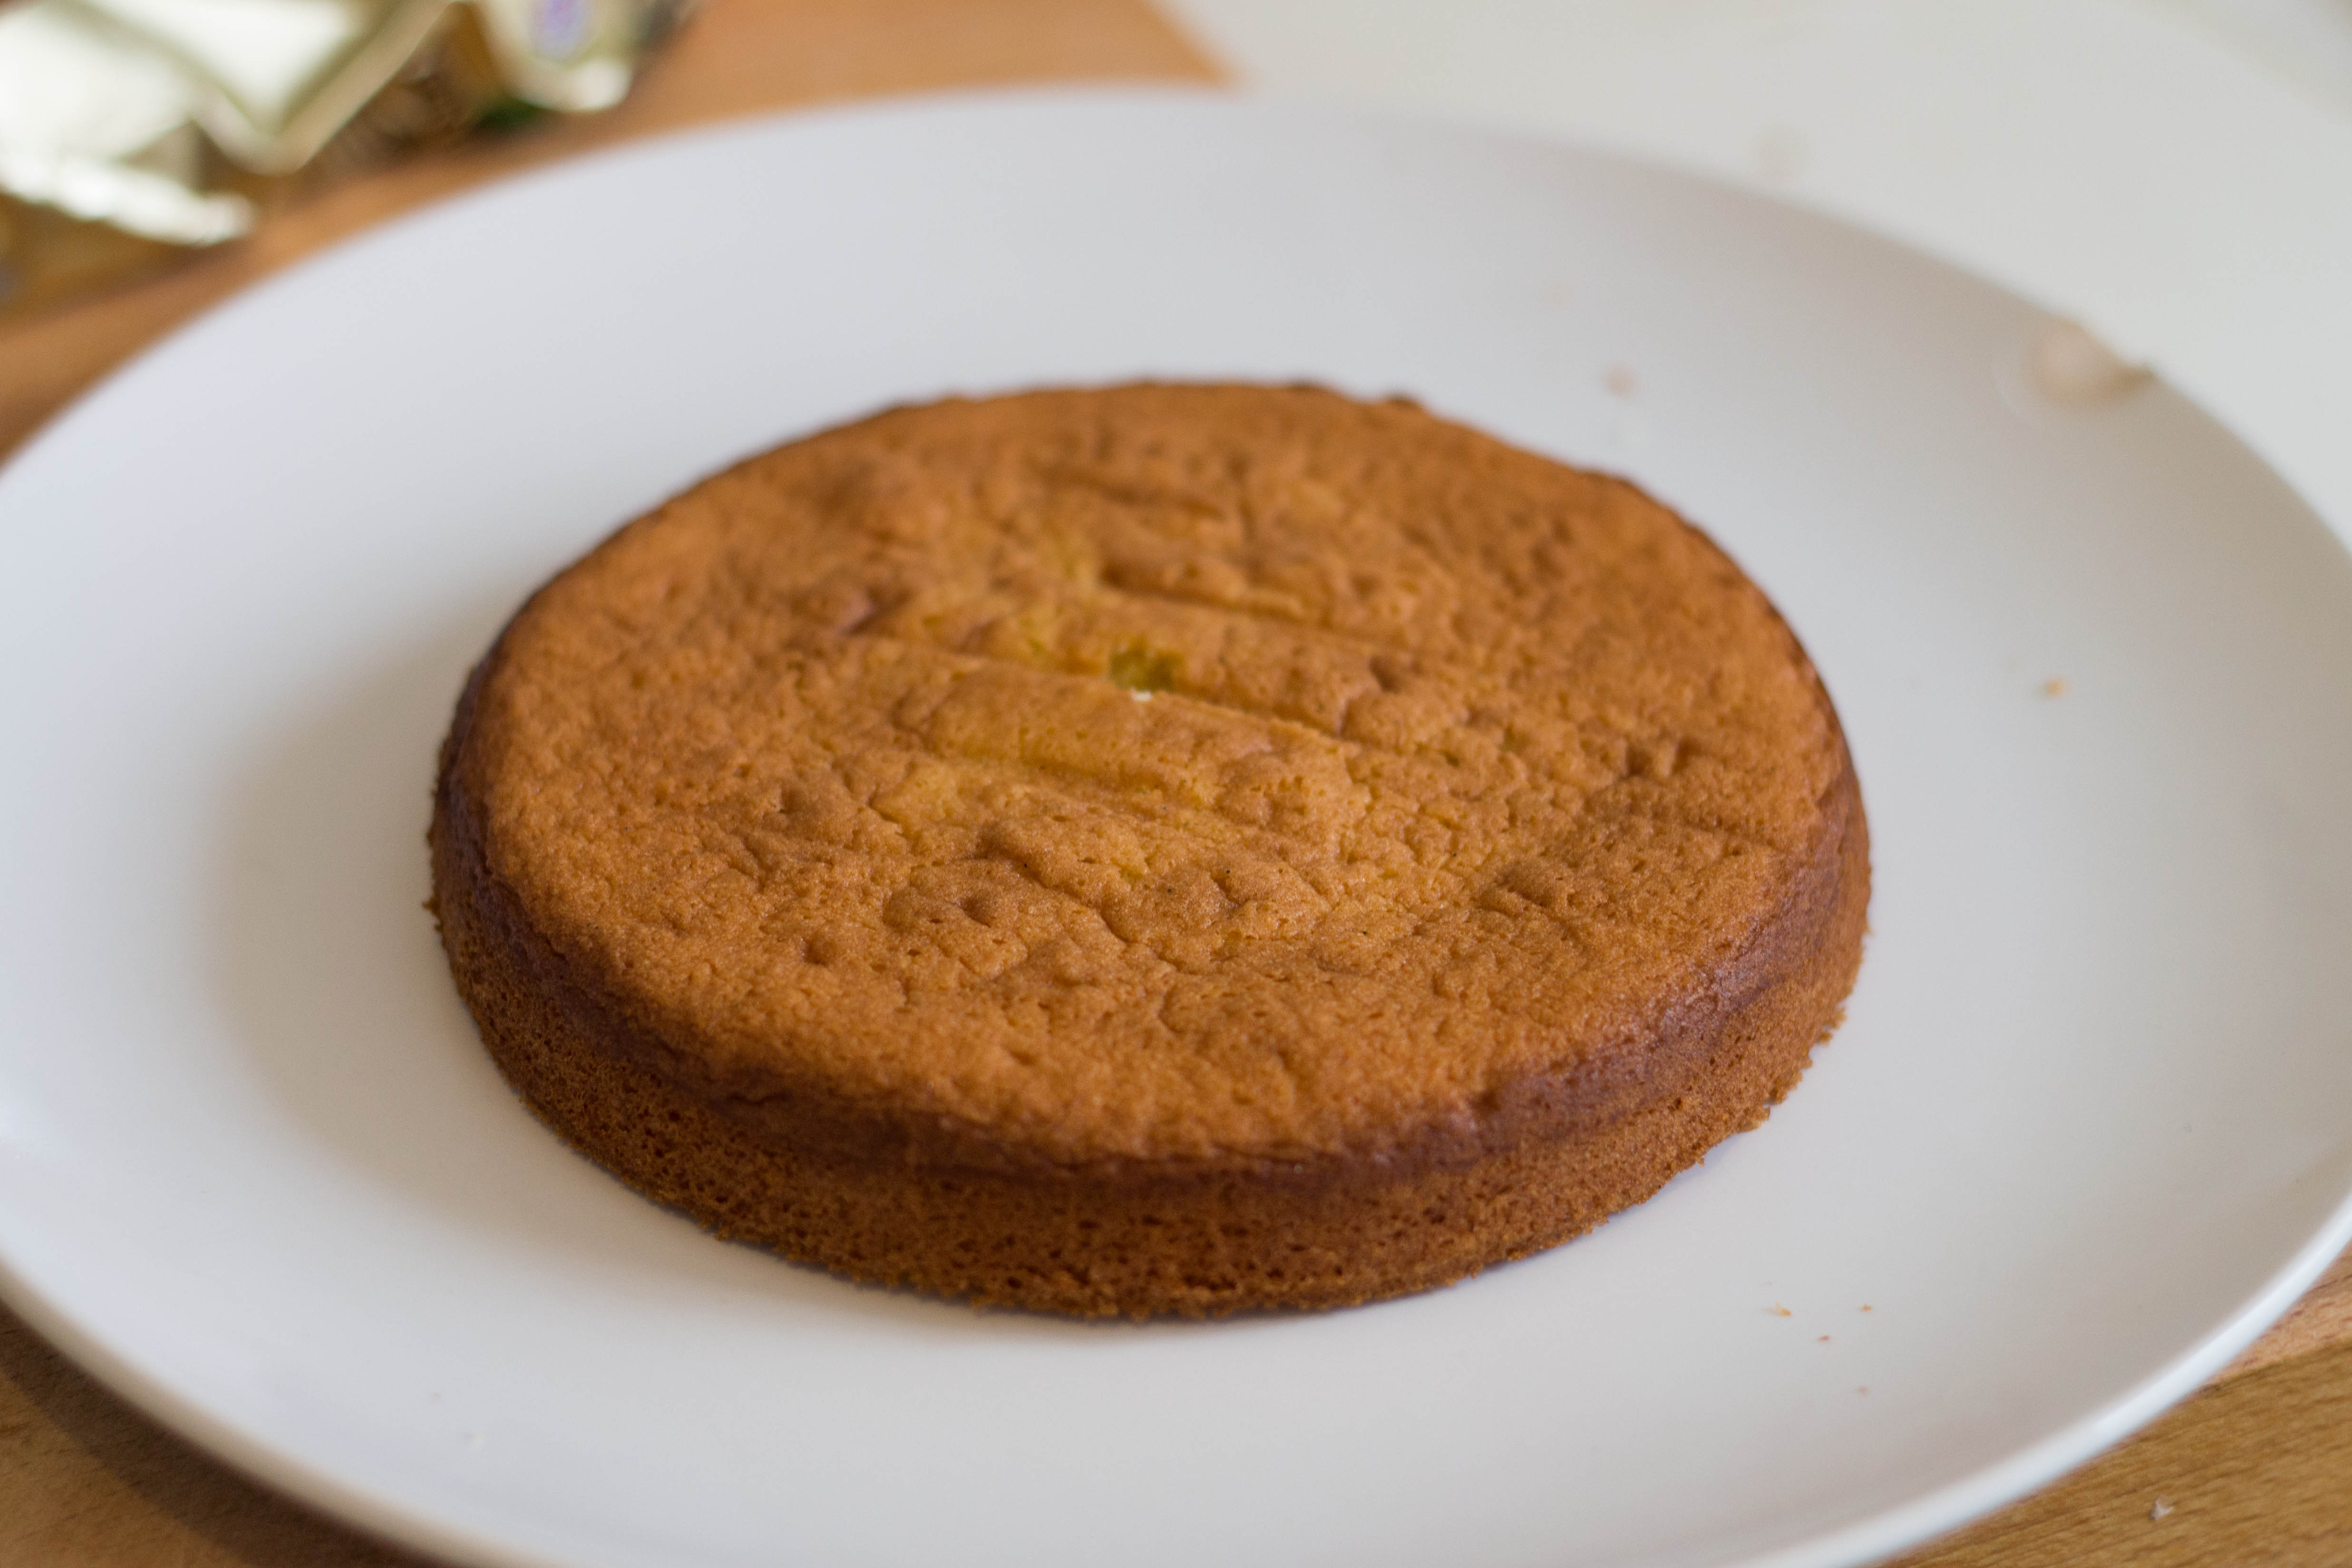
Start by levelling your cake layers. My layers actually came out nice and level, but I still like to use a wire cutter to get that perfect finish!
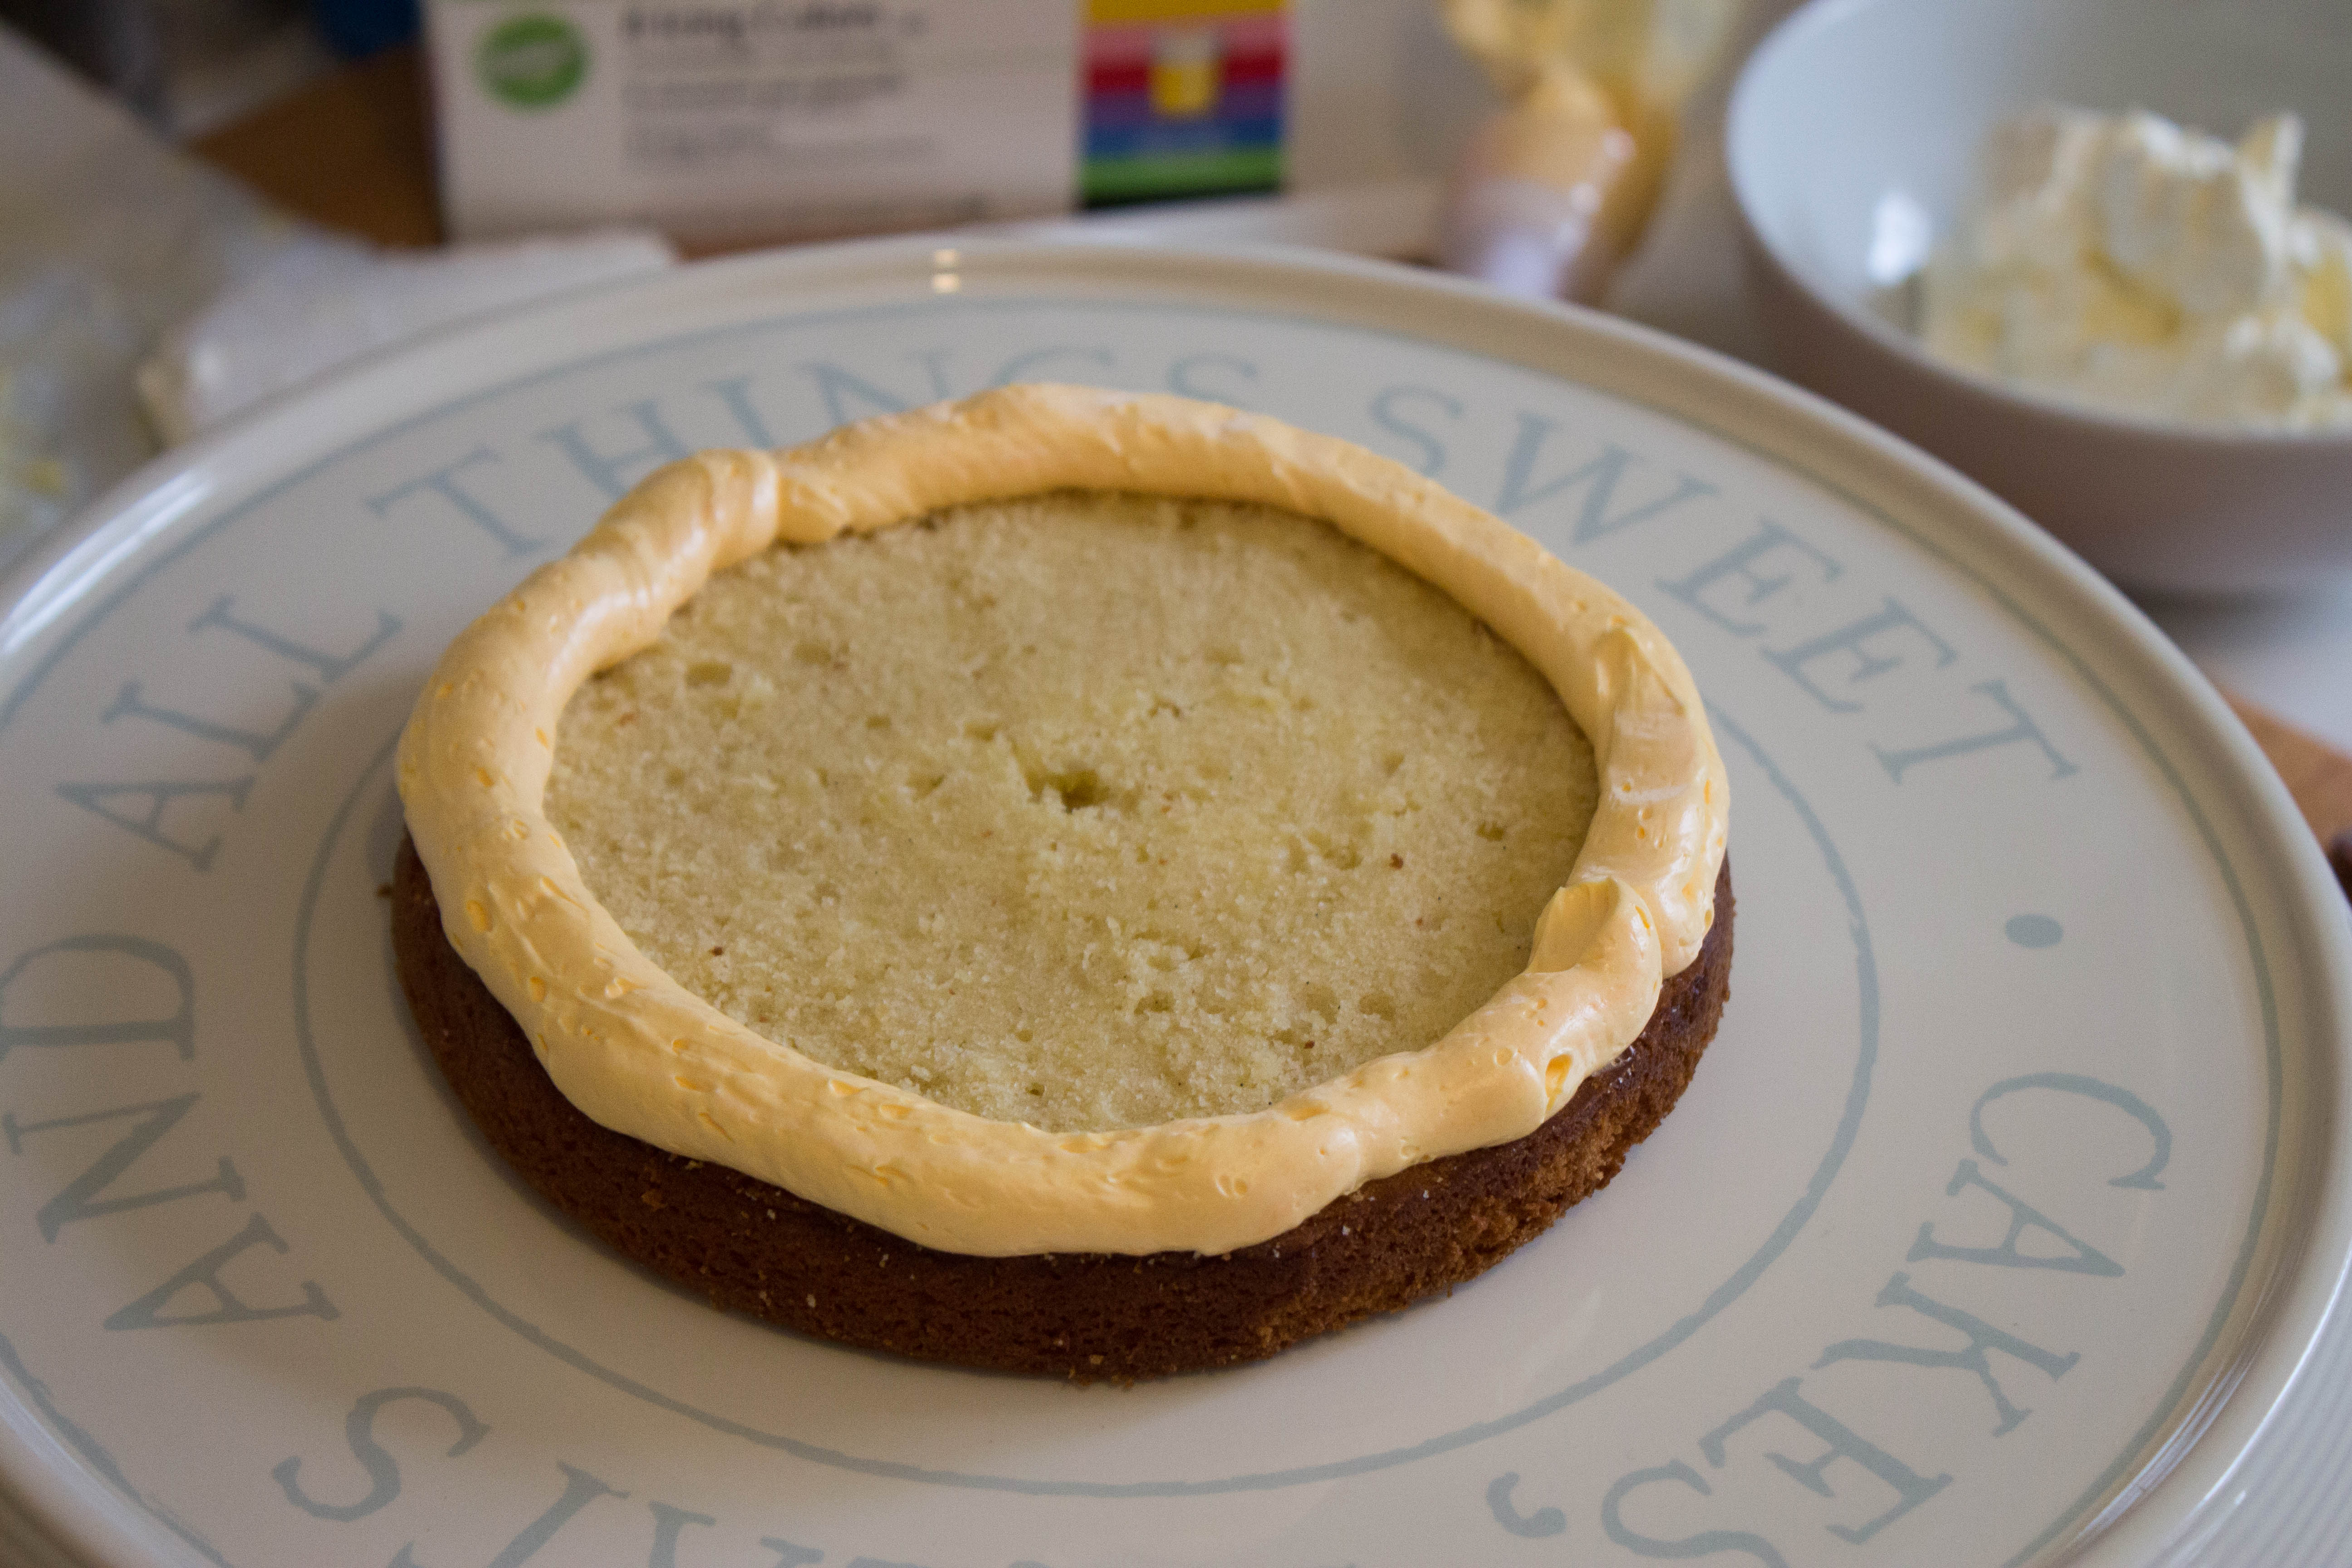
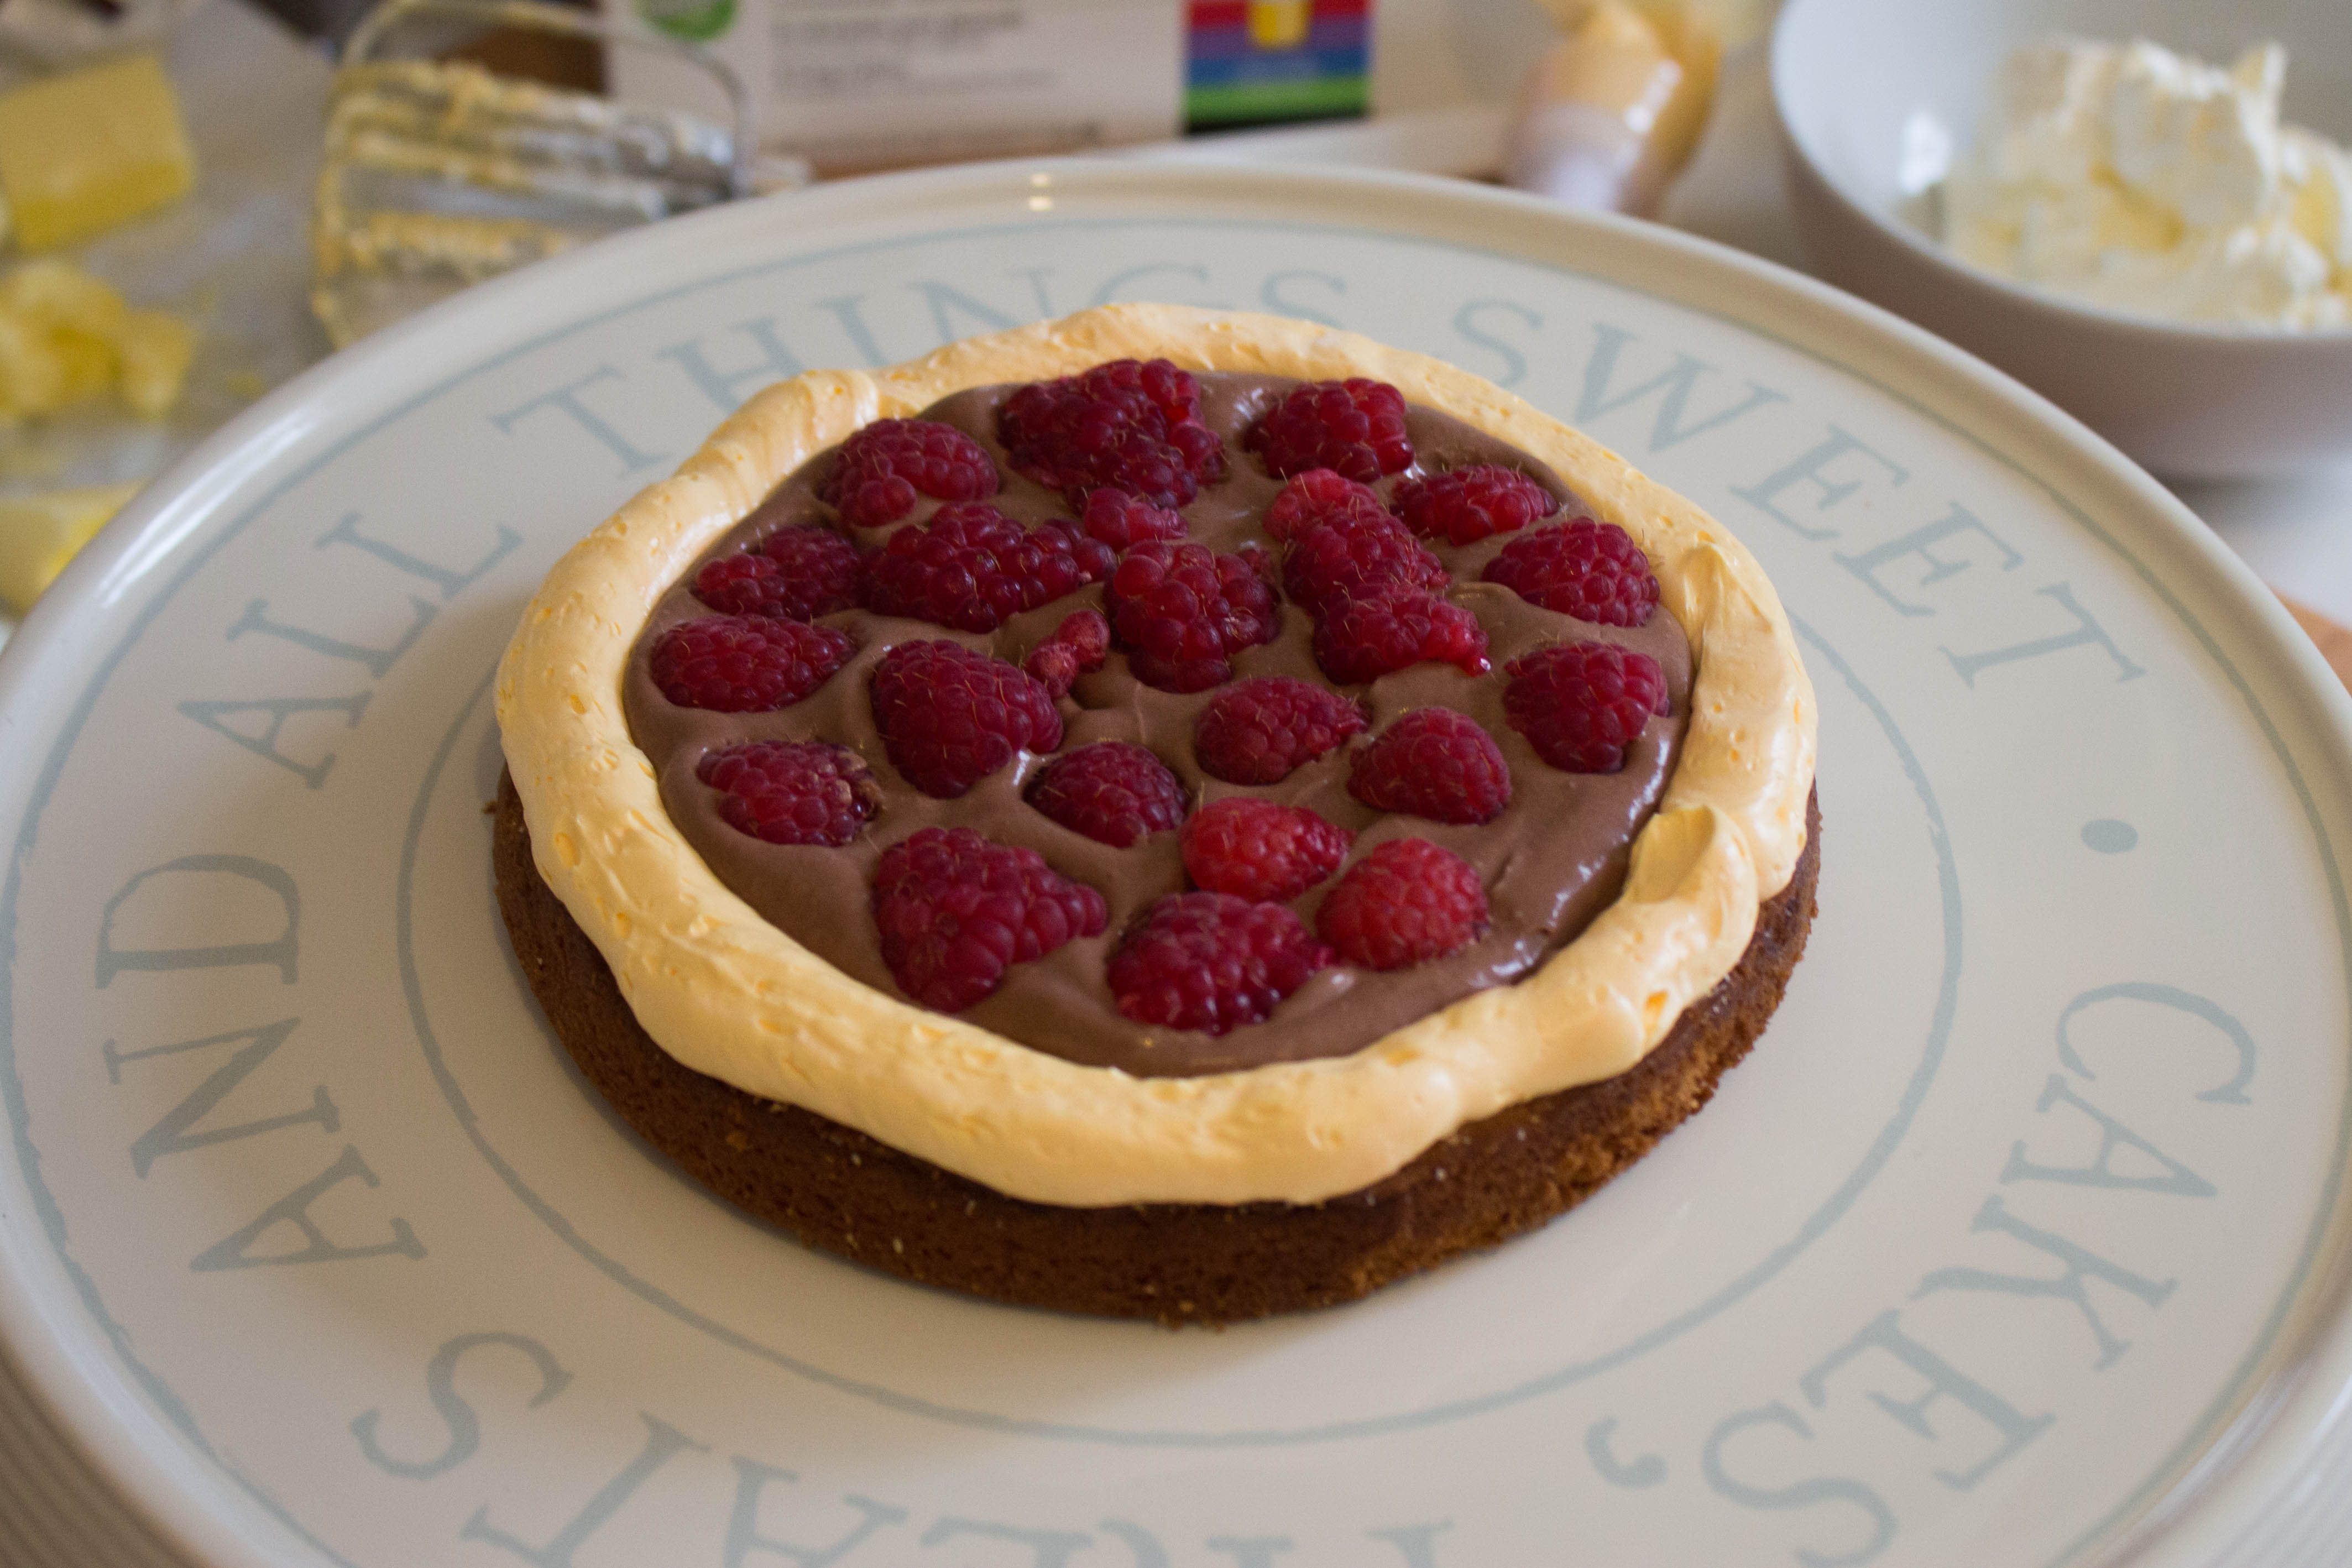
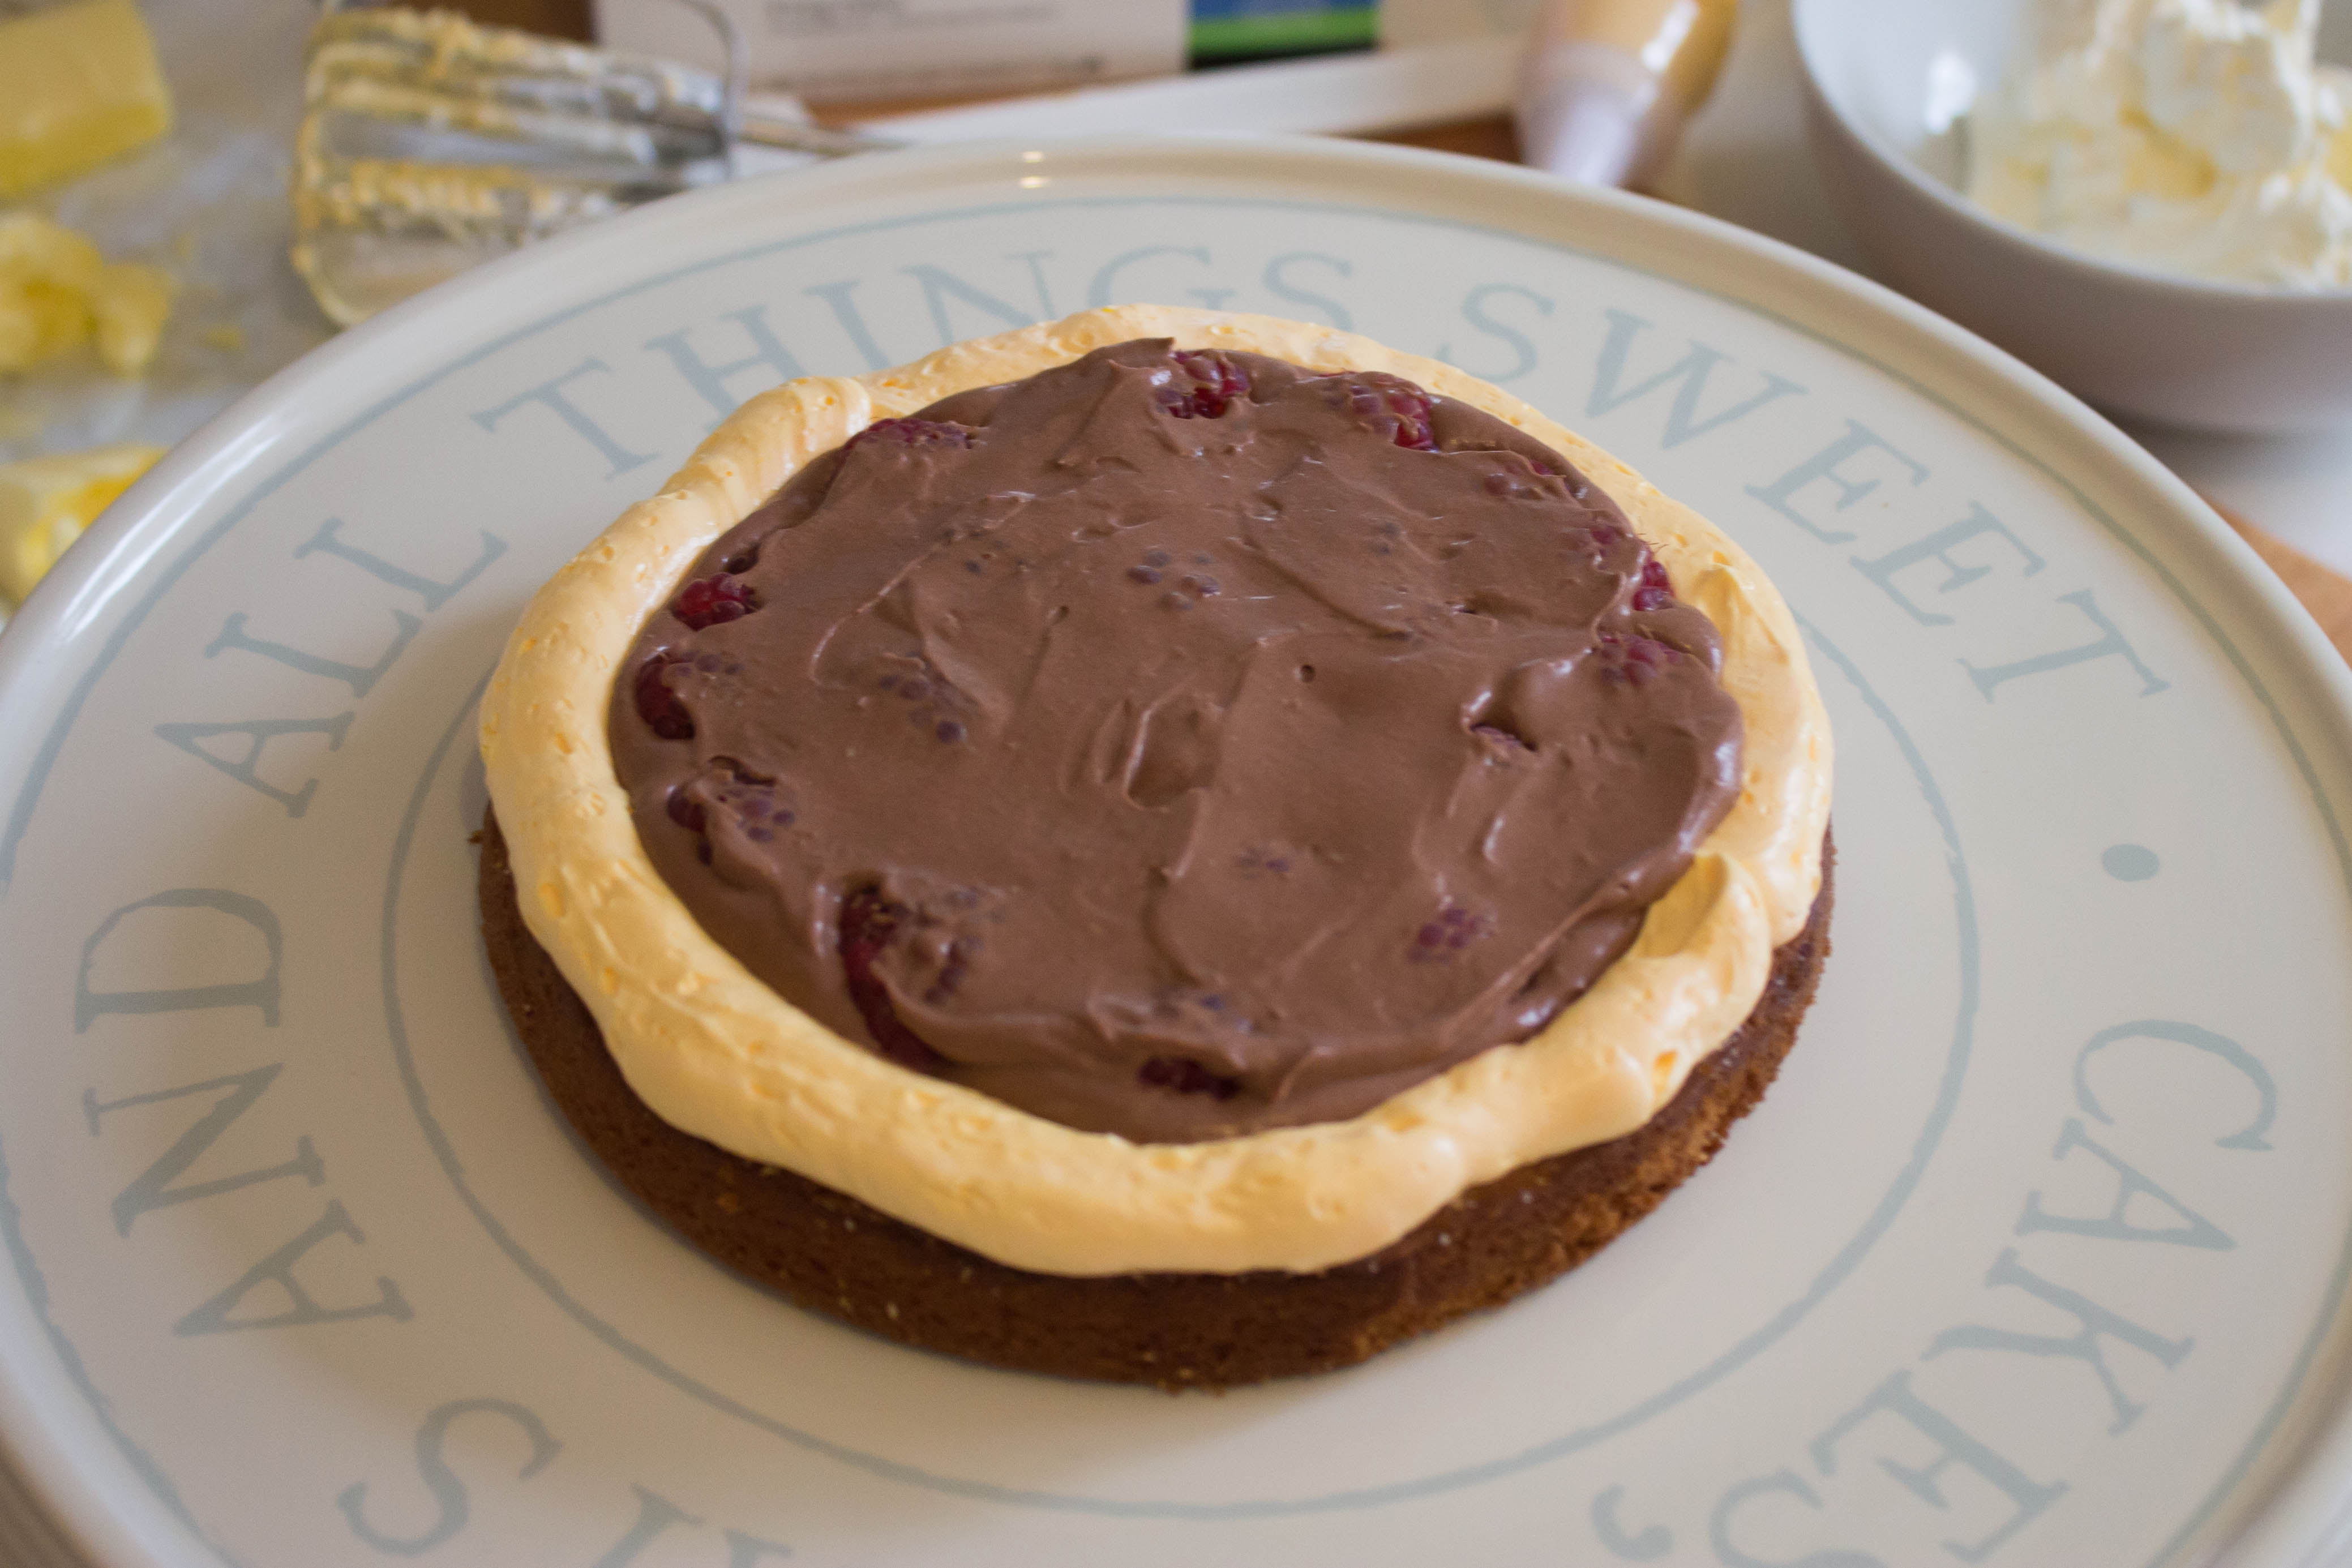
Place the first cake layer on your cake board or stand and pipe a dam of yellow buttercream around the edges, as in the photo above – this will stop your filling from leaking out the sides! Place a few spoons of your chocolate coconut filling in the centre and spread out evenly. Push your raspberries into the filling, staying clear of your buttercream dam, and then spread another layer of filling on top. Then repeat for your next layer!
Note: I cut my raspberries in half, but full ones would work too!
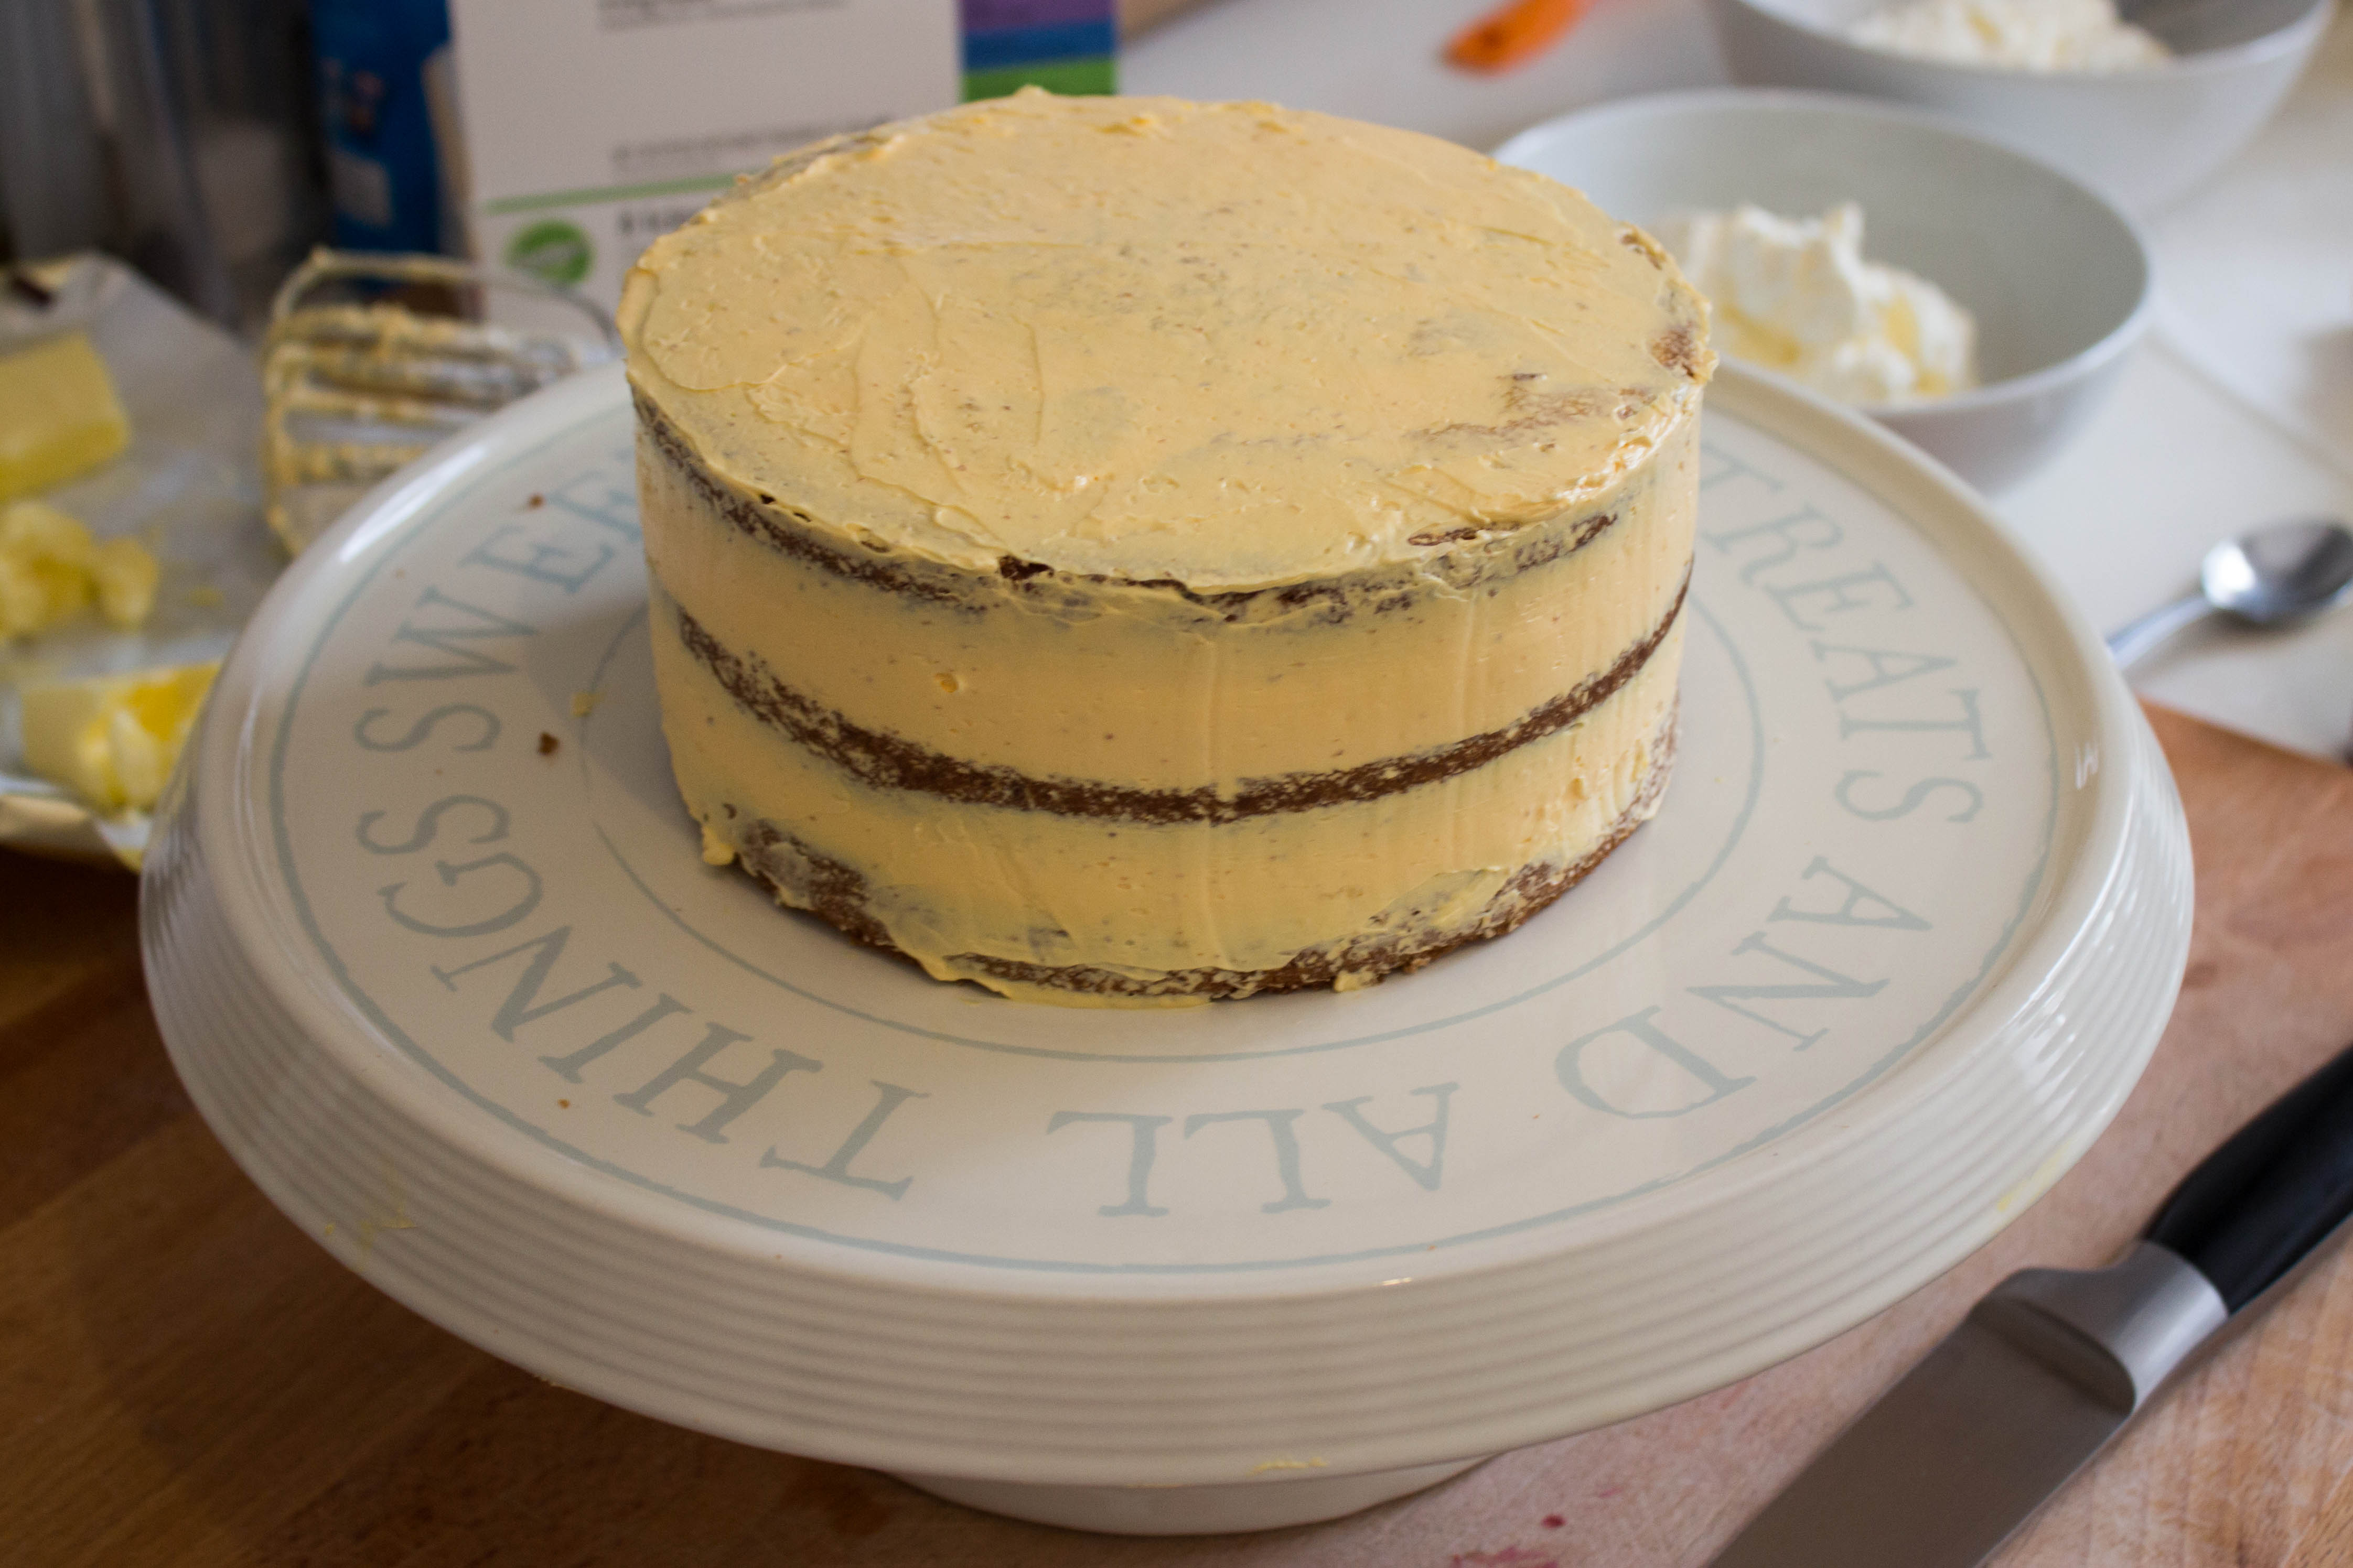
Place your filled cake in the fridge for about 25 minutes before moving on to crumb coating.
Crumb coat your cake using the yellow buttercream, and refrigerate again before frosting. You can read my post on ‘Building Your Layer Cake’ for a more in depth description of this.
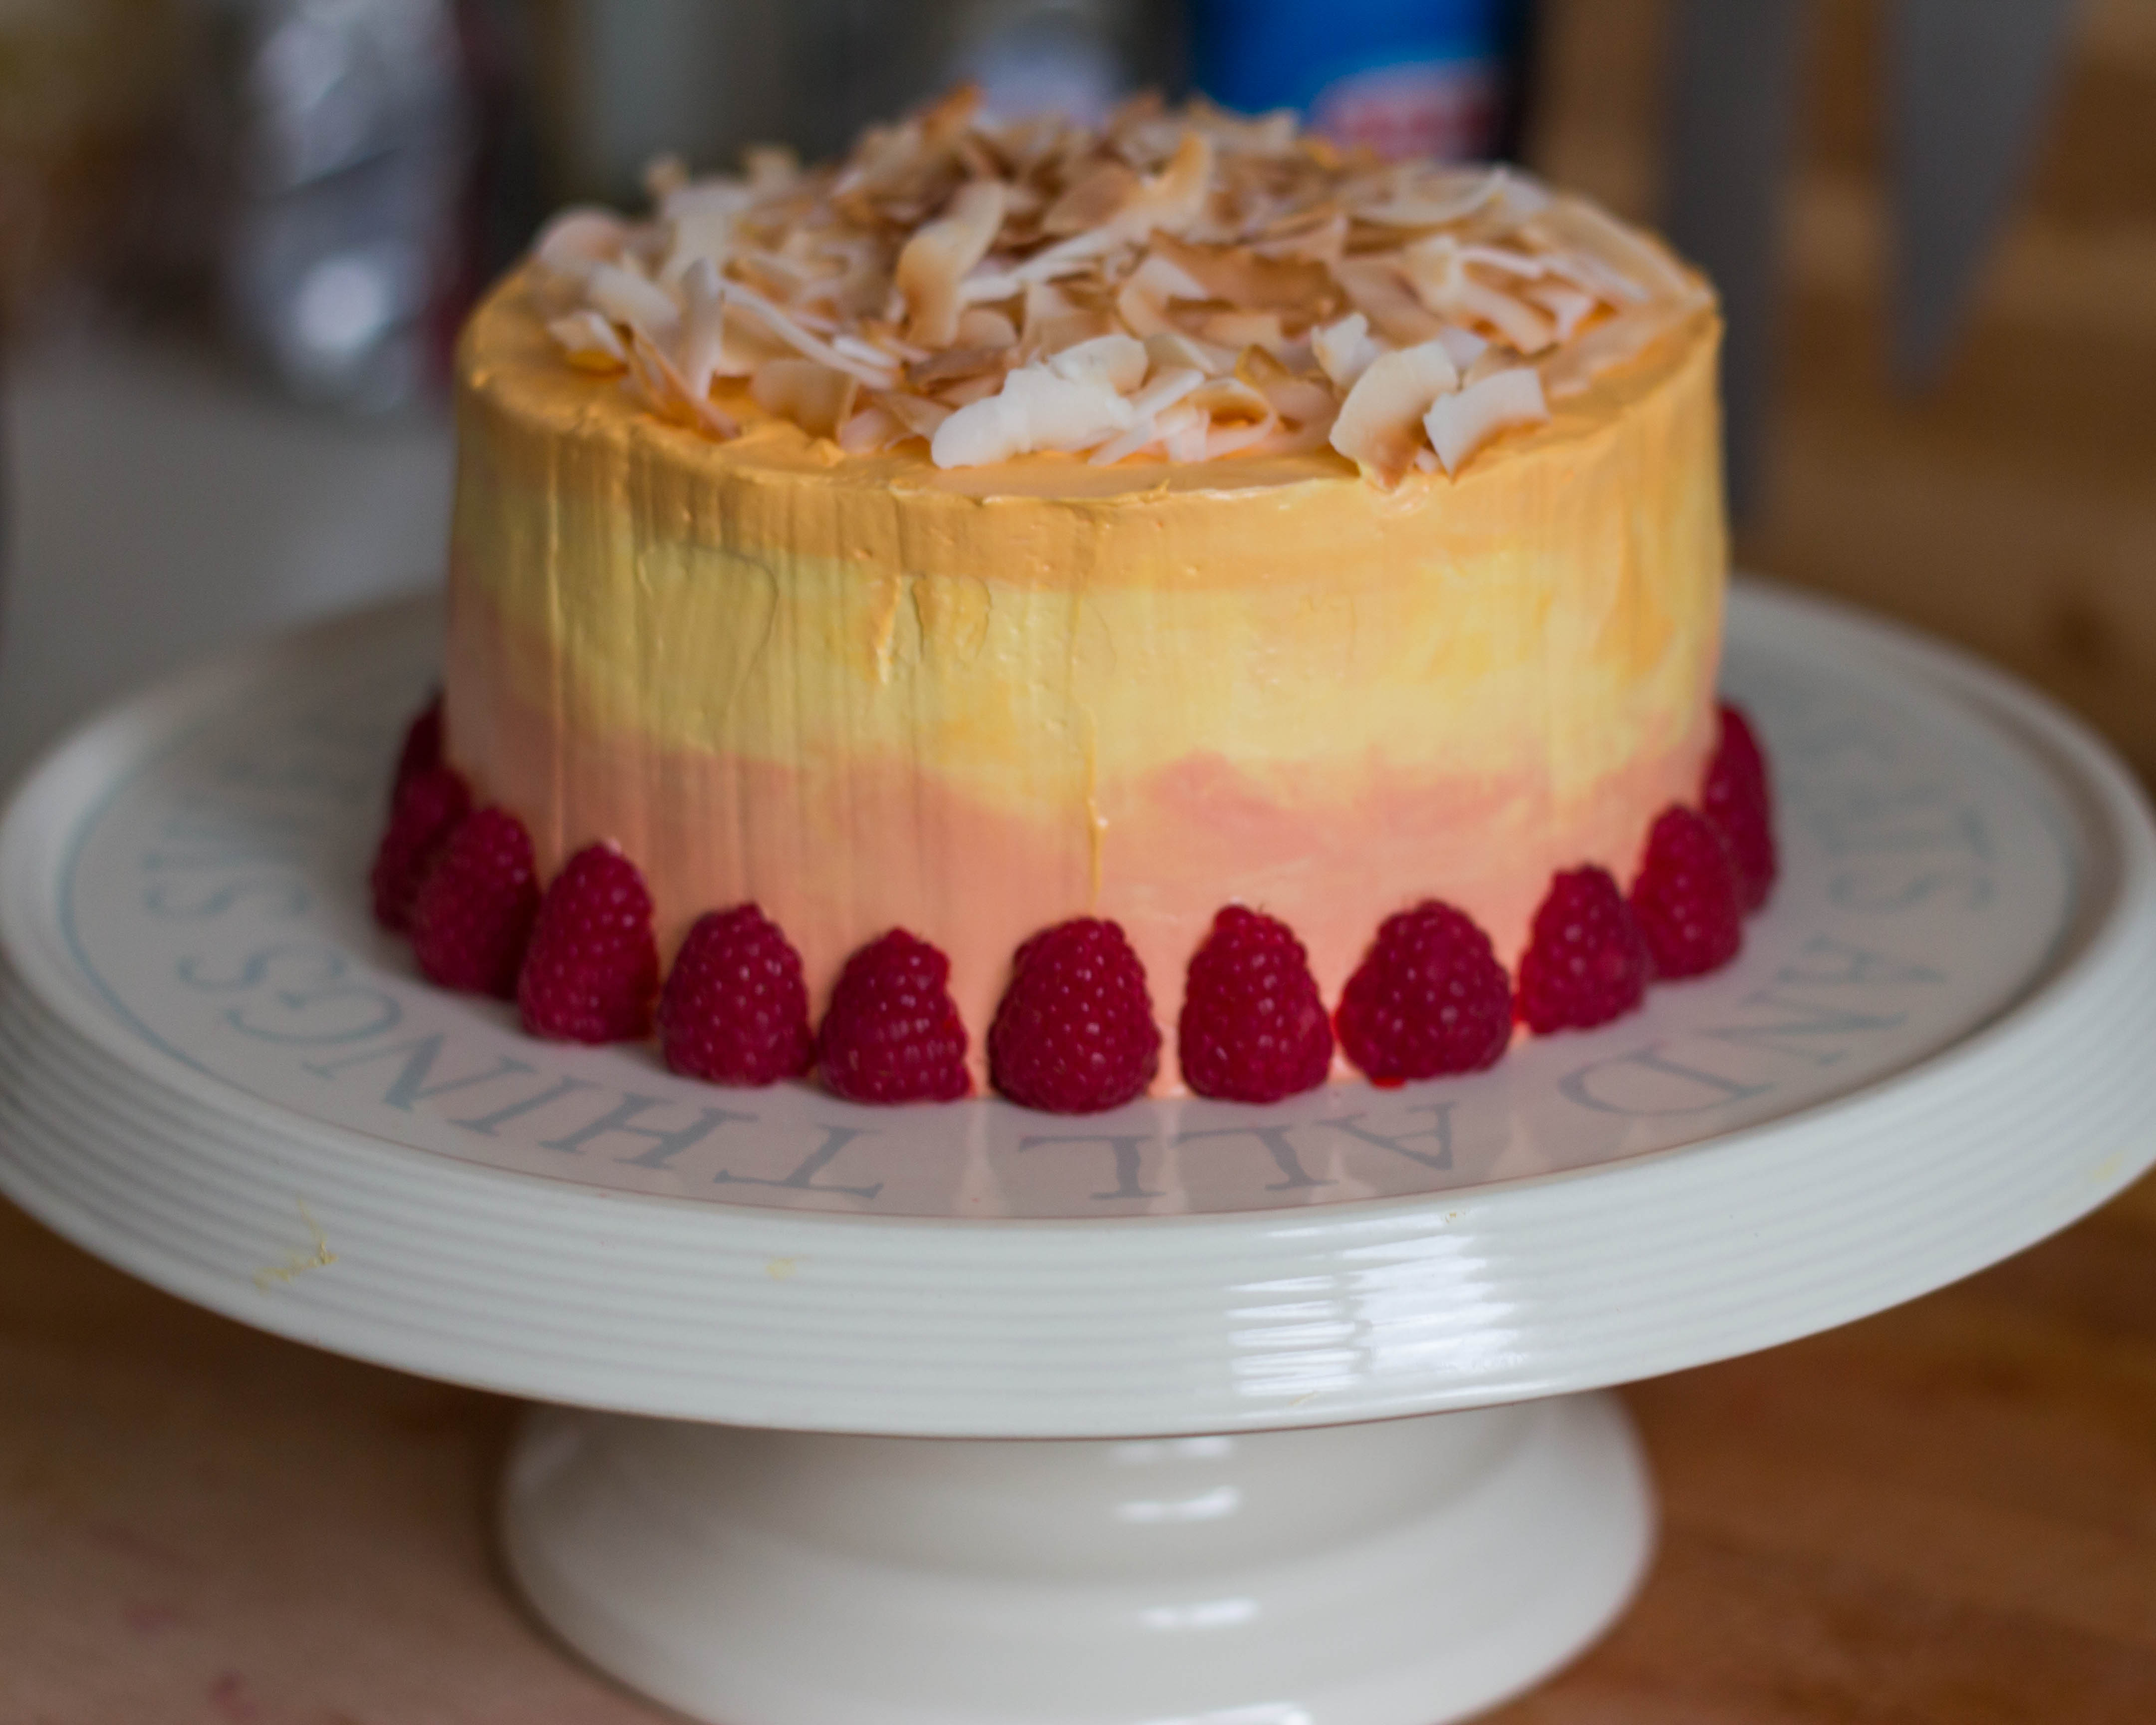
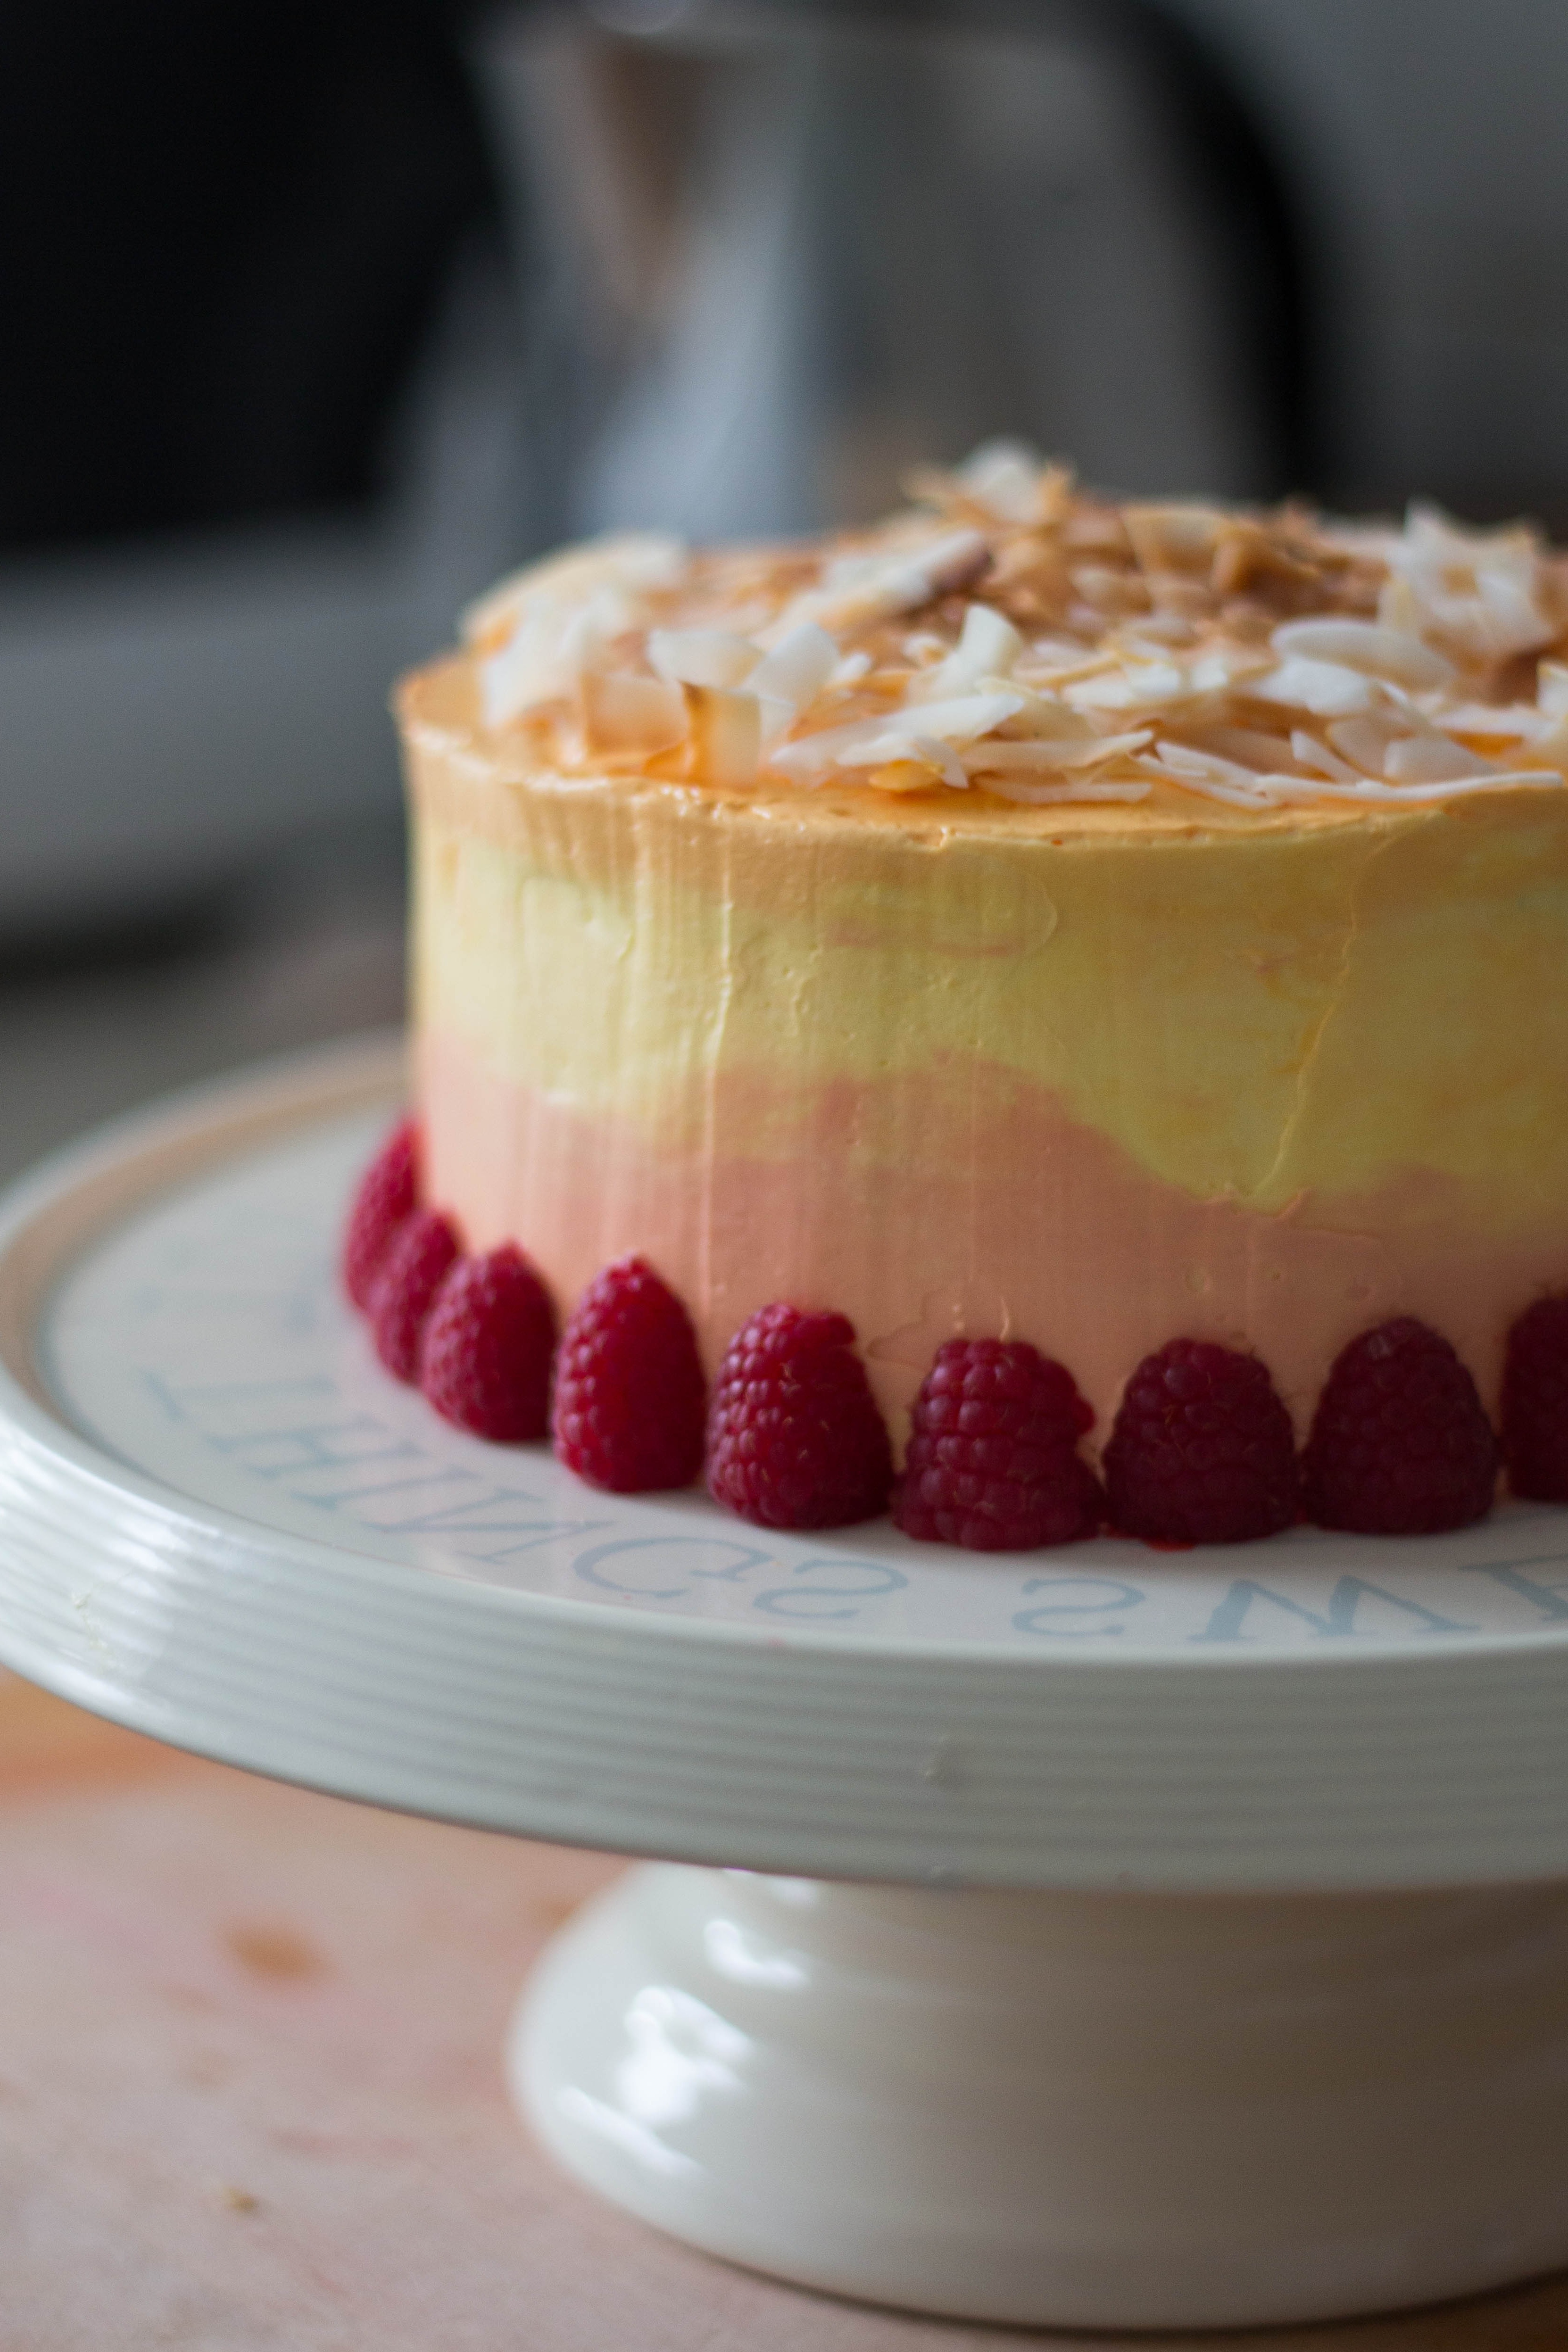
To frost your cake with a sunset effect, place a spoon of the orange buttercream on top of your cake and work out to the edges with a palette knife. Clean off your palette knife, and using this, take a scoop of your pink buttercream and spread around the base of your cake up to the middle layer. Clean off your palette knife again and scoop up some of the yellow buttercream, spreading this in the gap between the orange and pink.
Once your cake is covered, slowly smooth the icing with your palette knife by holding the knife upright on the sides of the cake and turning the cake continuously.
Clean off your palette knife before moving on to smoothing the top of your cake. Hold the knife horizontally and smooth across the surface in a circular motion. You will need to go back and forth between smoothing the sides and top of your cake to get the desired finish, but be sure to clean off your palette knife before you switch each time!
Tip: For less contrast, blend your colours a little before smoothing by swiping in an upwards or downwards motion where your colours meet.
Decorate your cake with the remaining fresh raspberries and top with toasted coconut.
Enjoy… x

One thought on “Coconut Sunset Cake”