
I’ll be honest, I had no idea what to call this cake… I was asked to make a rainbow cake, and as I’d already done a plain old rainbow coloured vanilla cake, I wanted to do something a bit different.
So… I threw in all the colours… as well as a couple of extra flavours!

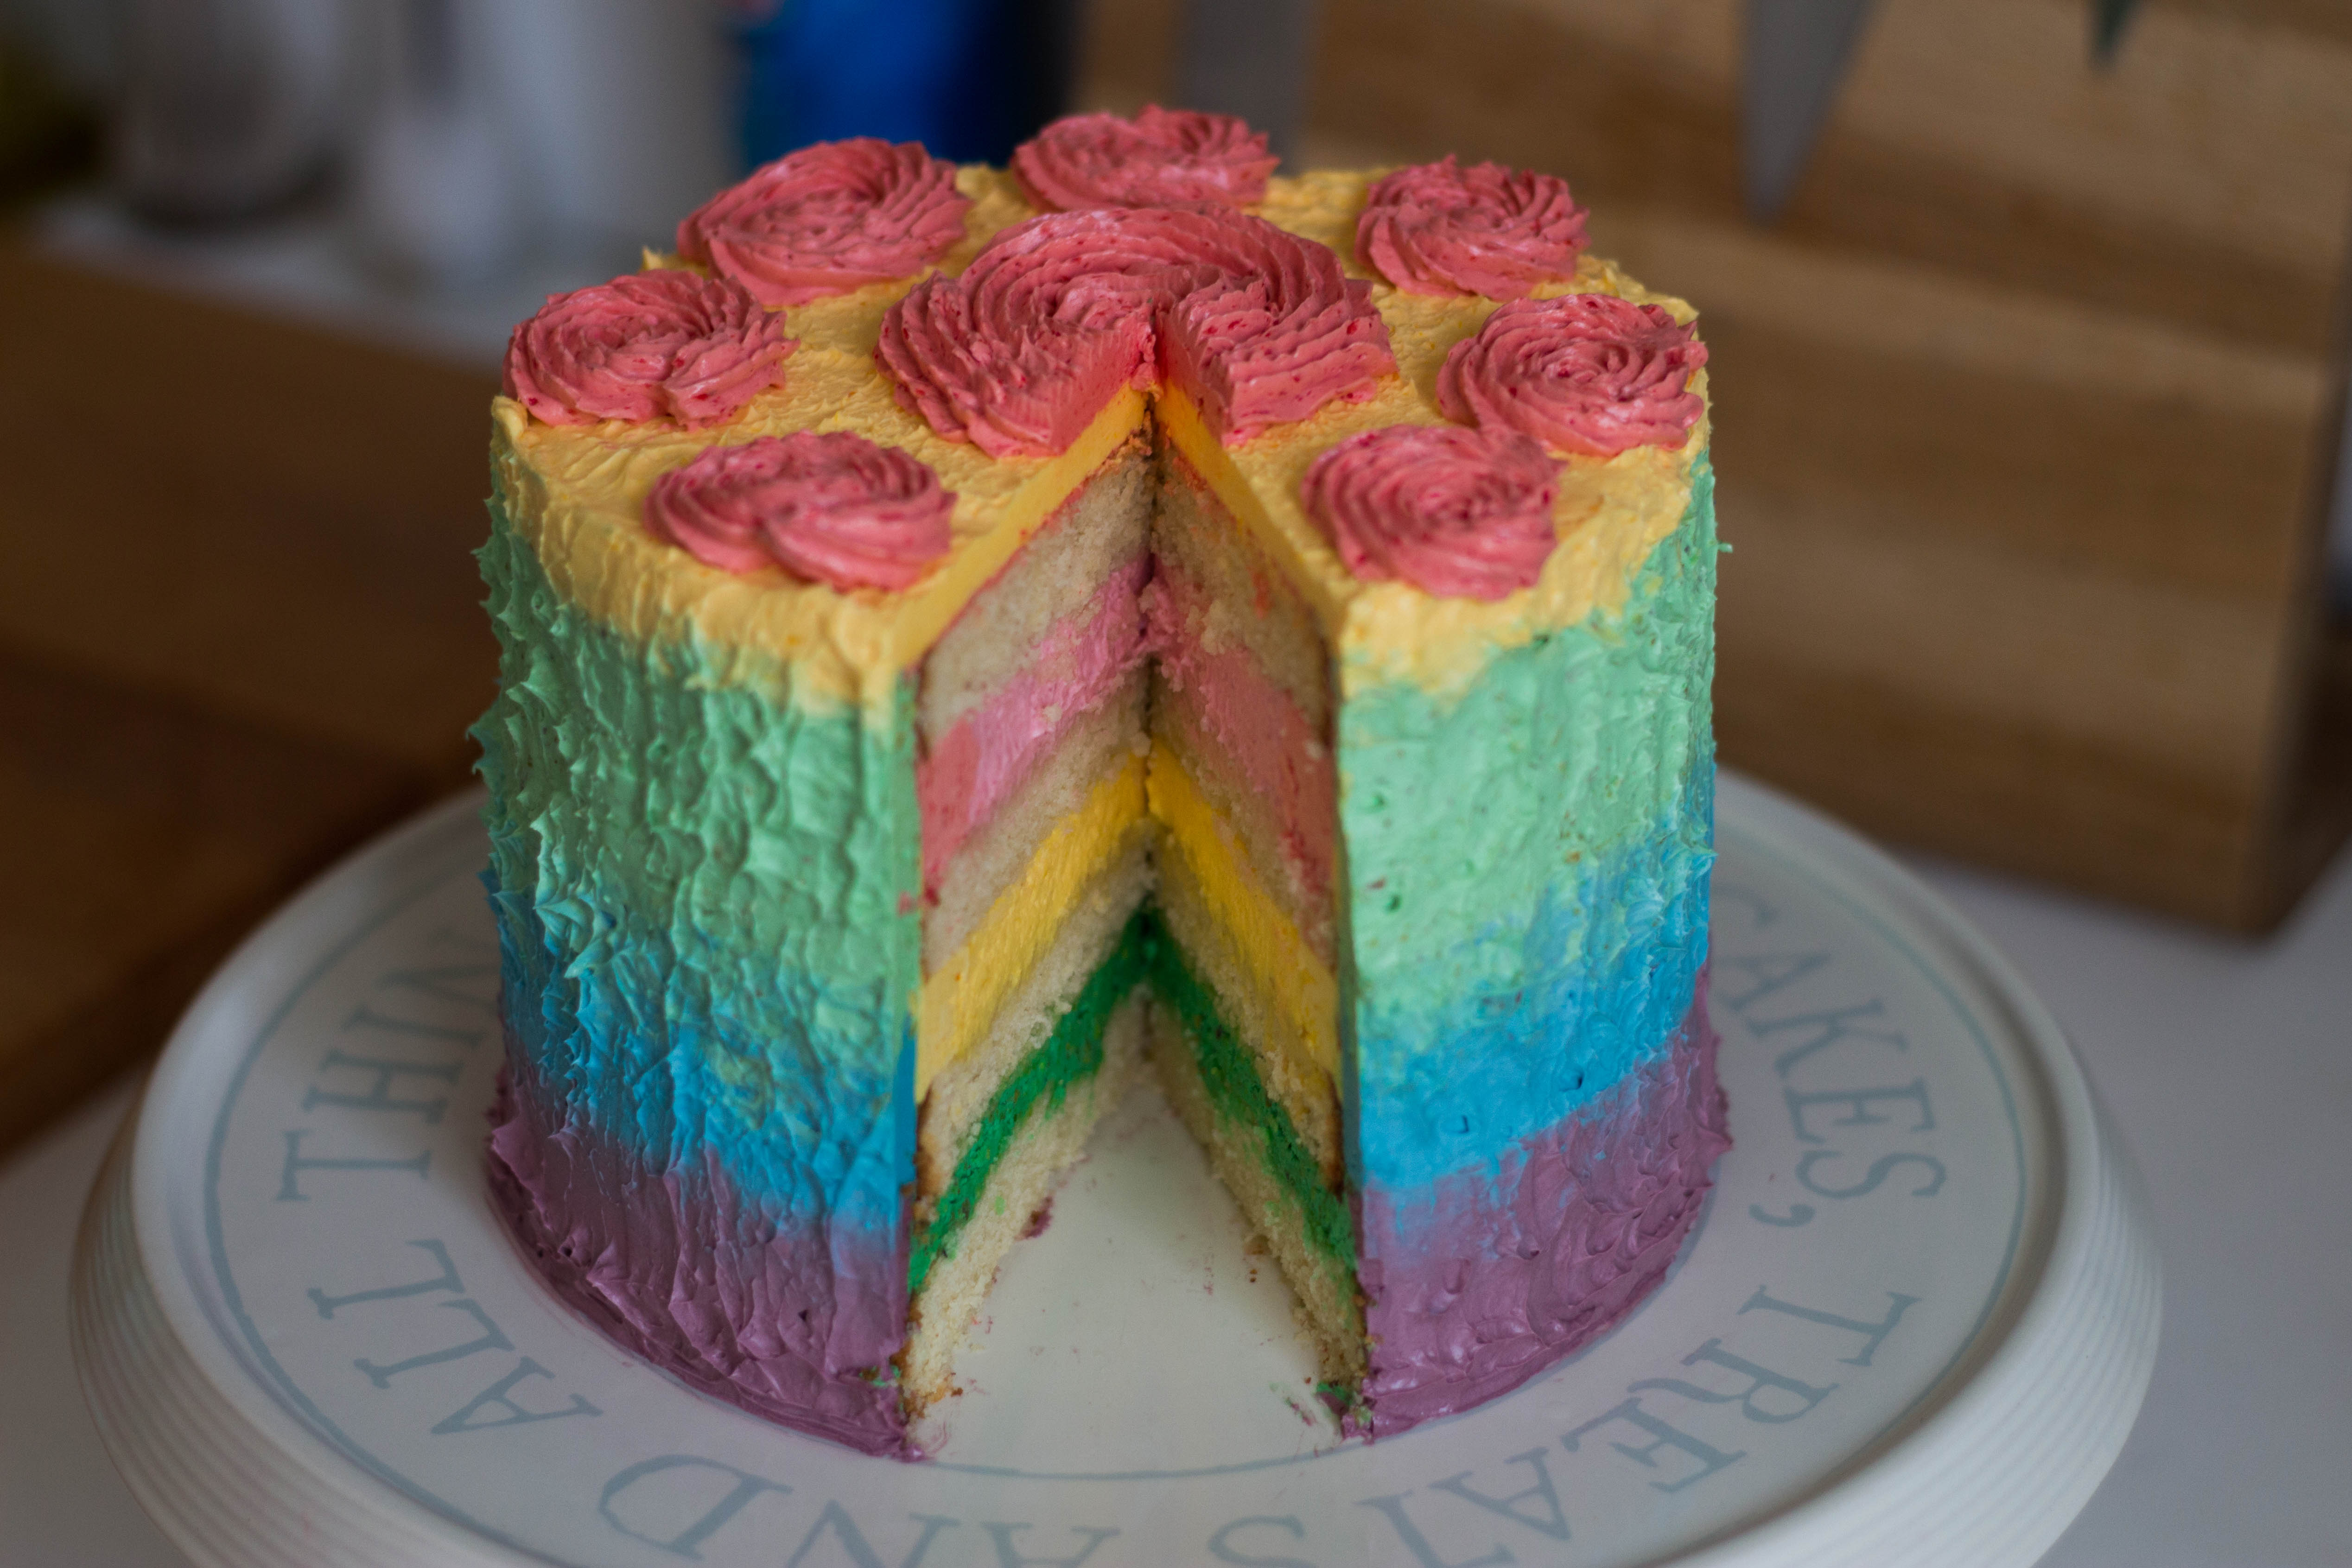
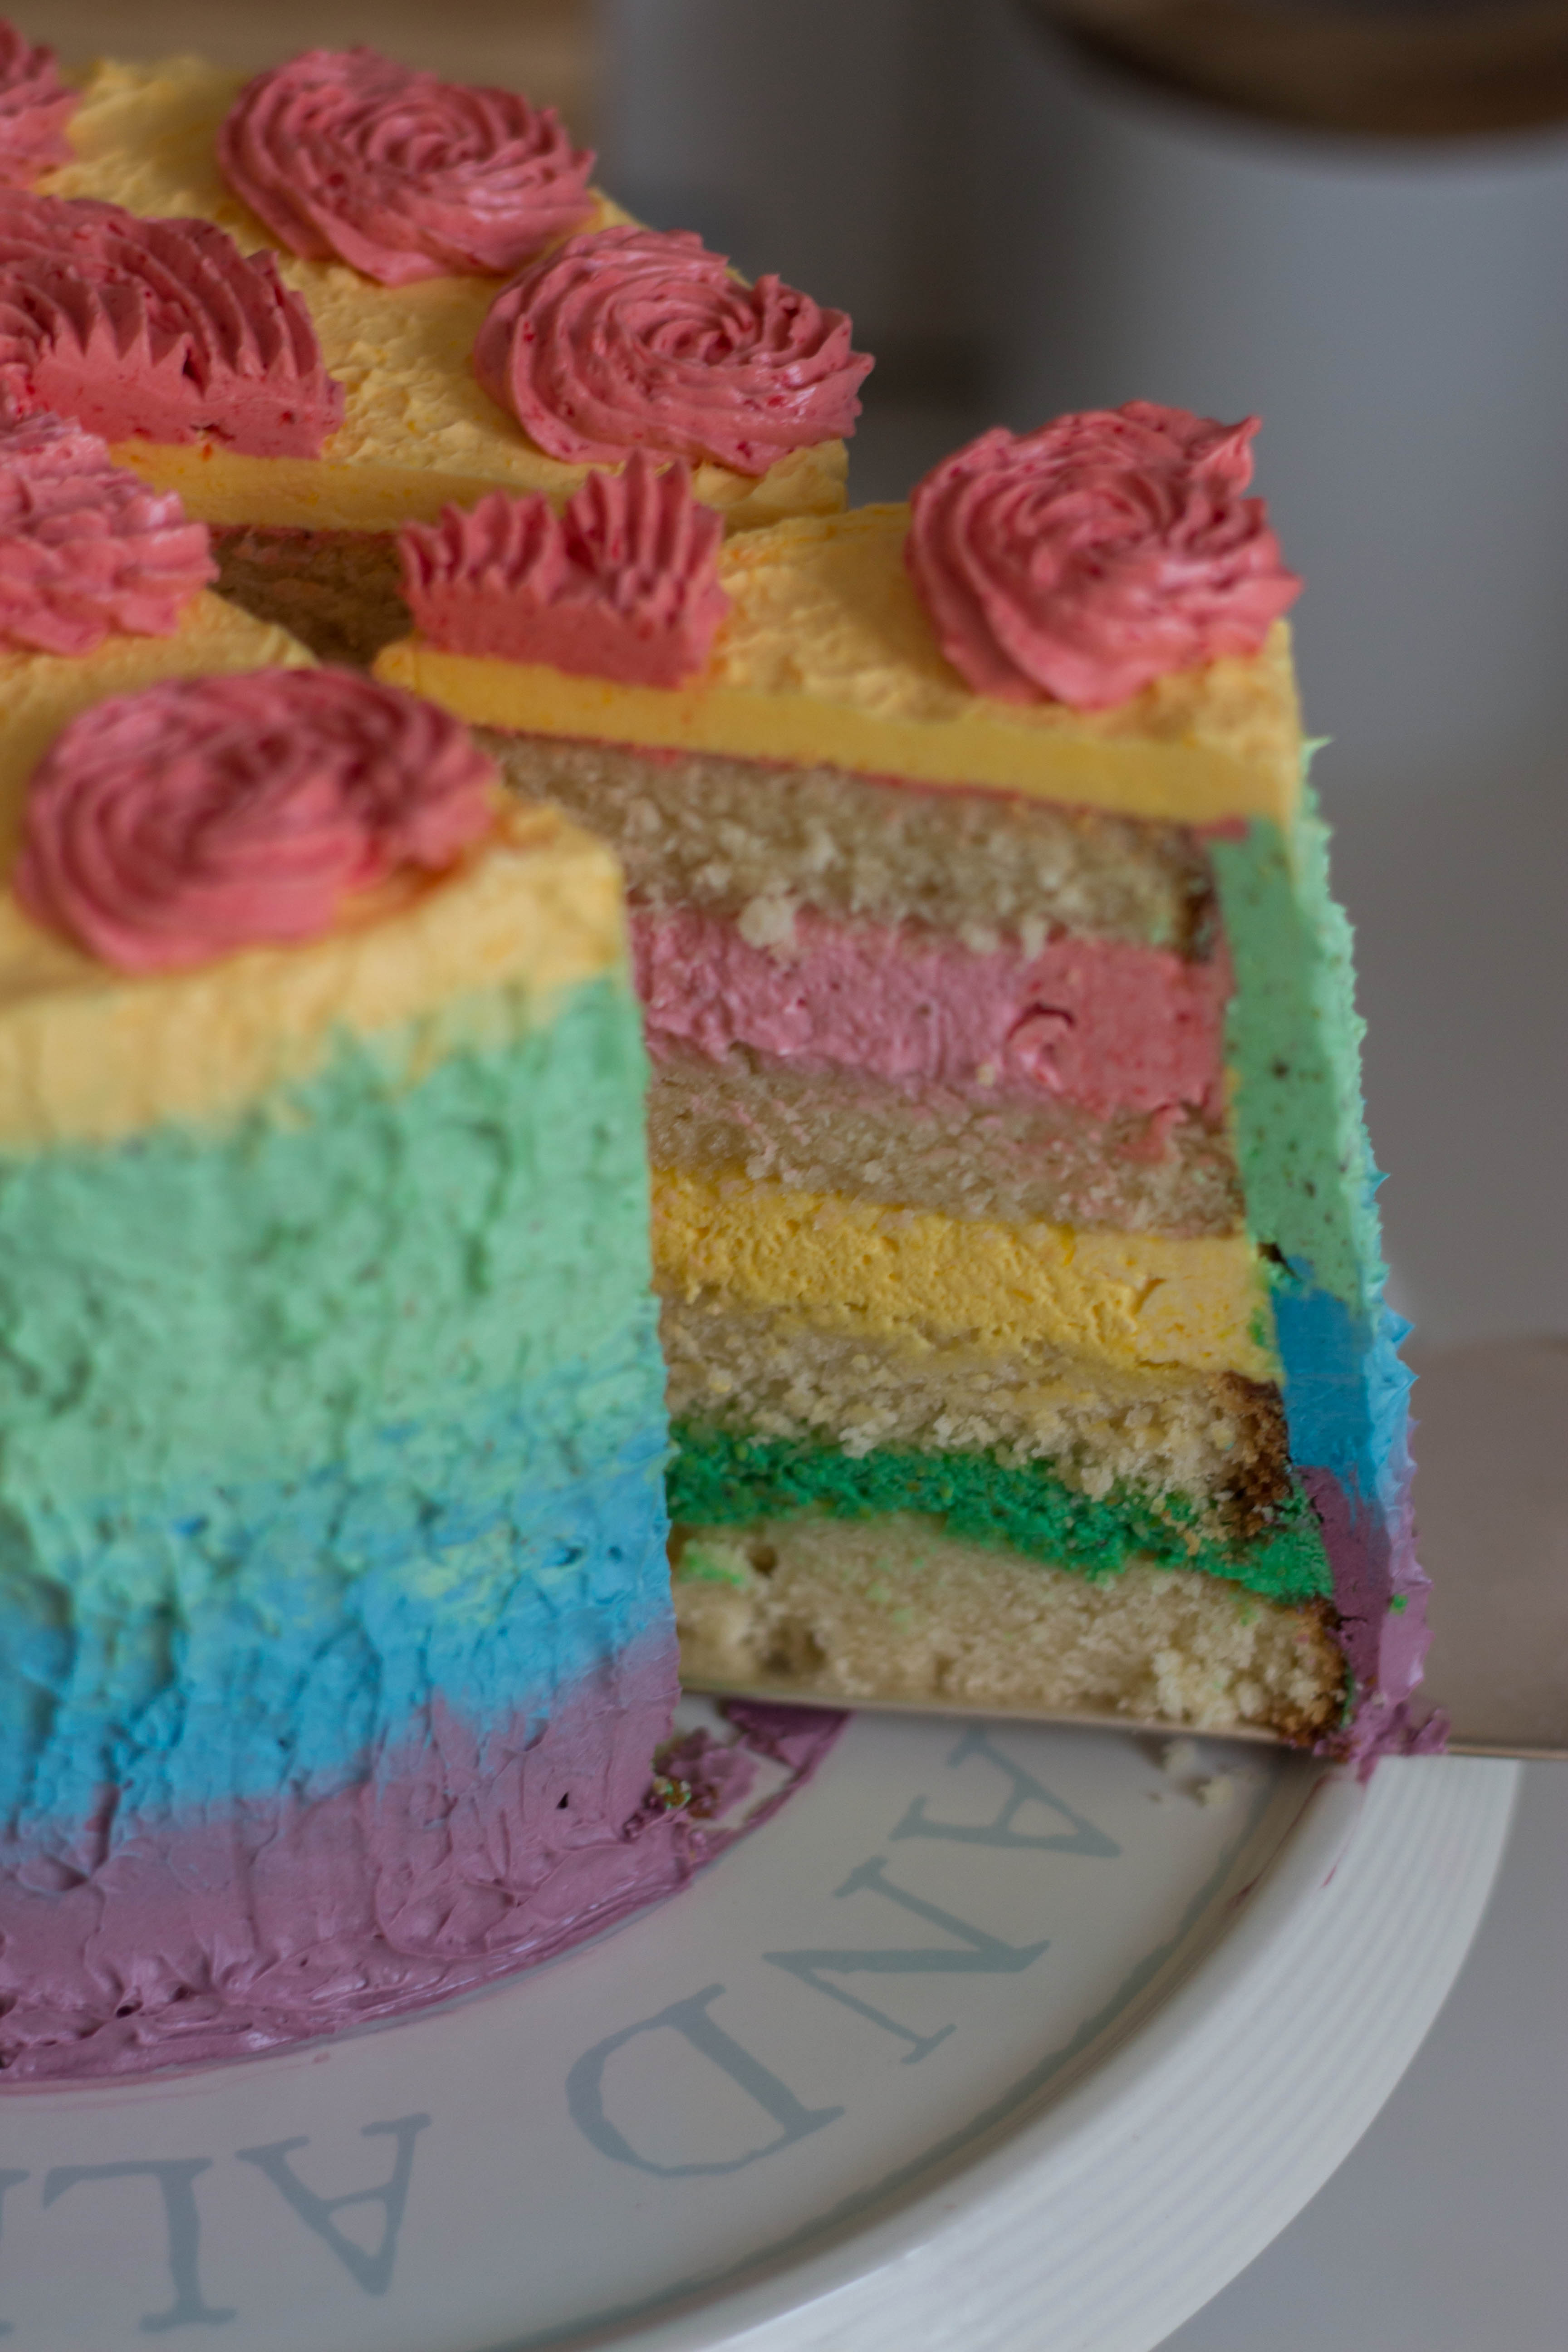
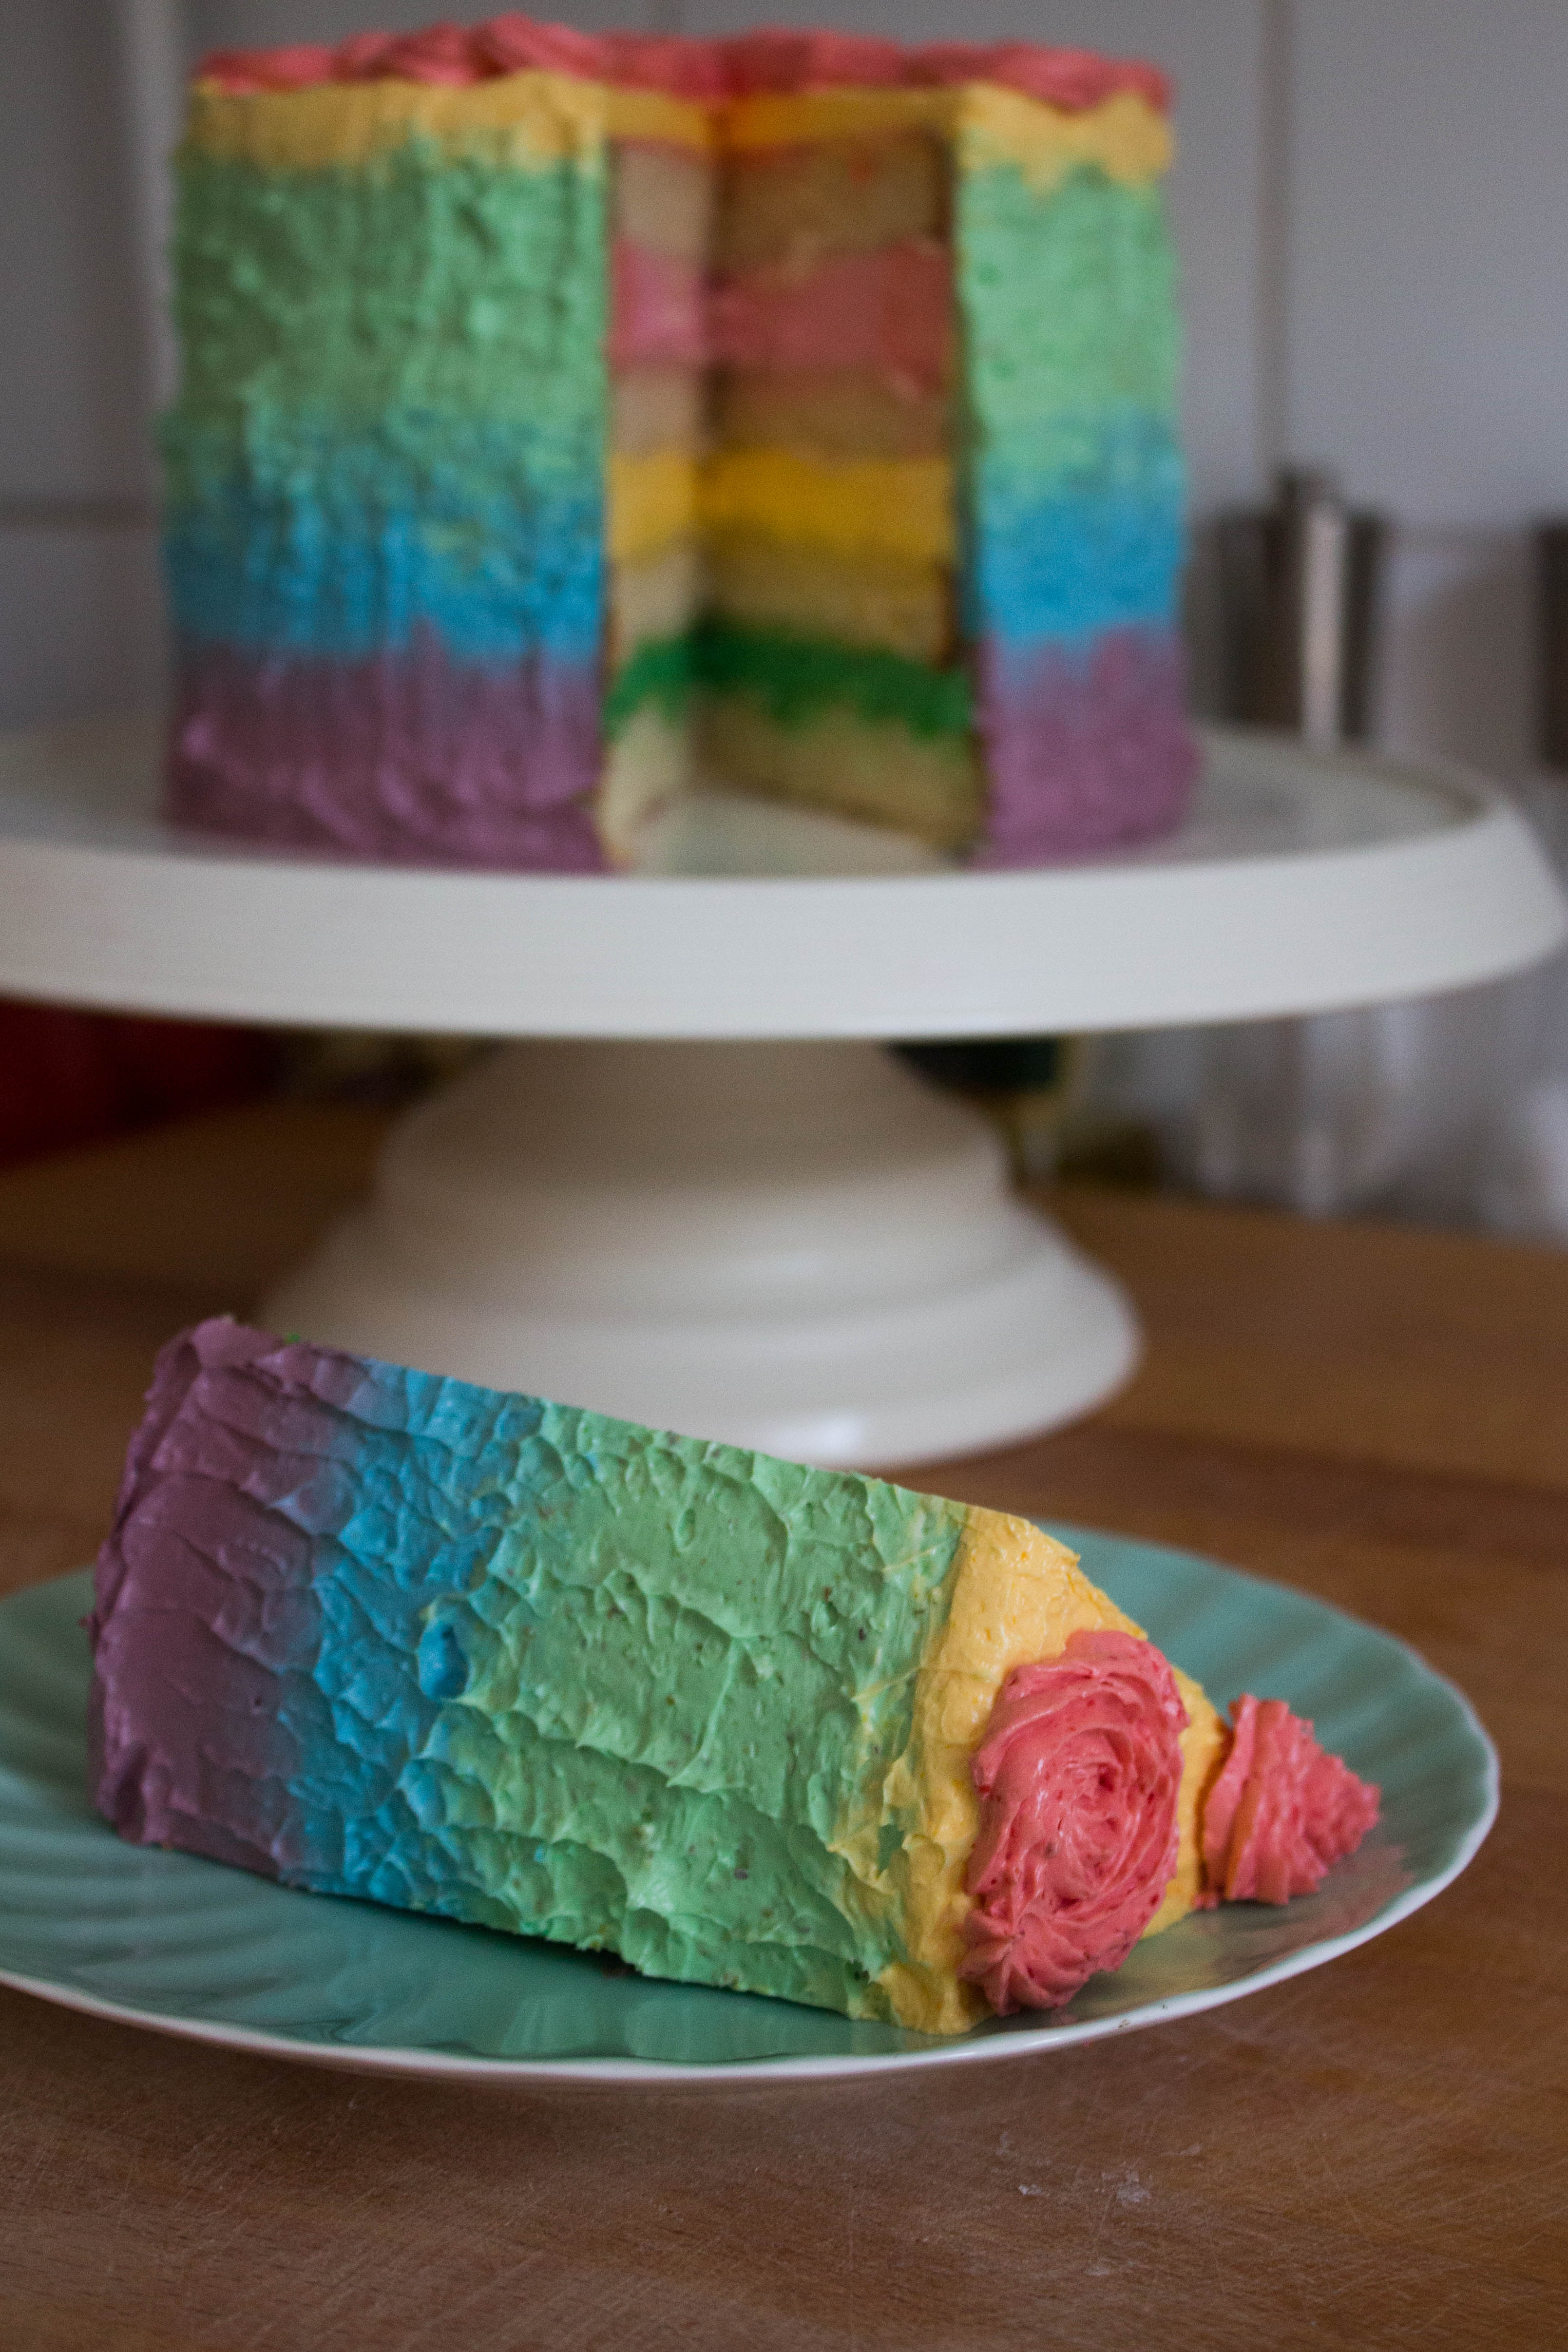
Vanilla, pistachio, strawberry, mango, blue heaven… quite a tasty combination!


What is blue heaven, you ask? Well, I’m glad you did, although the answer is not nearly as exciting as the name suggests…
Blue heaven is a classic Australian milkshake, or spider, flavour. It’s blue, and is a flavour in itself, but technically (although unofficially) it is actually vanilla raspberry.
So what’s a spider? Only the best kiddie (and I use that term lightly) drink ever! The explanation definitely deserves pictures, so until next time…
And in the meantime…


Rainbow Flavoured Layer Cake
White Cake Recipe
Yield: 4 layer 8 inch cake
Ingredients
2 medium eggs
4 large egg whites
2 Tbsp extra thick cream
270ml whole milk
2 tsp vanilla extract
440g (3 cups) plain flour
430g (2 cups) caster sugar
25g (1 1/2 Tbsp) baking powder
4g (1/2 tsp) salt
180g cold butter, cut into cubes
Method
Preheat oven to 180°C/350° F/Gas Mark 4.
Combine eggs, egg whites, cream, vanilla and 3/4 cup of milk, then set aside.

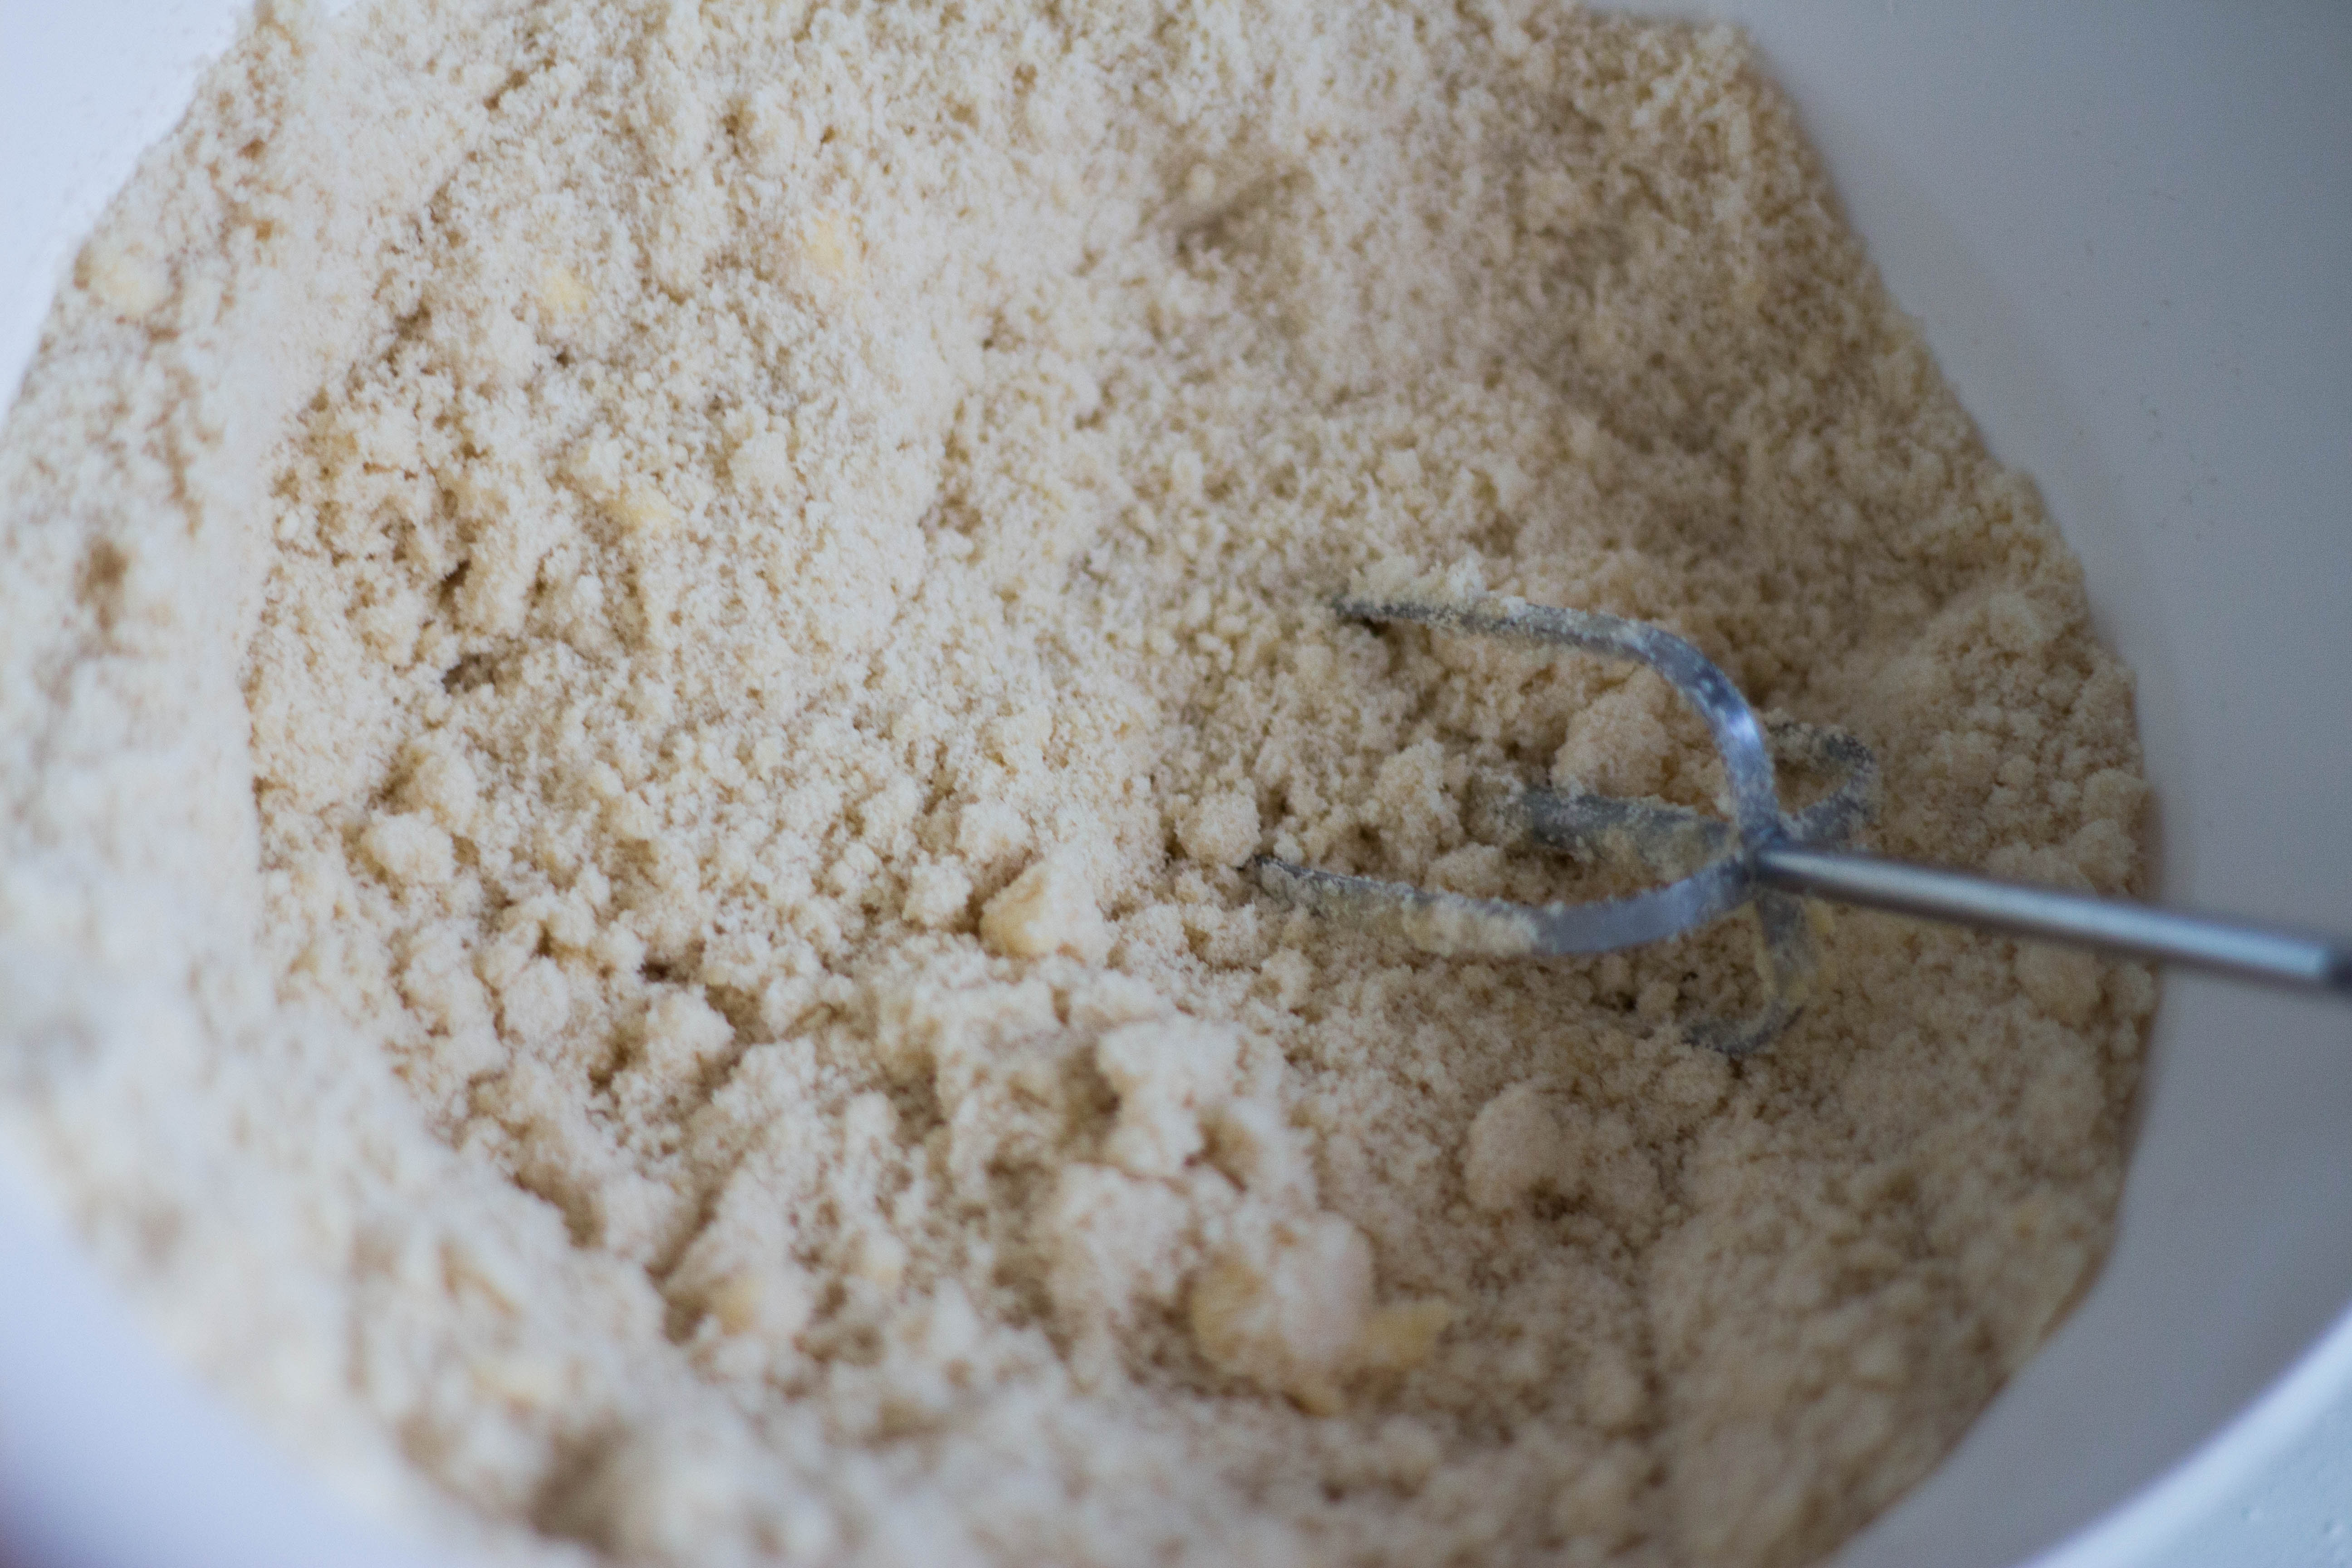
Stir together all dry ingredients – flour, sugar, baking powder and salt – then gradually beat in the cubes of butter until you are left with a fine crumb.

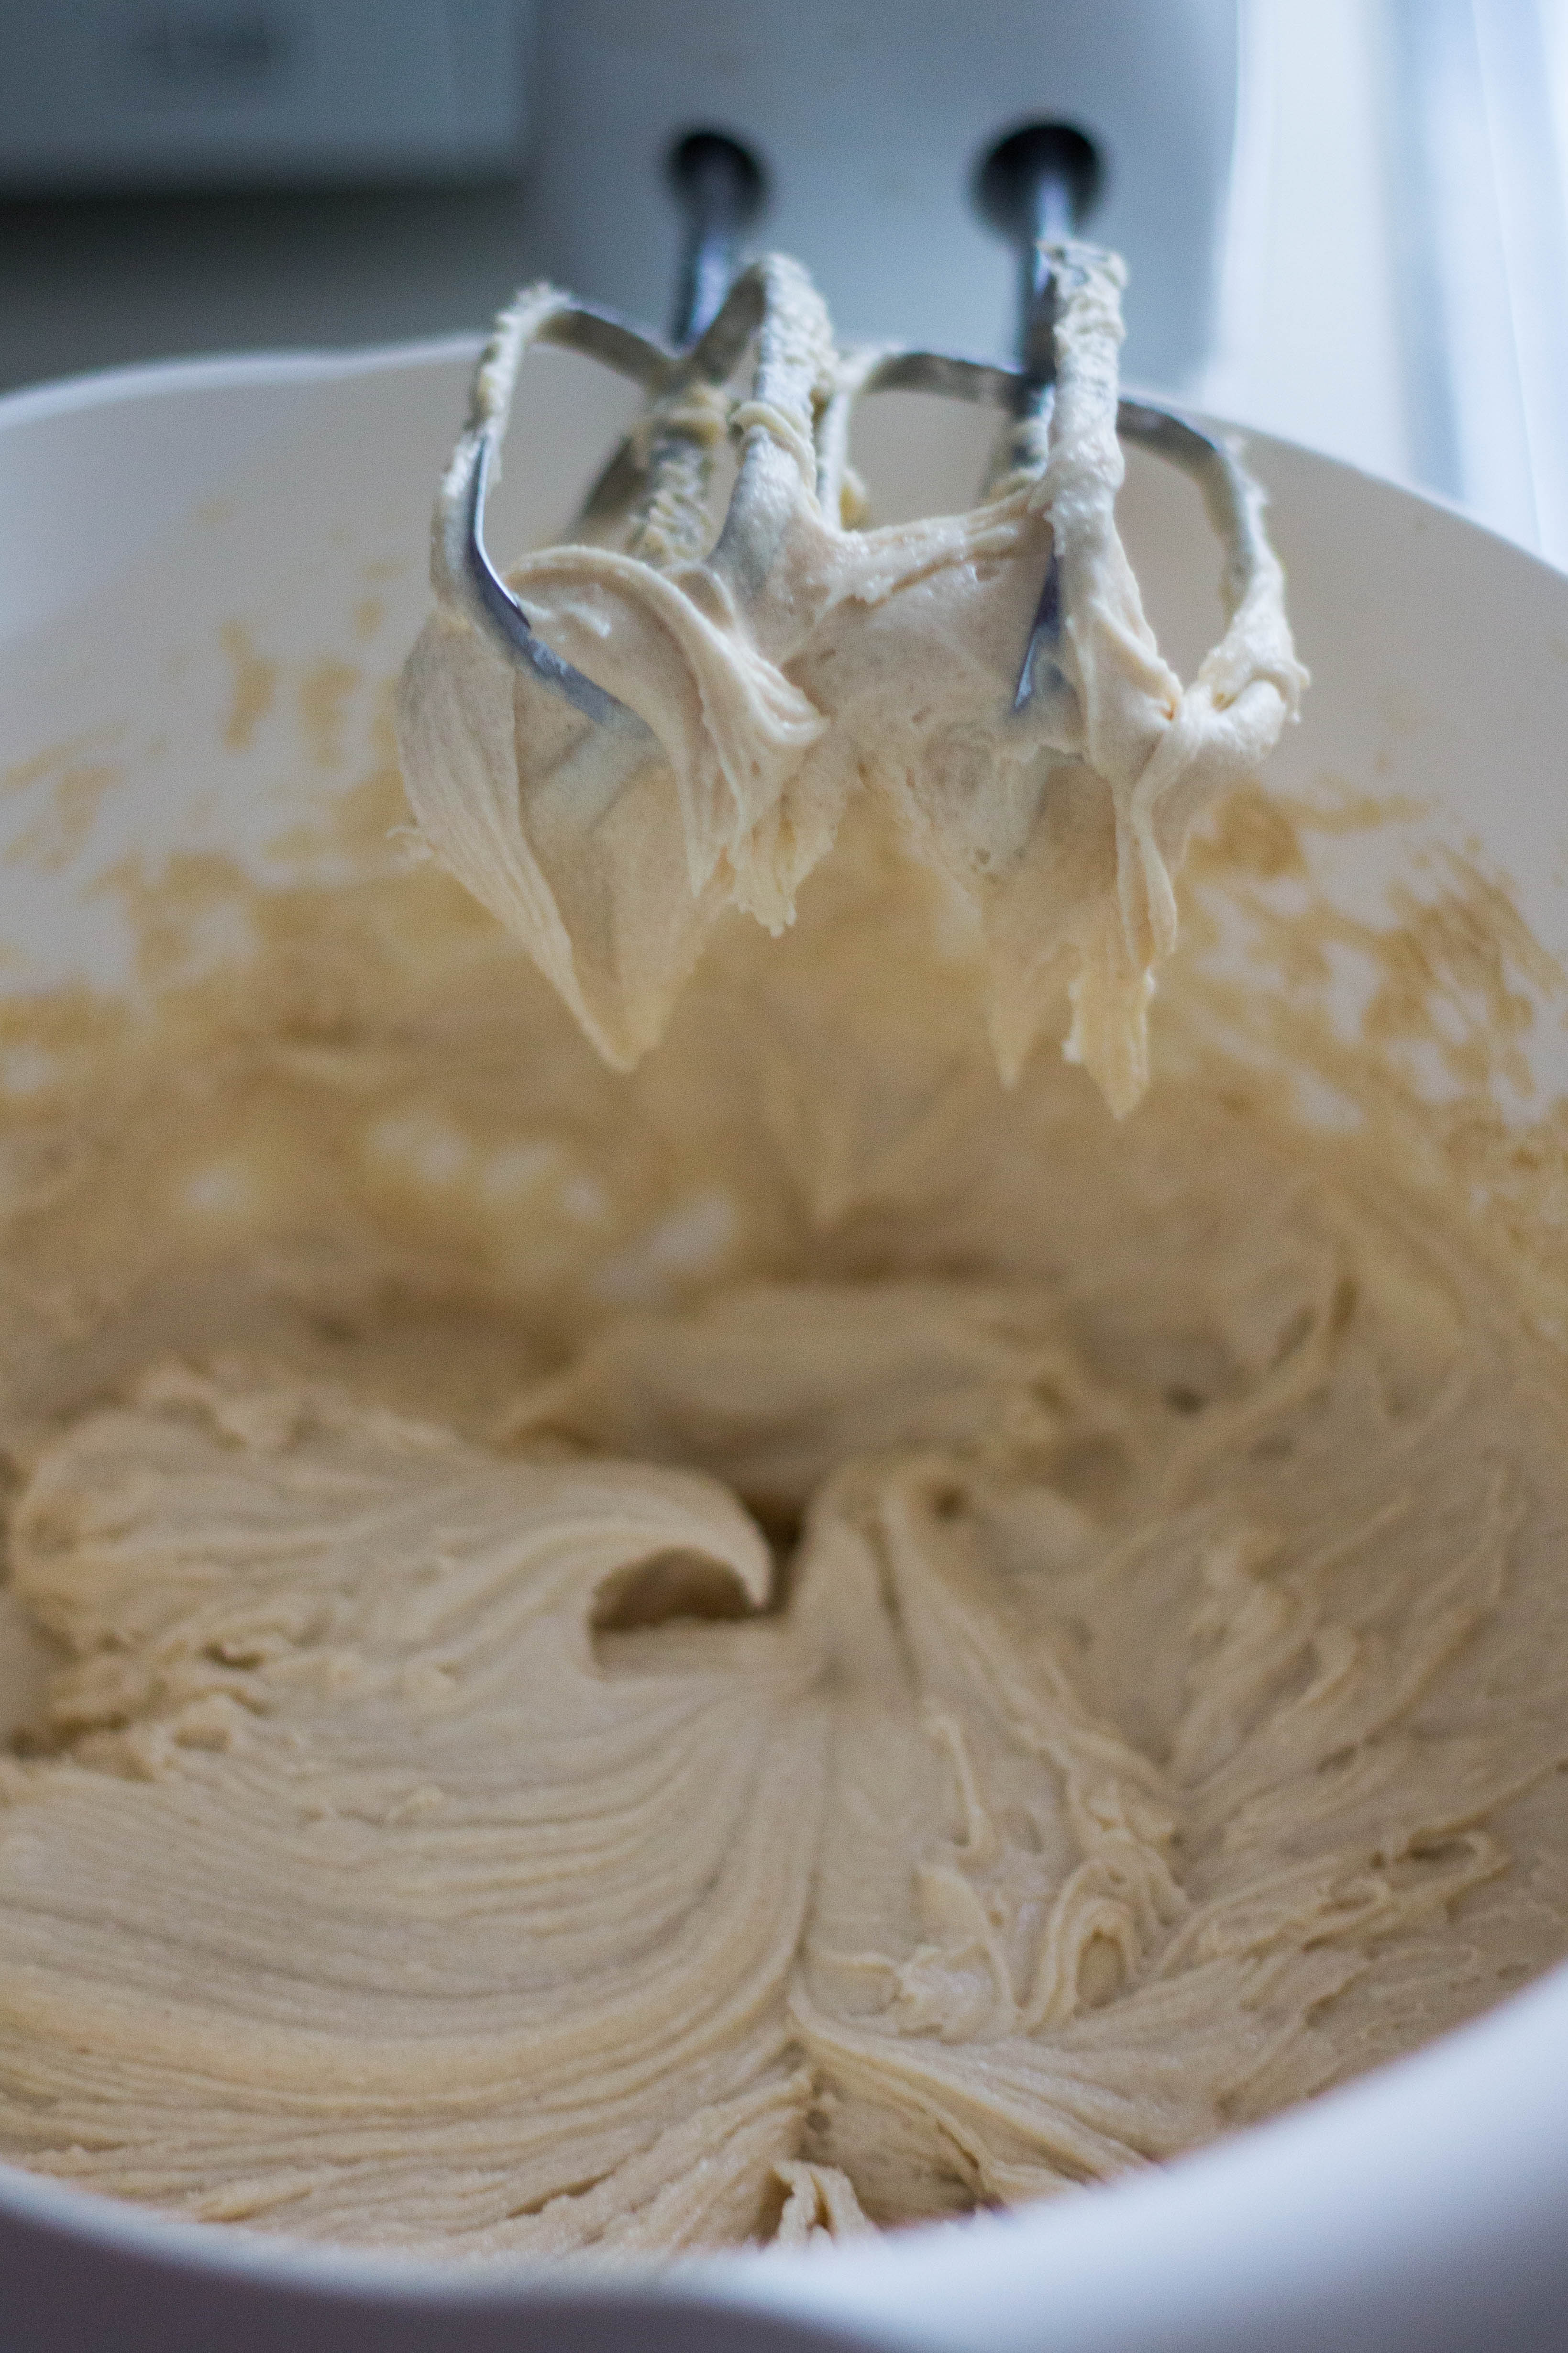
Add the remaining milk and beat until fully incorporated, then, in three separate batches, pour in the egg mixture and beat for a further five minutes until your mixture is light and creamy.

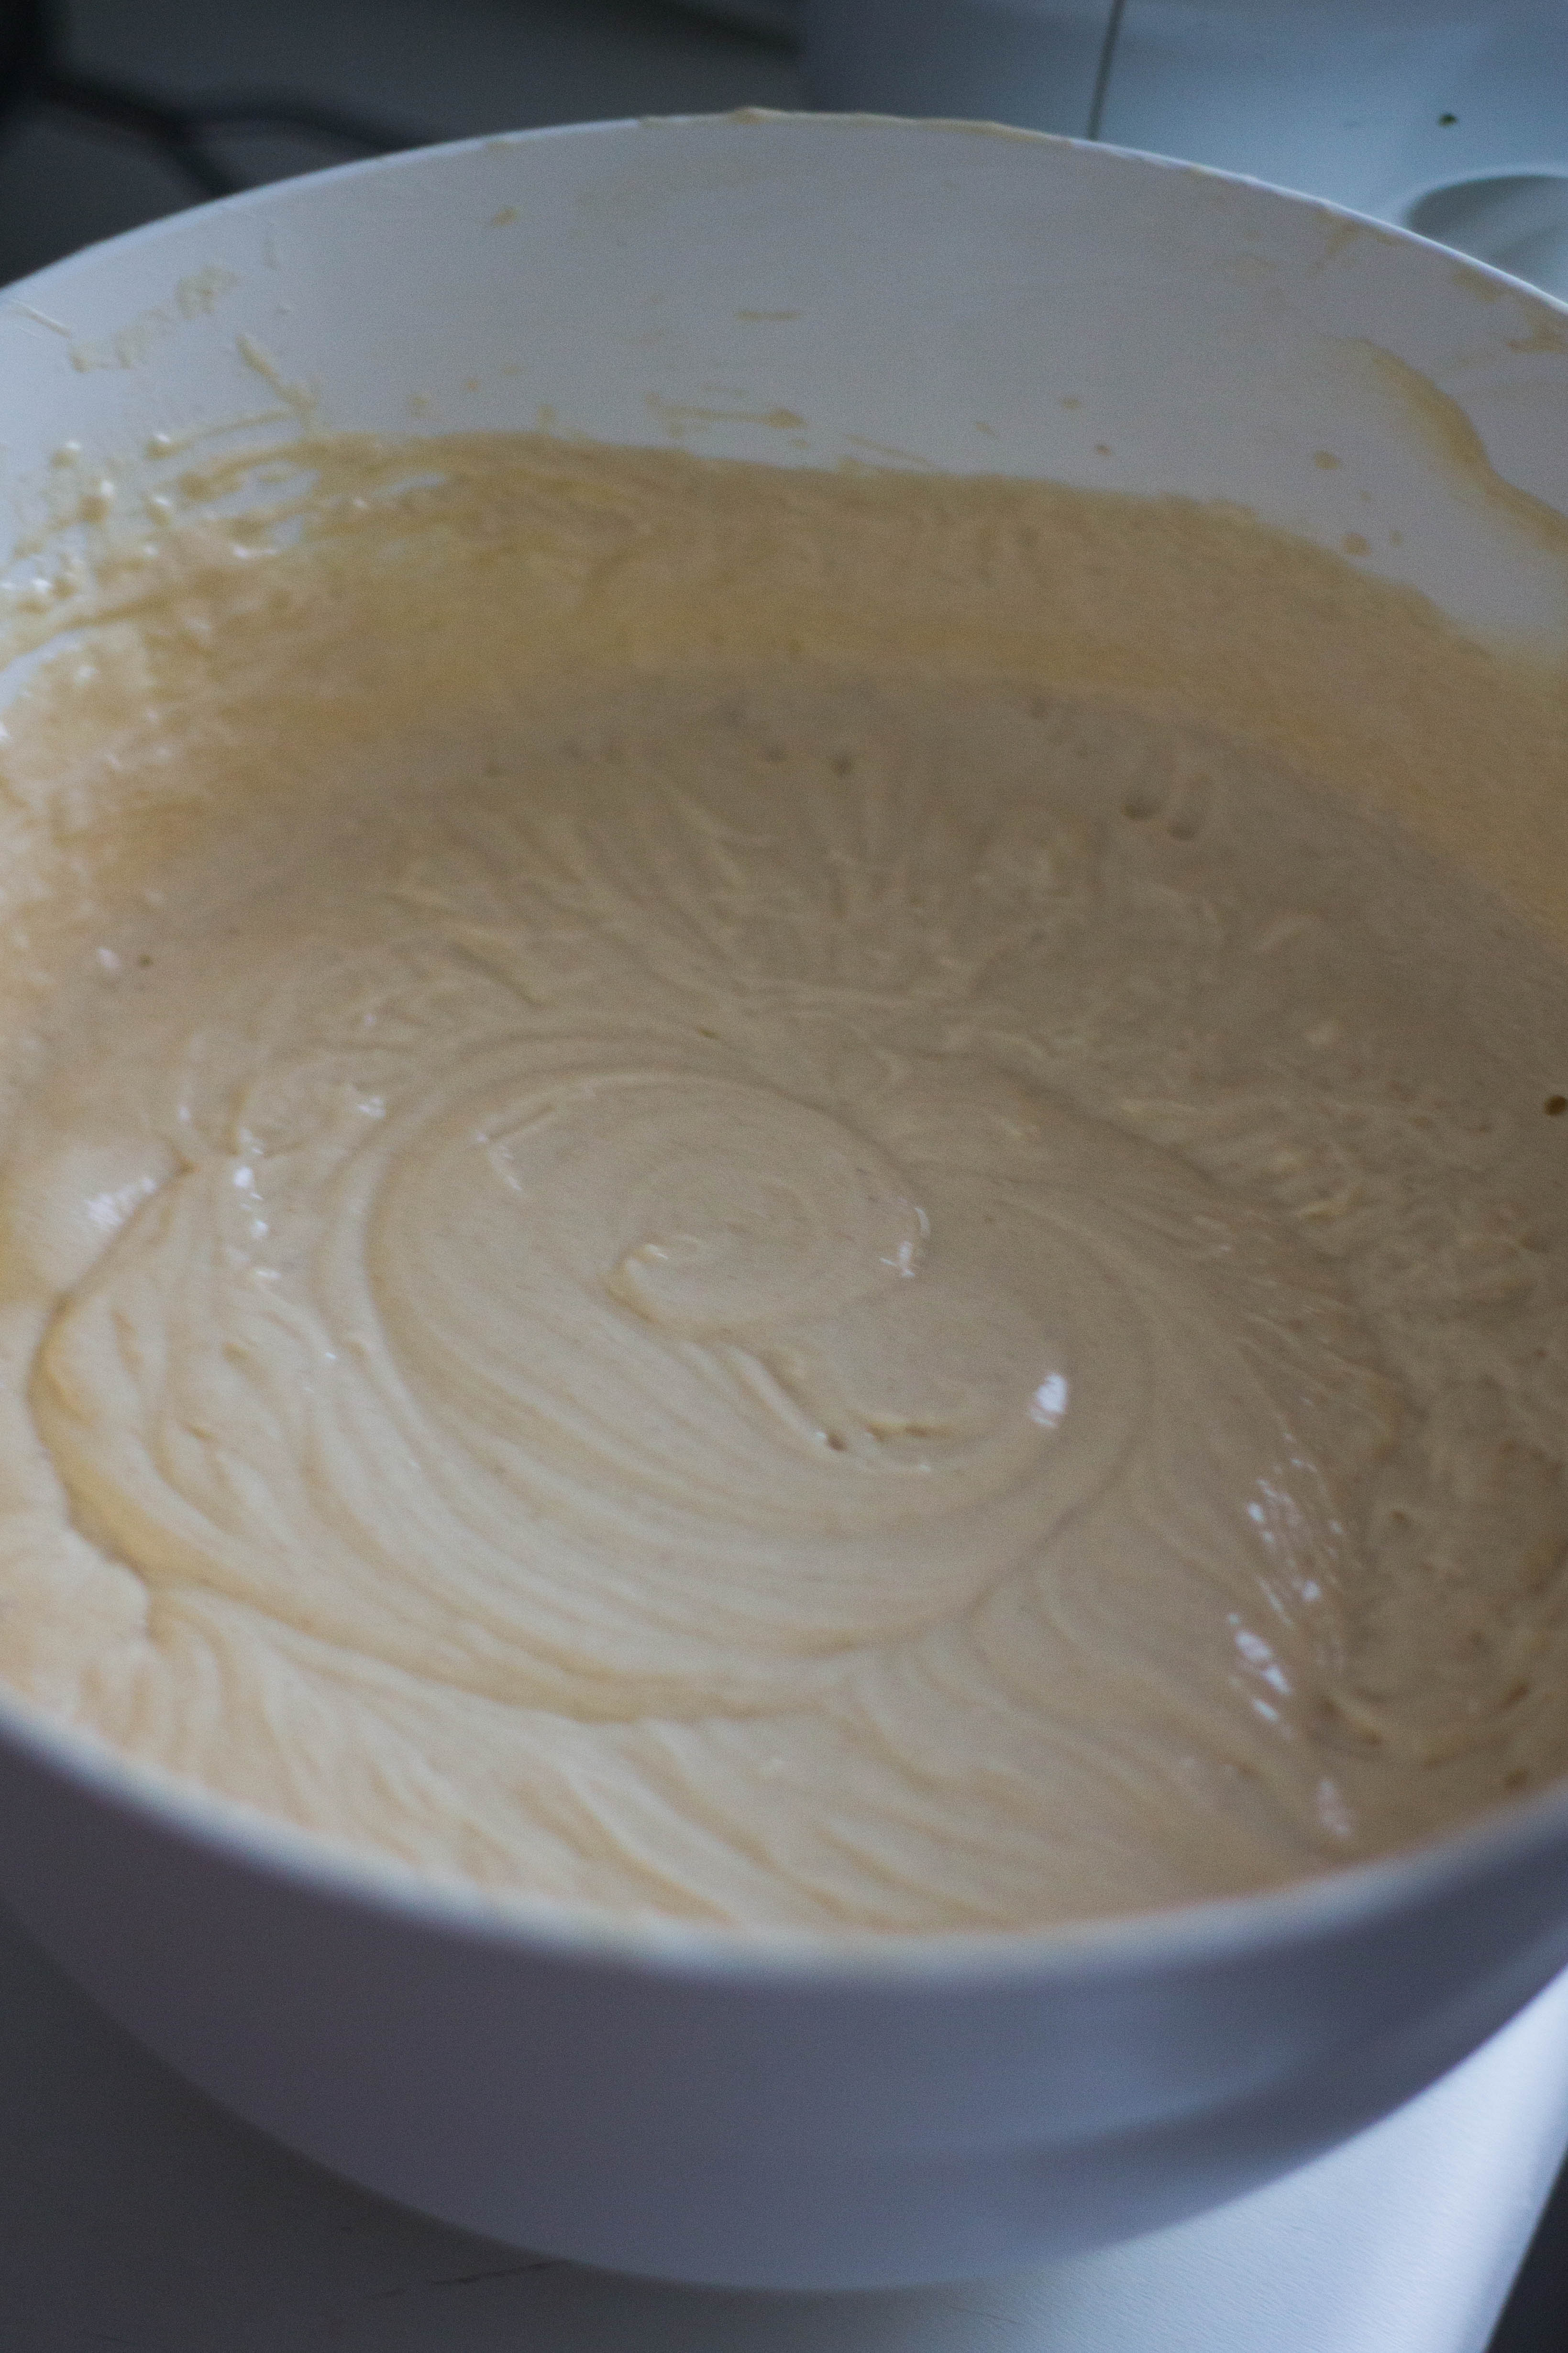
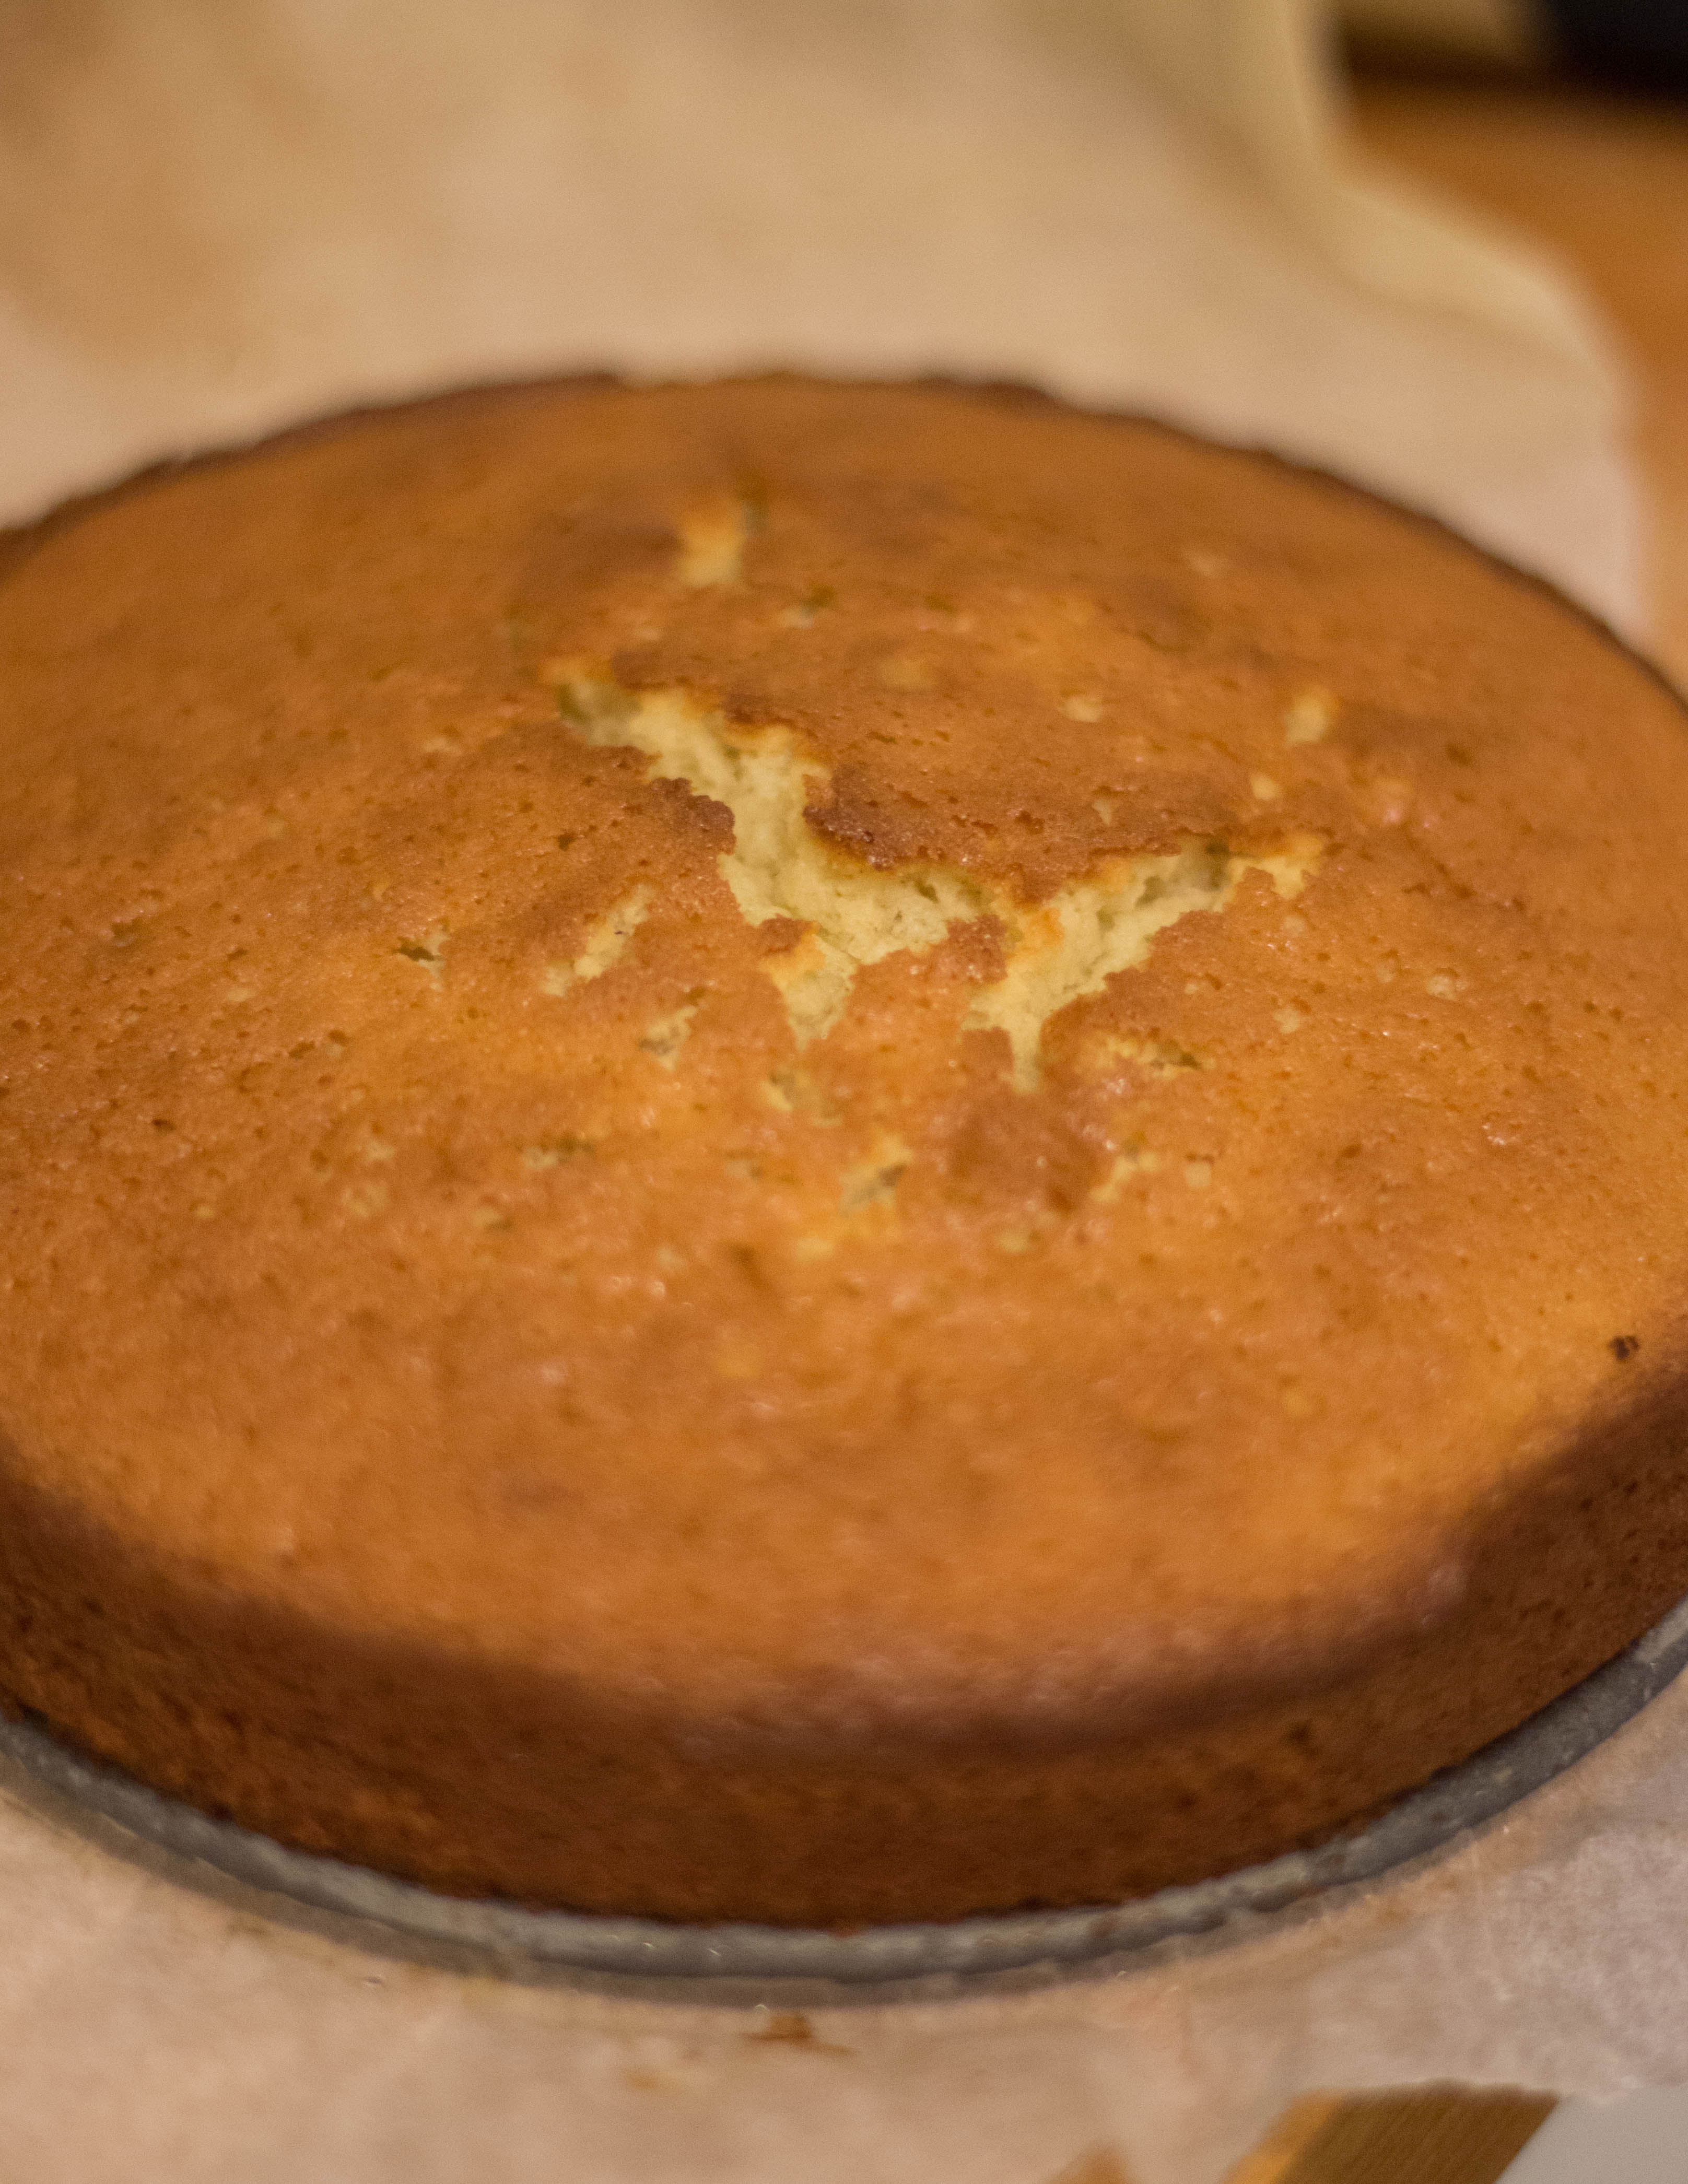
Separate the cake batter into four even quantities to make your layers, then bake each layer in your preheated over for 30 minutes.
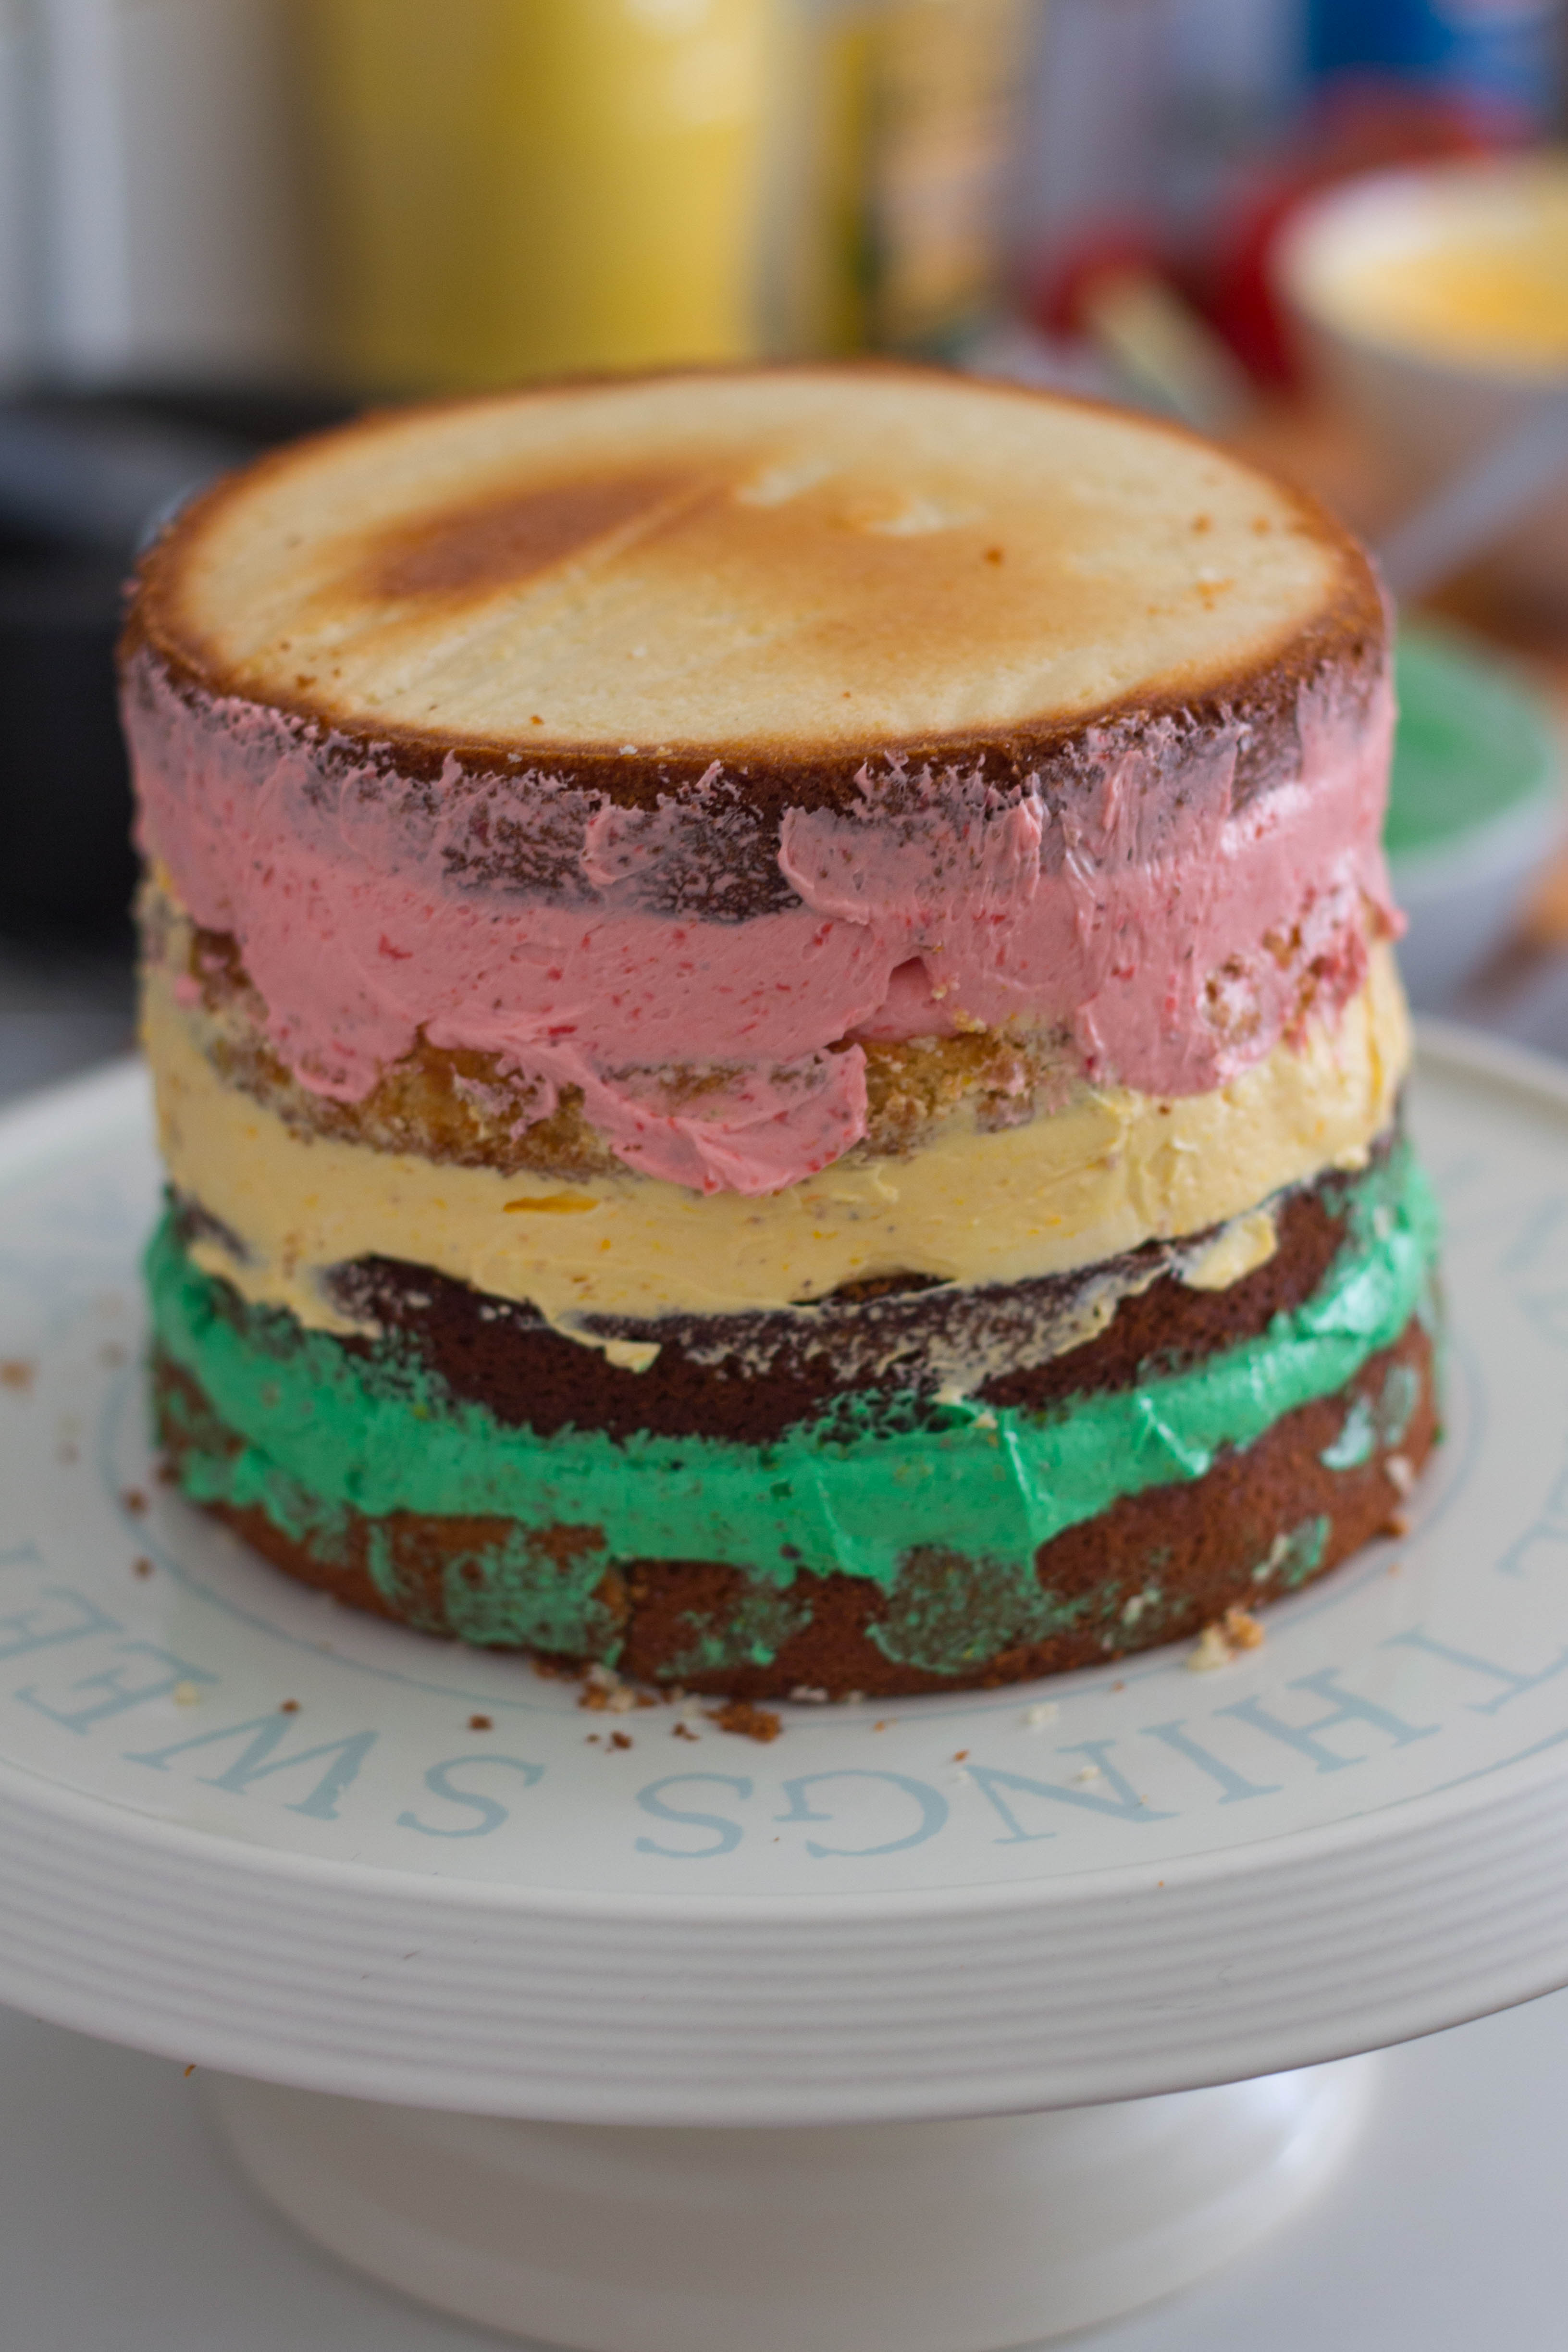
Mango, Pistachio and Strawberry Creamy Cream Cheese Fillings
Ingredients
300ml double cream
300g cream cheese
135g (3/4 cup) icing sugar
70g ground pistachio
200g strawberry puree
200g mango puree
Method
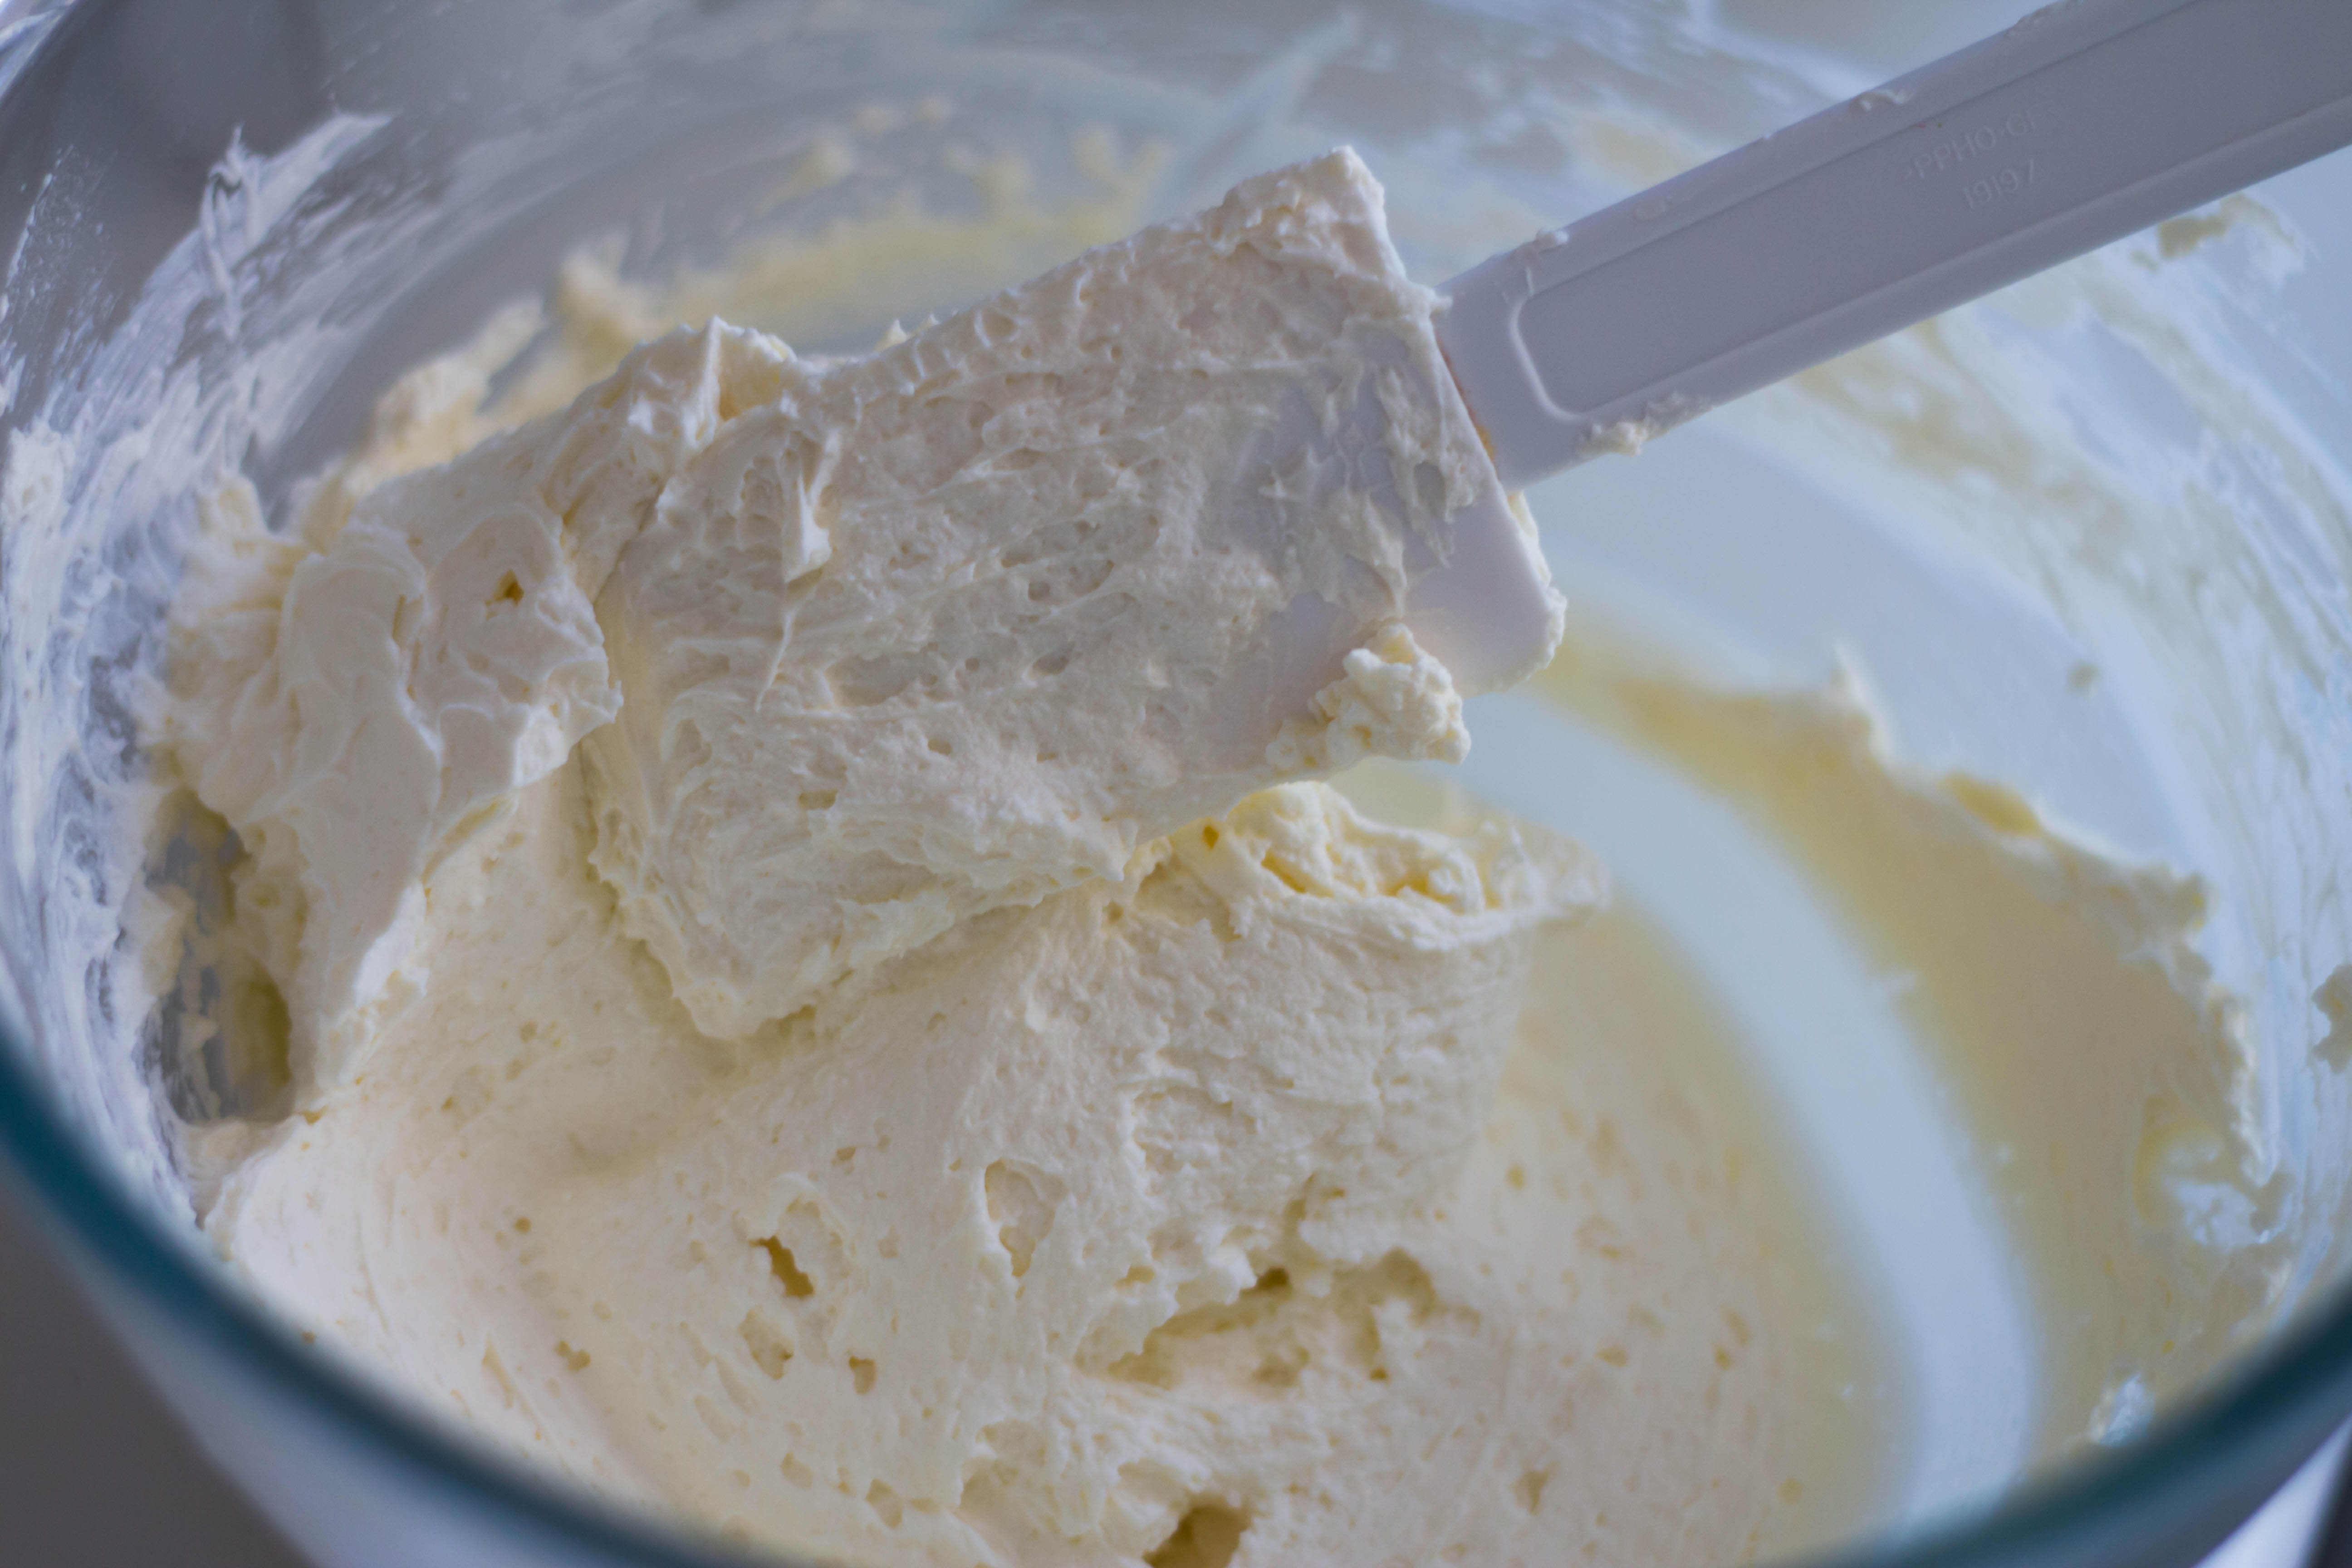
Beat the cream until it begins to thicken, then add in 1/2 cup icing sugar. Continue to beat until cream is thick, and soft peaks have formed.
Beat the cream cheese until smooth, then add in 1/4 cup of icing sugar and beat until combined.
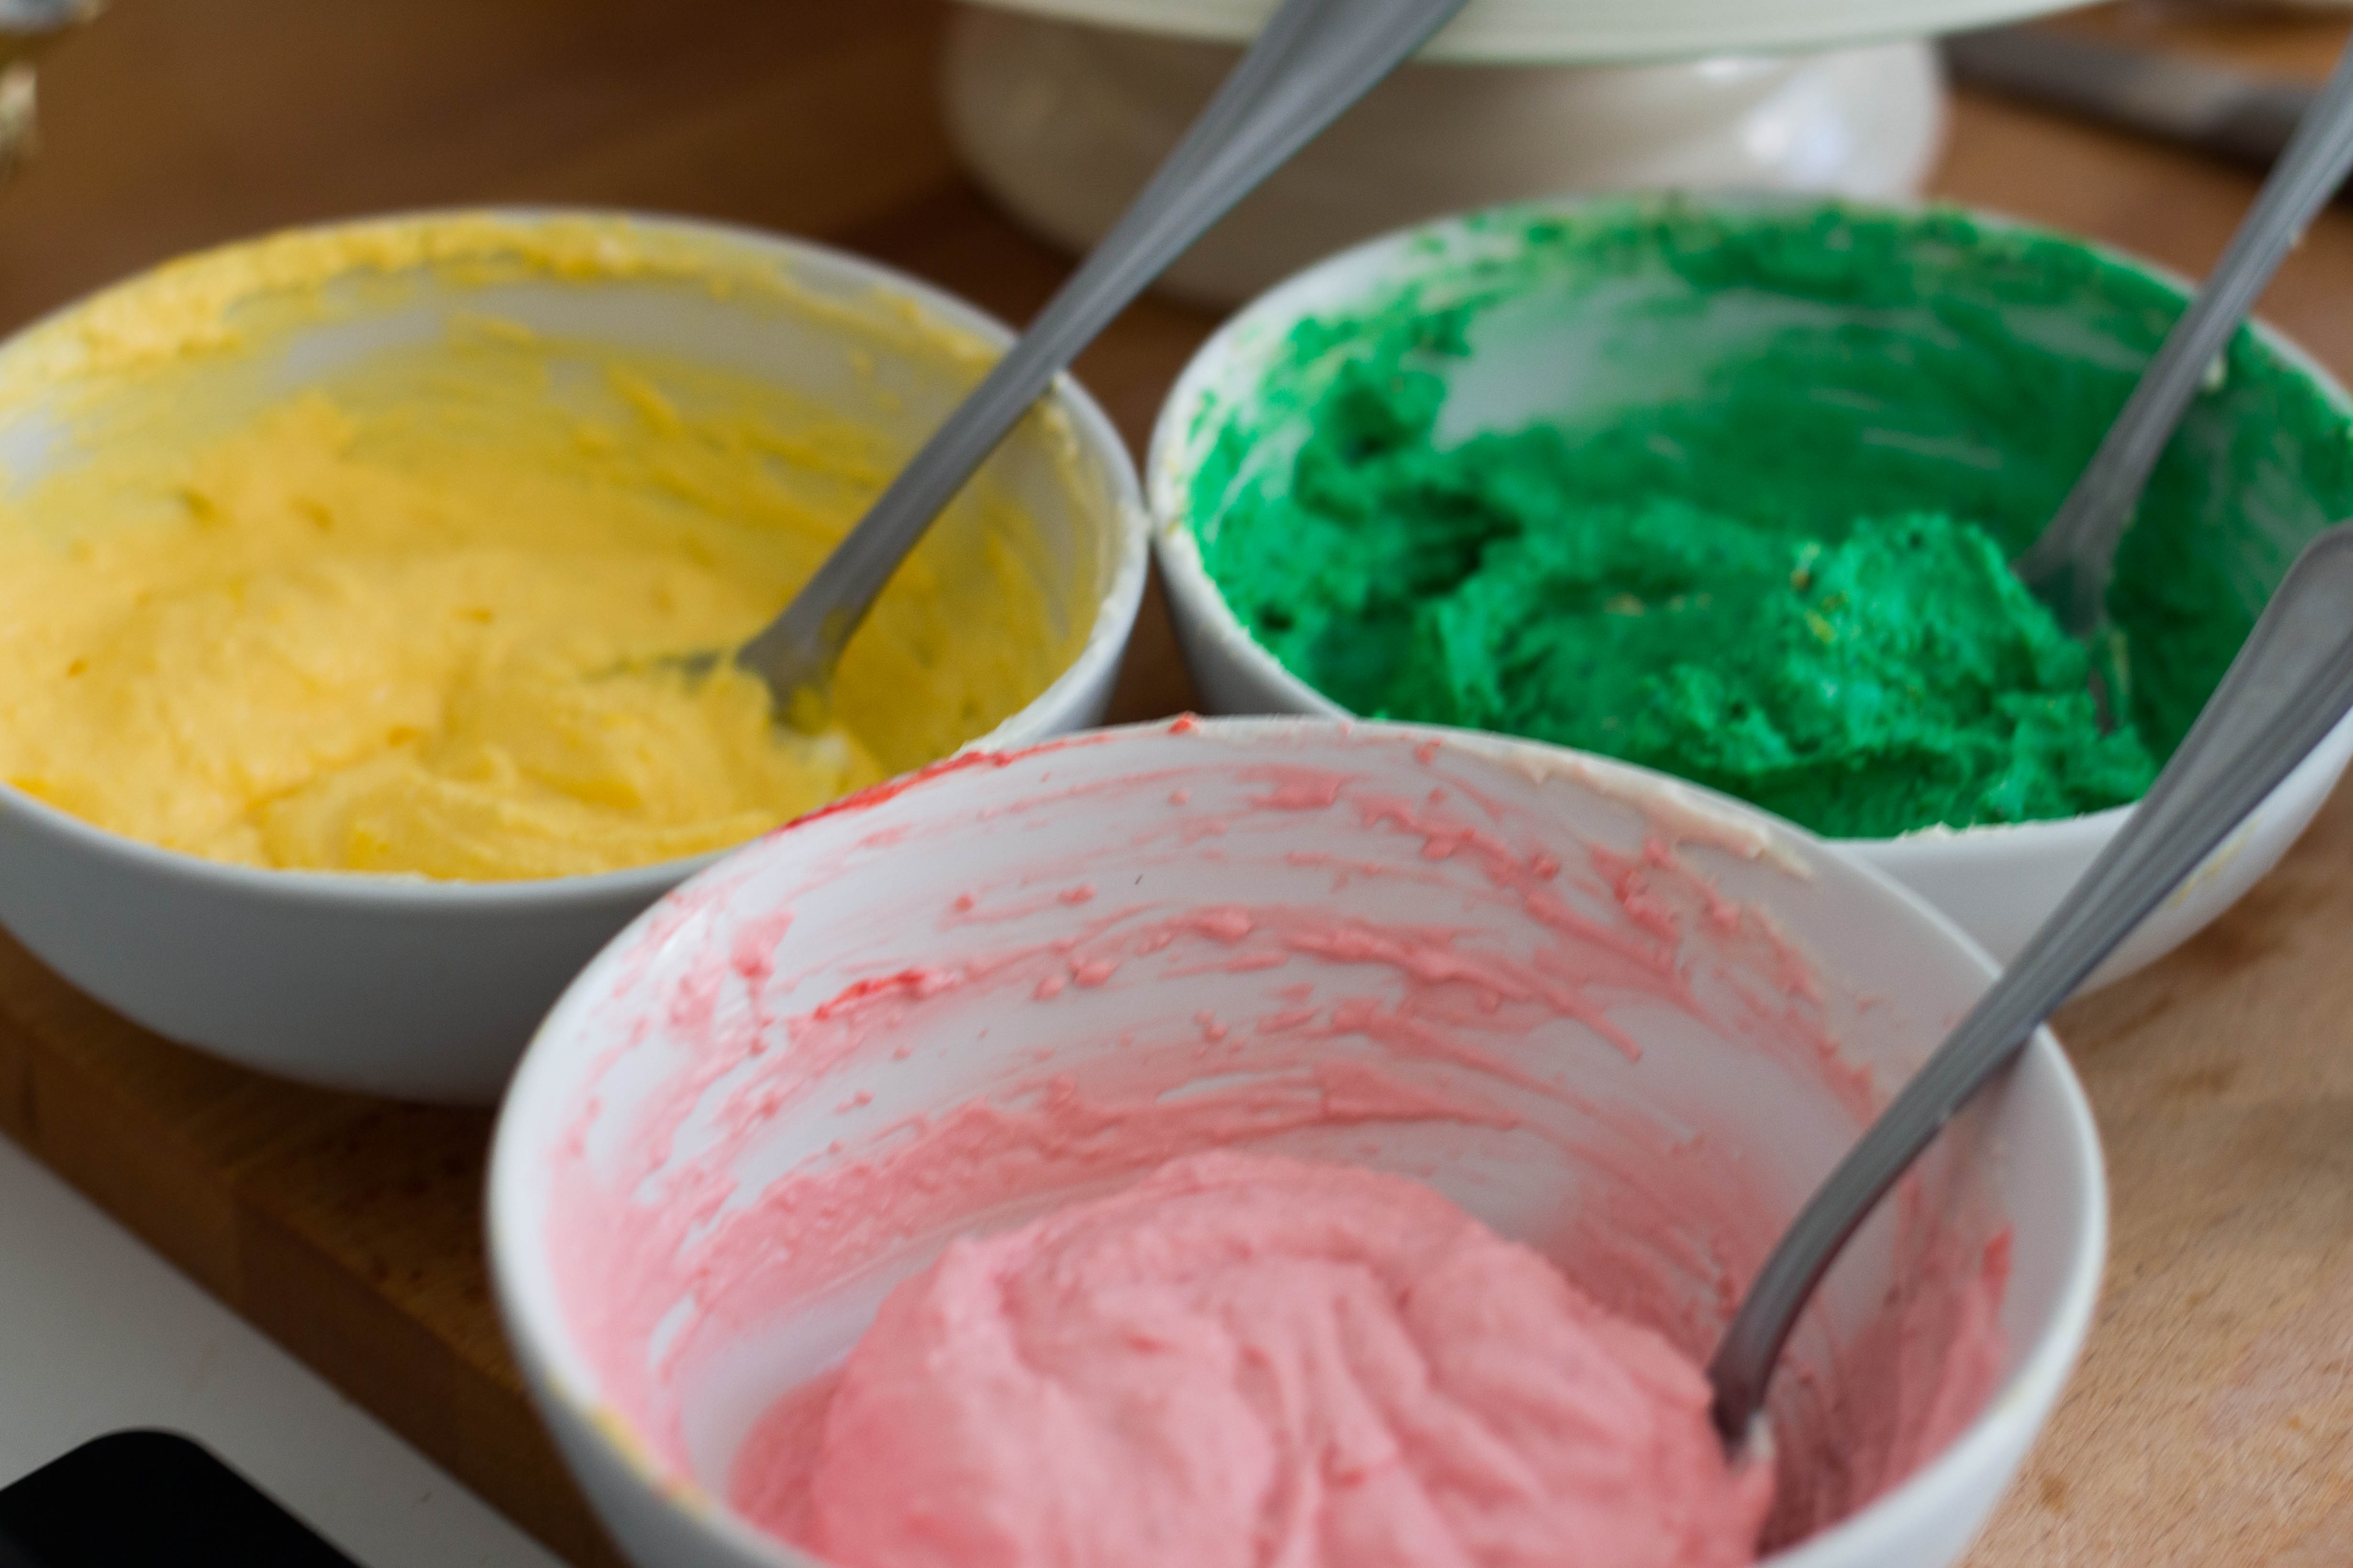
Fold the two mixtures together, then separate into three separate bowls.
Fold the mango puree into one bowl, the strawberry puree into the next, and the ground pistachios into the final bowl.
Tip: Add a few drops of food dye to give the fillings their vibrant colours.
Italian Meringue Buttercream
Ingredients
425g butter, room temperature and chopped into cubes
4 large egg whites
220g (1 cup) sugar
80ml water
Flavourings
1 tsp vanilla extract
1 tsp vanilla extract + 1/2 tsp raspberry essence
30g ground pistachio
50ml mango puree
50ml strawberry puree
purple, blue, green, yellow and red food dye
Method
Separate your eggs, breaking the egg whites into a very clean, dry stainless steel or glass bowl.
Take 1/2 cup of your sugar and gently heat this in a saucepan with the water. Once the syrup begins to bubble around the edges, start beating your egg whites. When your egg whites start to foam add in the remaining sugar and continue to beat.
Once your syrup is bubbling in the centre, take it off the heat and add it to your egg whites in a slow stream, beating continuously. Keep beating until the egg whites and the bowl have cooled to room temperature, your egg whites should be lovely and thick at this stage.
Keep your beaters going and add the cubes of butter a little at a time, your egg whites will collapse a little, but just keep beating – you will eventually end up with a lovely light, smooth buttercream.
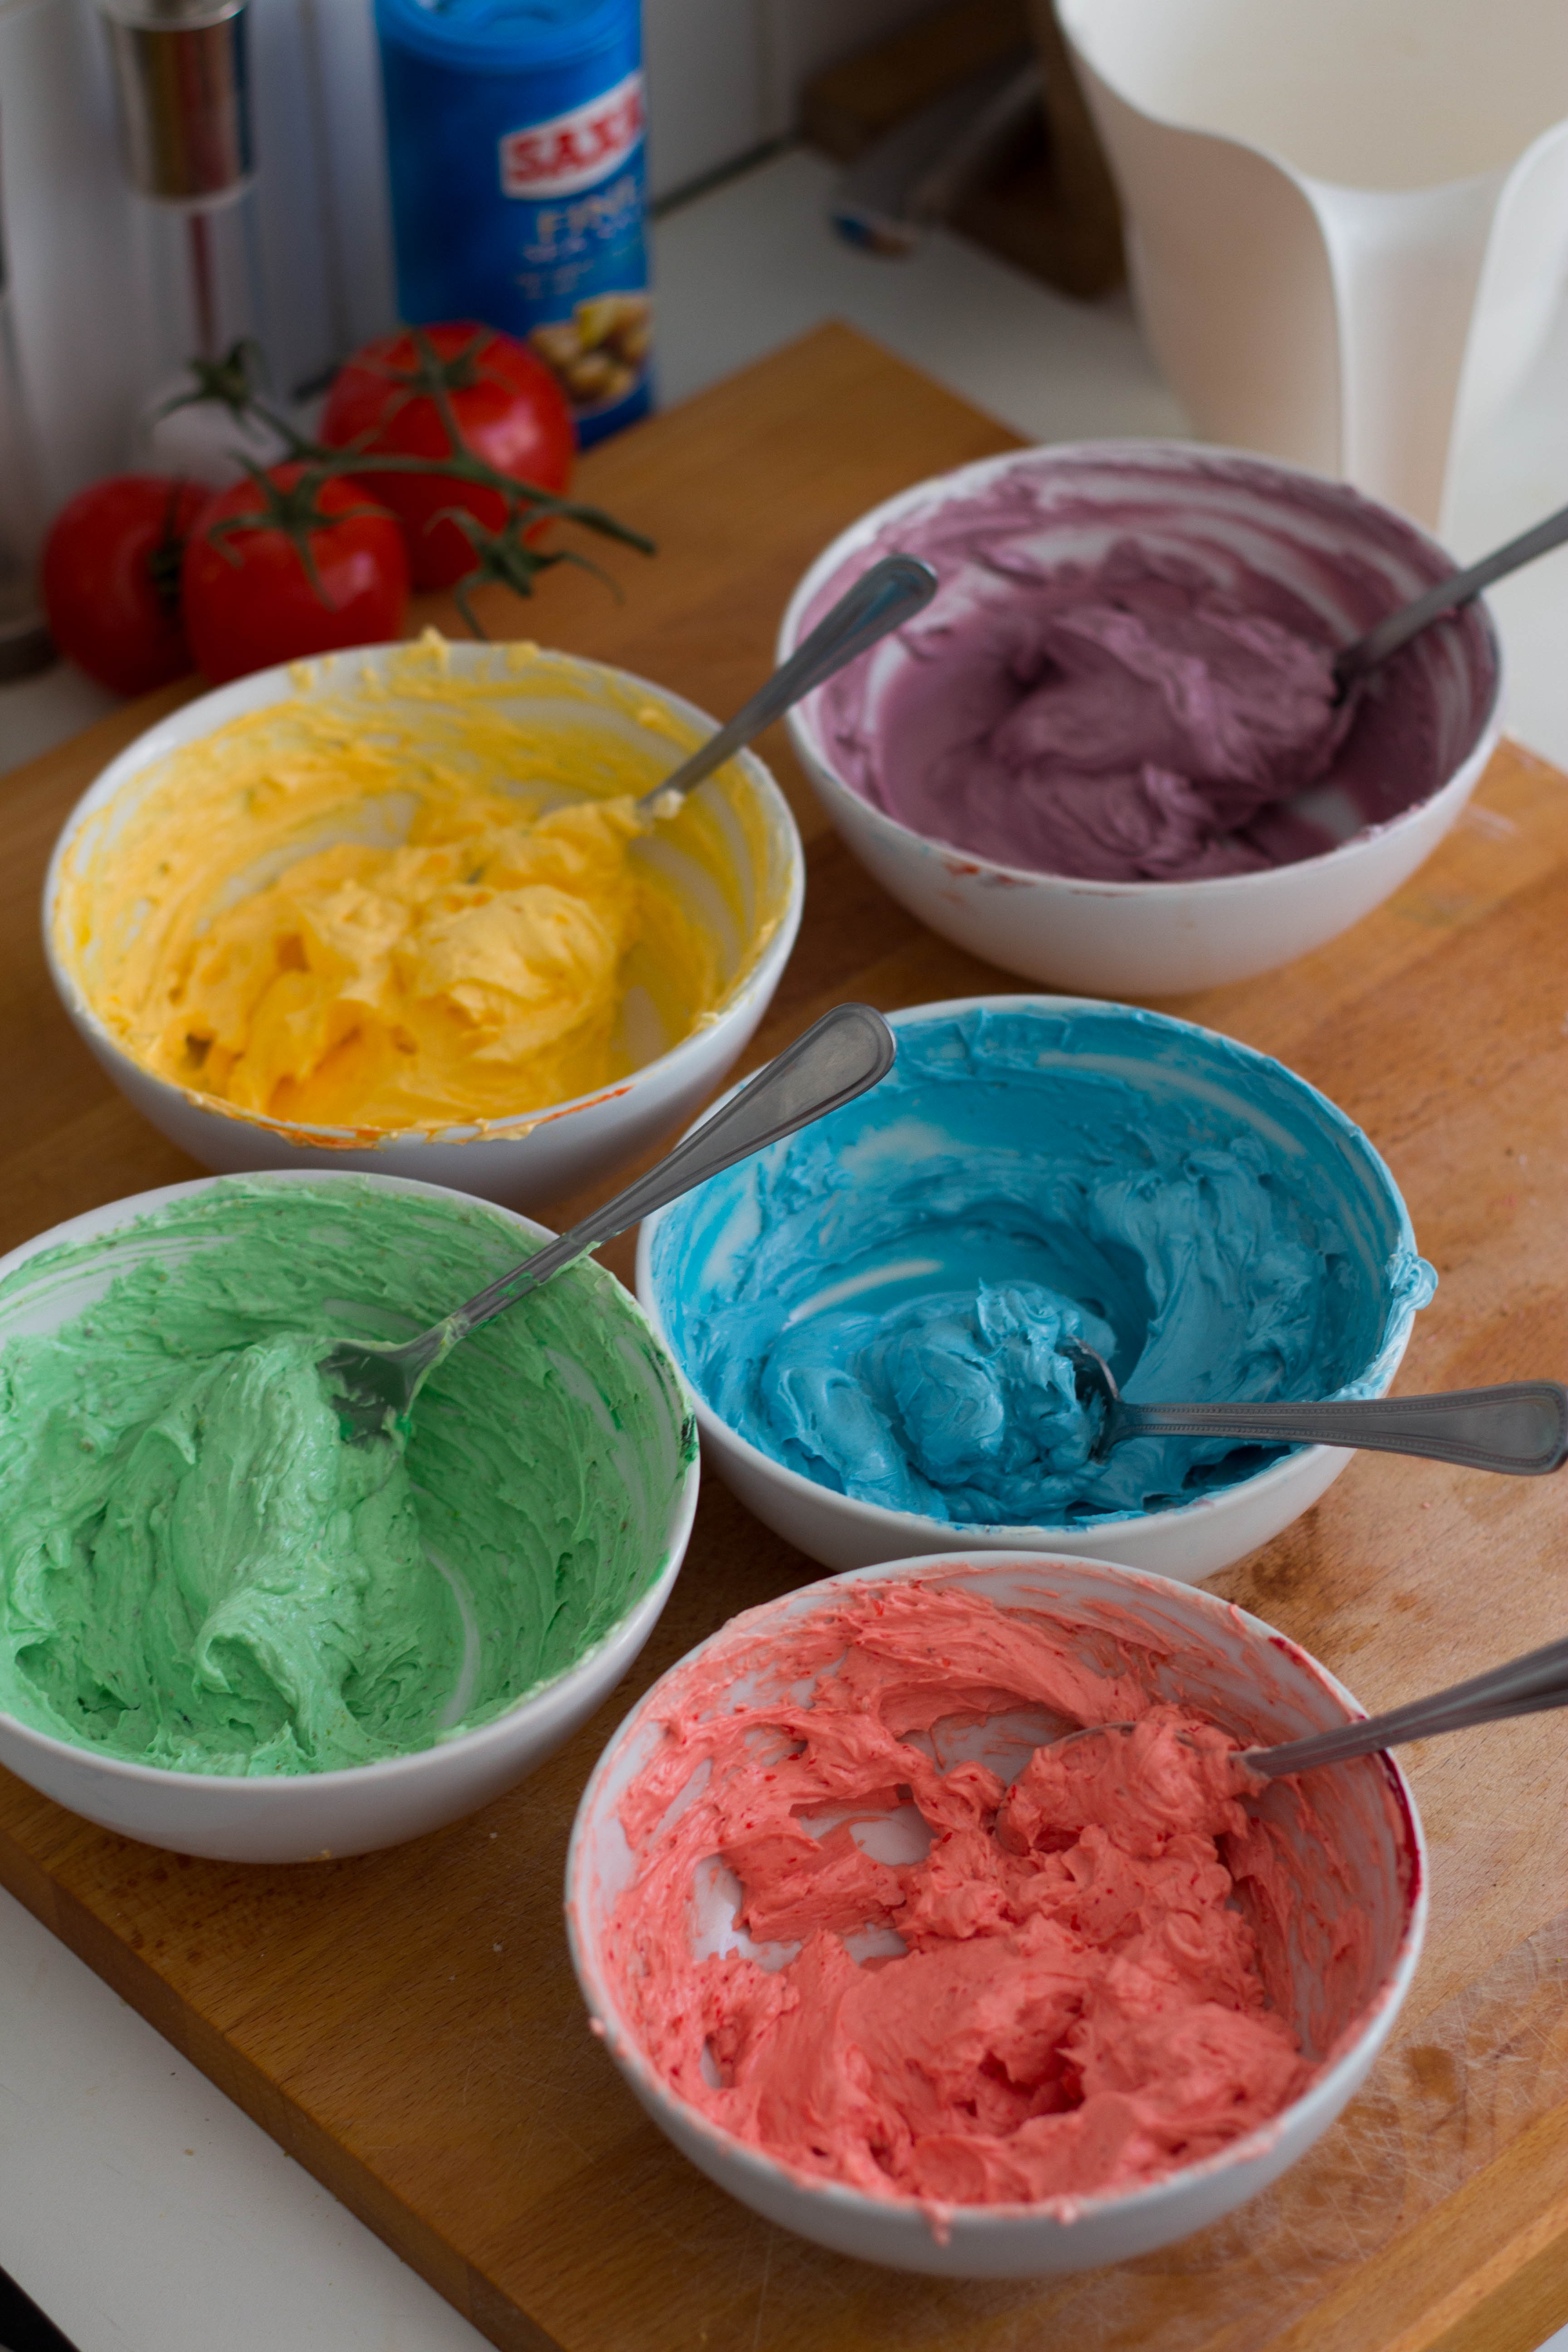
Divide your buttercream into five separate bowls, then flavour and colour them as below. You should have about 1 – 2 Tbsp more buttercream in each of the pistachio, mango and strawberry bowls. This extra buttercream will be used for crumb coating.
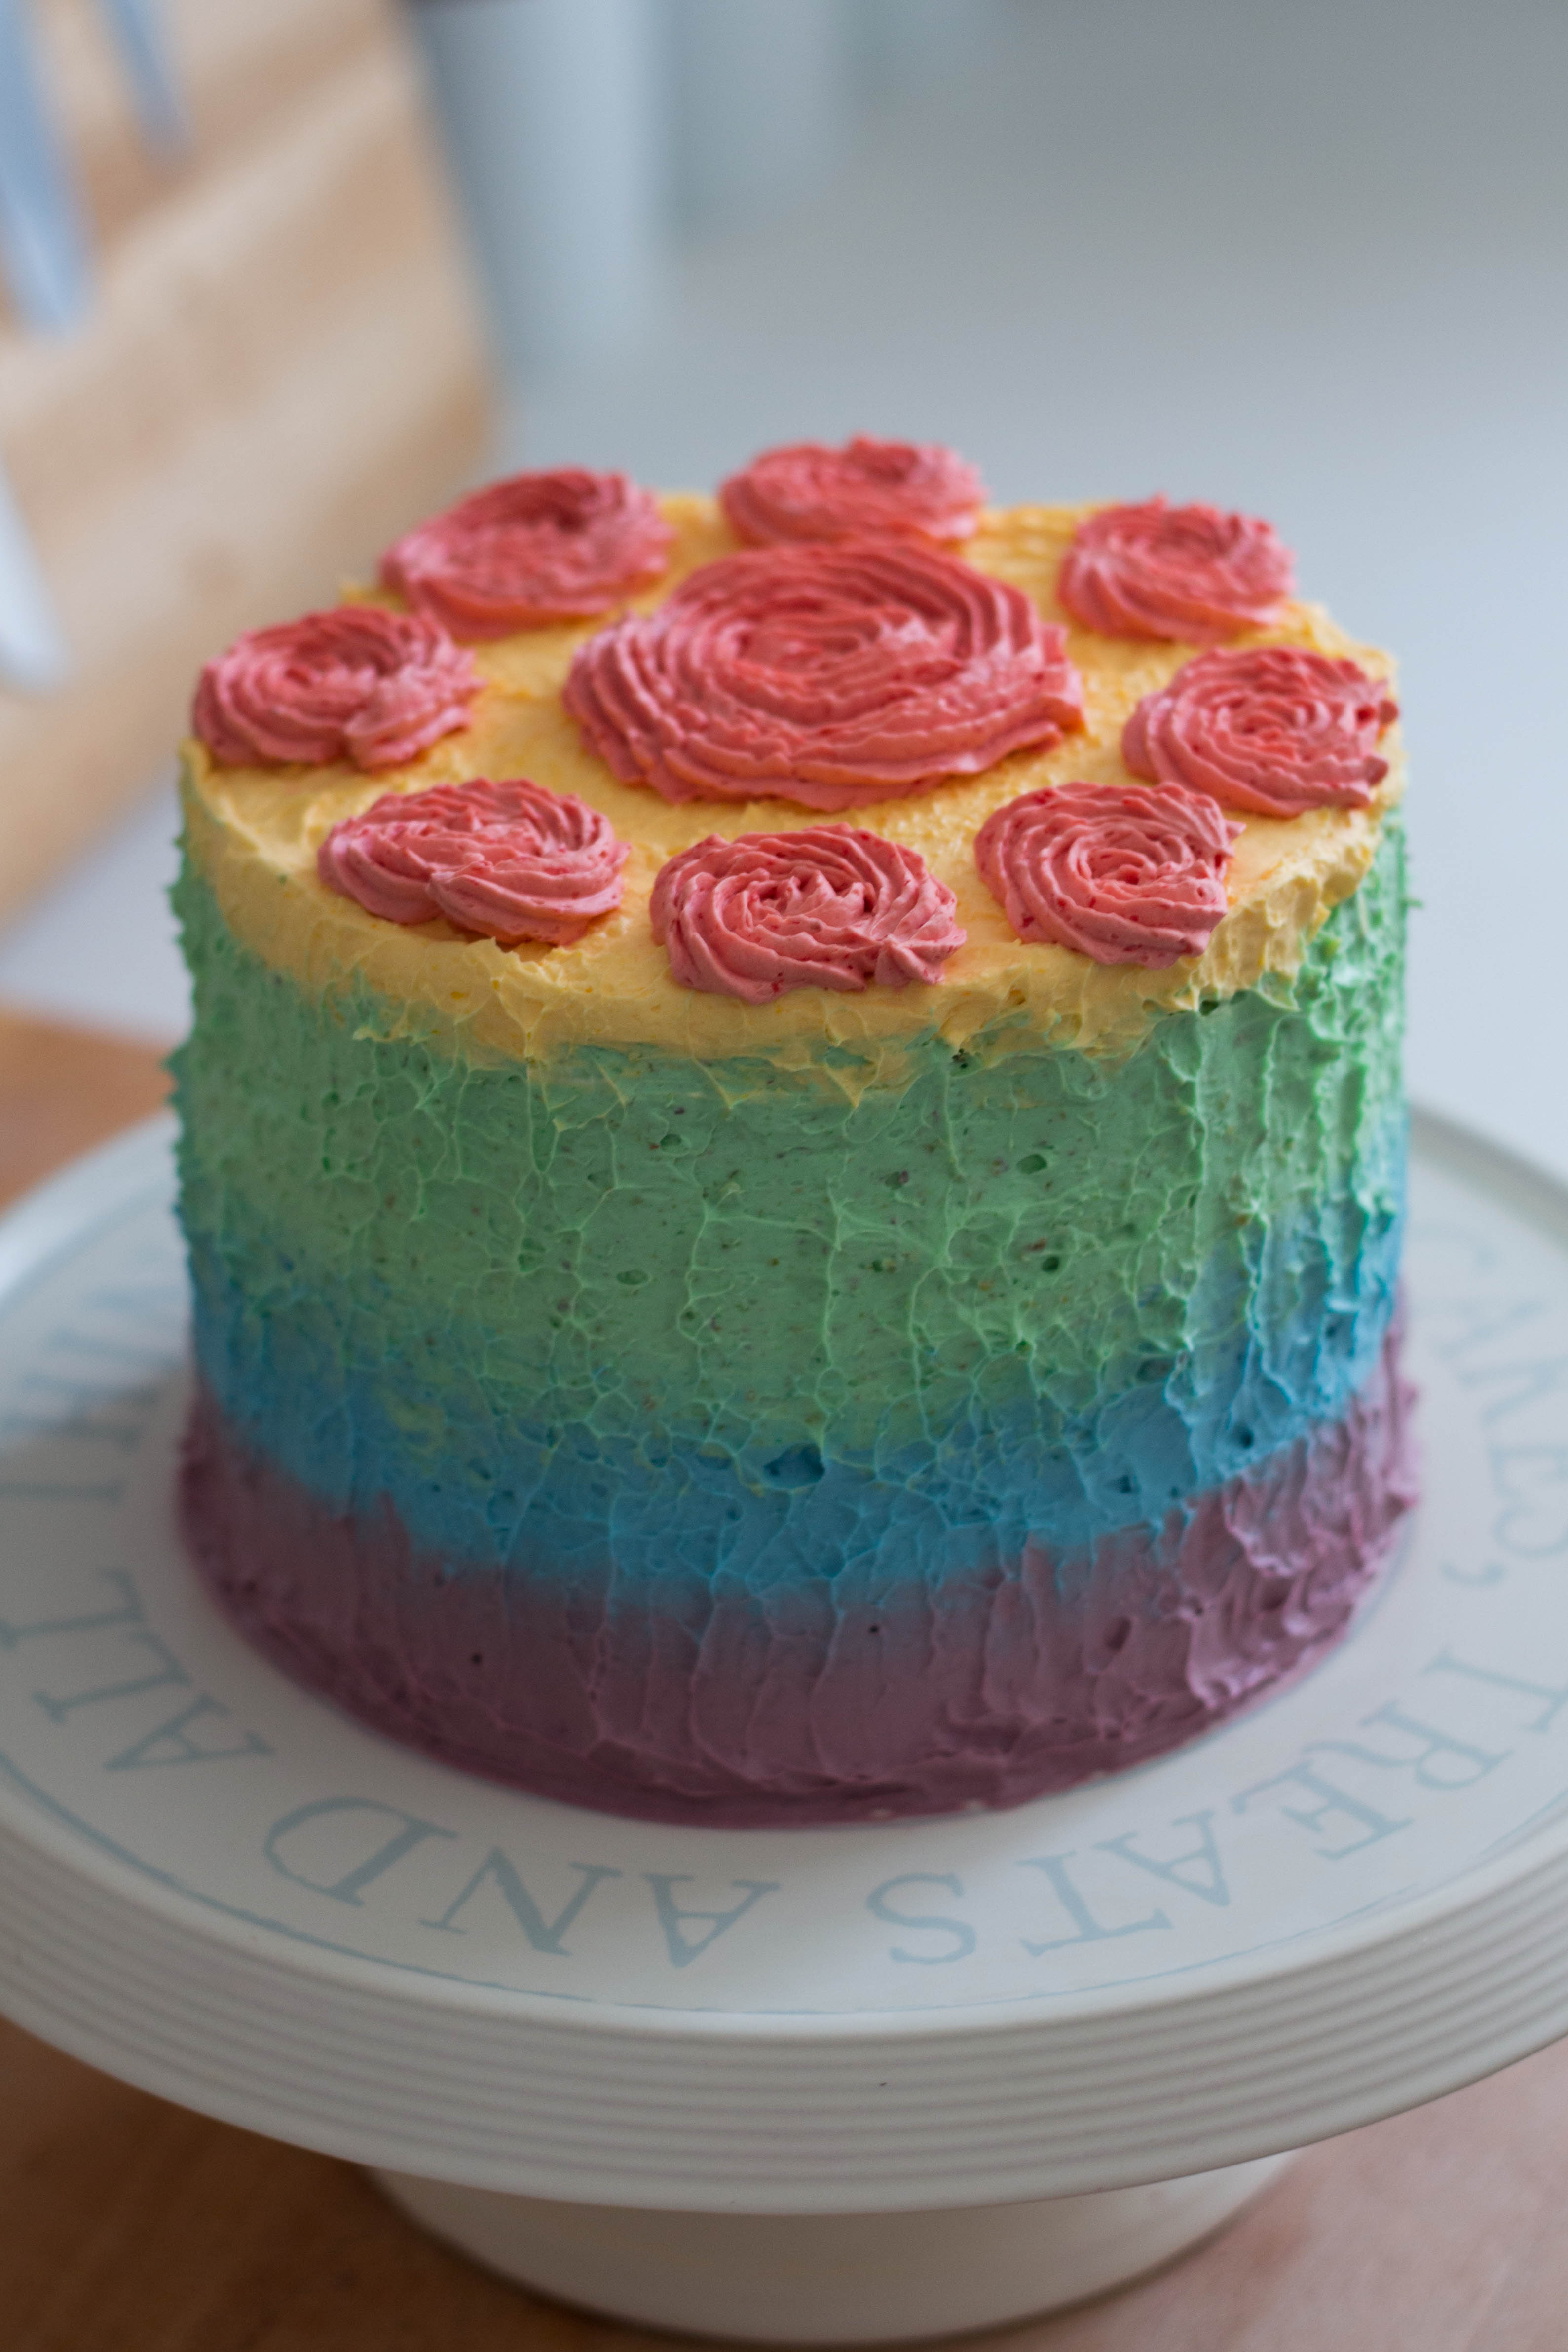
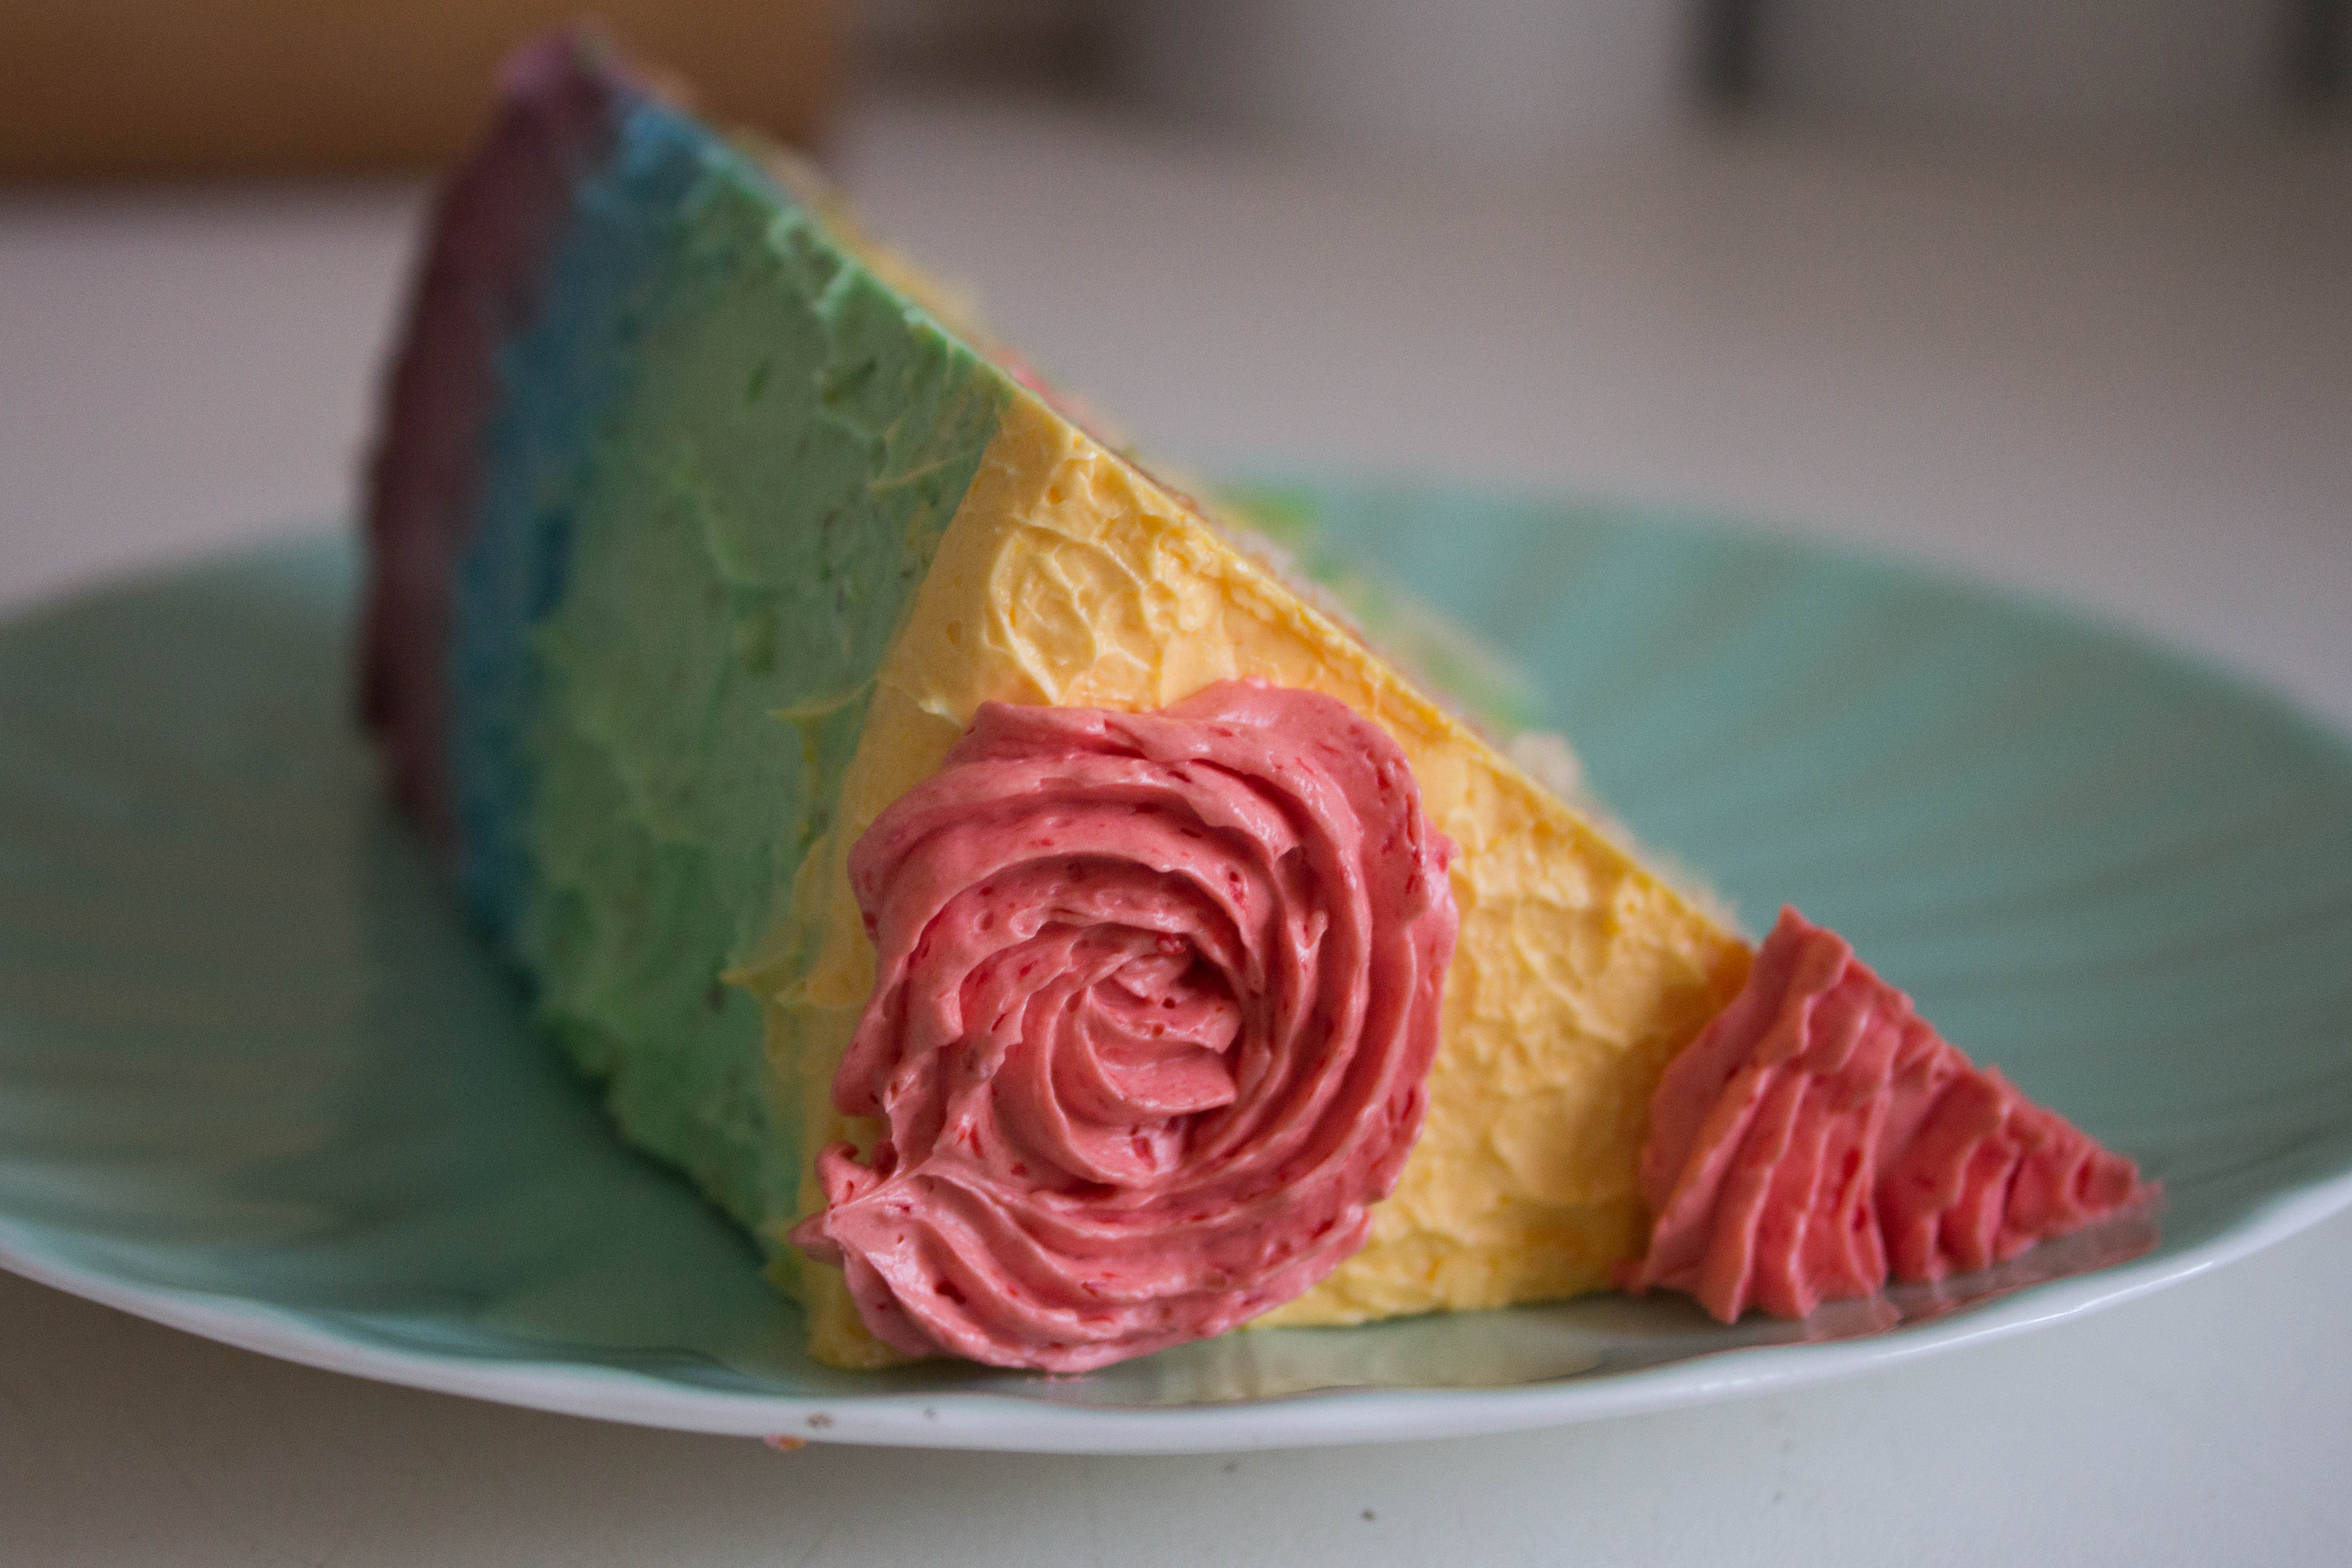
Purple: vanilla
Blue: vanilla + raspberry (blue heaven!)
Green: pistachio
Yellow: mango
Red: strawberry
Or, experiment with your own colours and flavours!
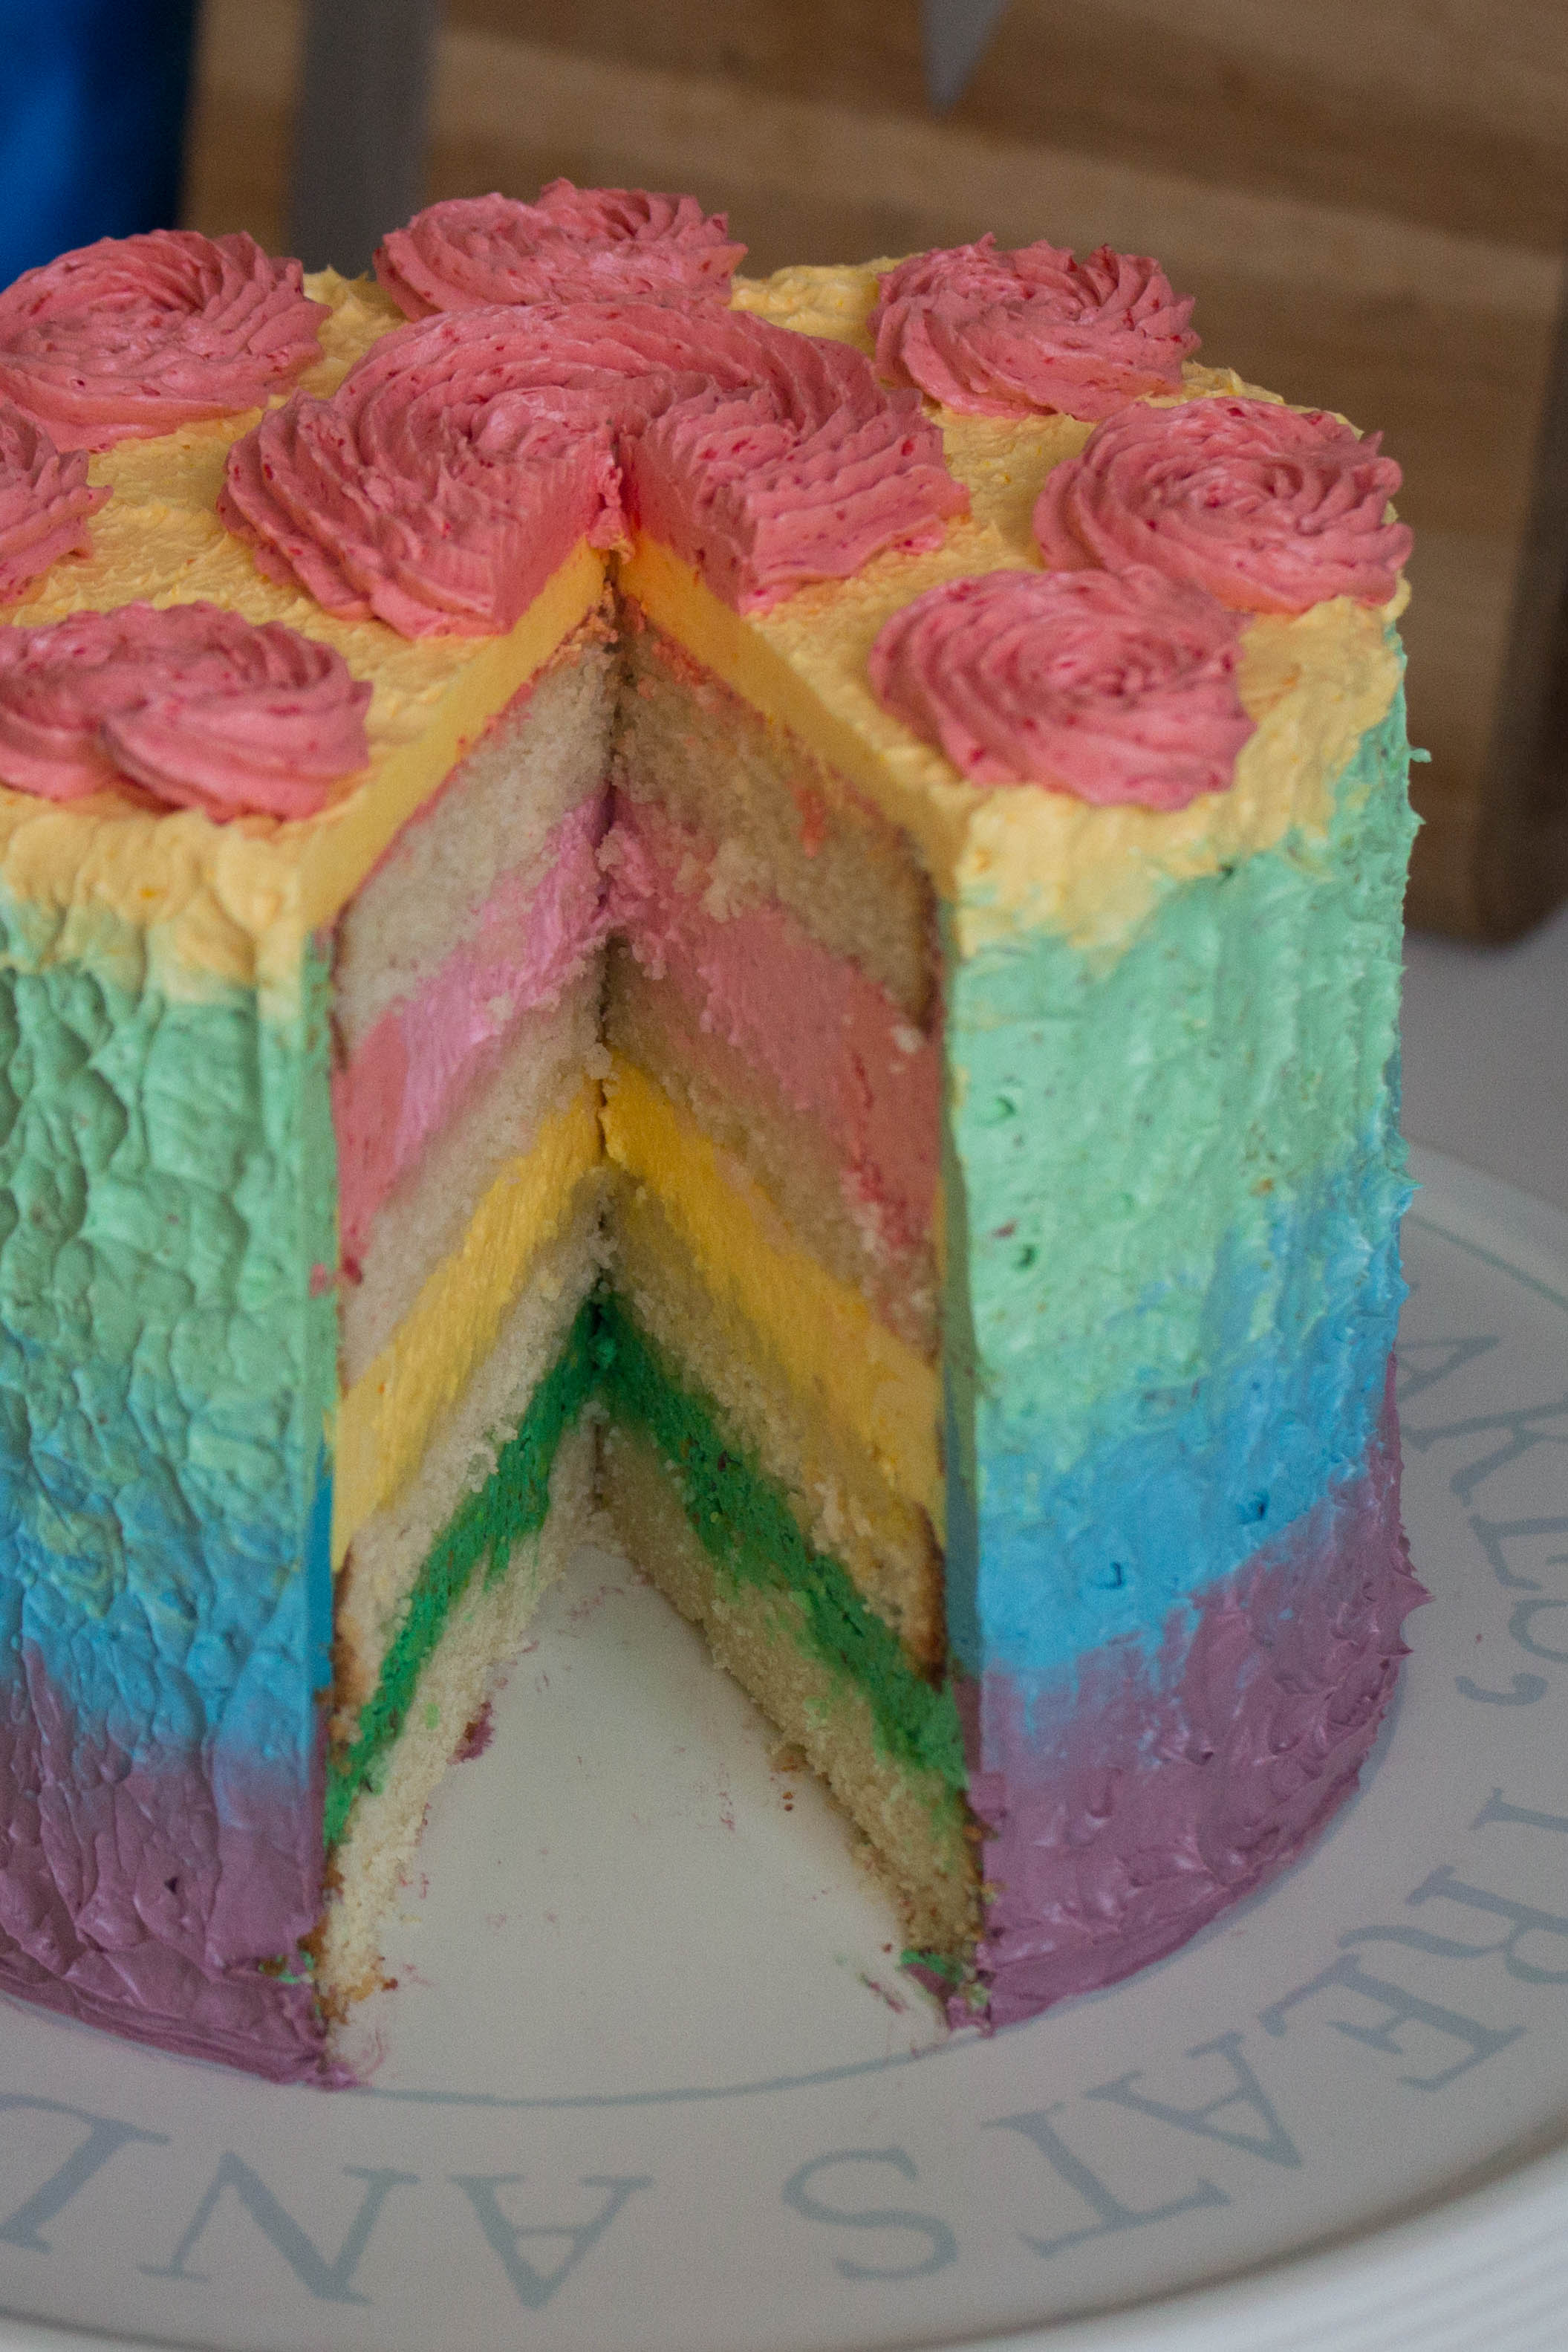
Assembling Your Cake
Start by levelling your cake layers. I use a cake cutting wire so that my layers are all exactly the same, but if you don’t have one of these just use a large serrated knife to level the surface of your cake layers.
Start with the pistachio. Pipe a dam around the edge of your cake using the green pistachio buttercream, then fill the centre with the pistachio cream cheese filling. Smooth the surface, making it as level as possible, before placing your next cake layer on top.

Next is the mango. Again, using your yellow mango buttercream this time, pipe a dam around the outside of your cake, and then fill the centre with your mango filling. Smooth the filling so that the cake is level, then place your next layer on top.
Finally, repeat the process with your strawberry buttercream and filling, then place the final cake layer on top.
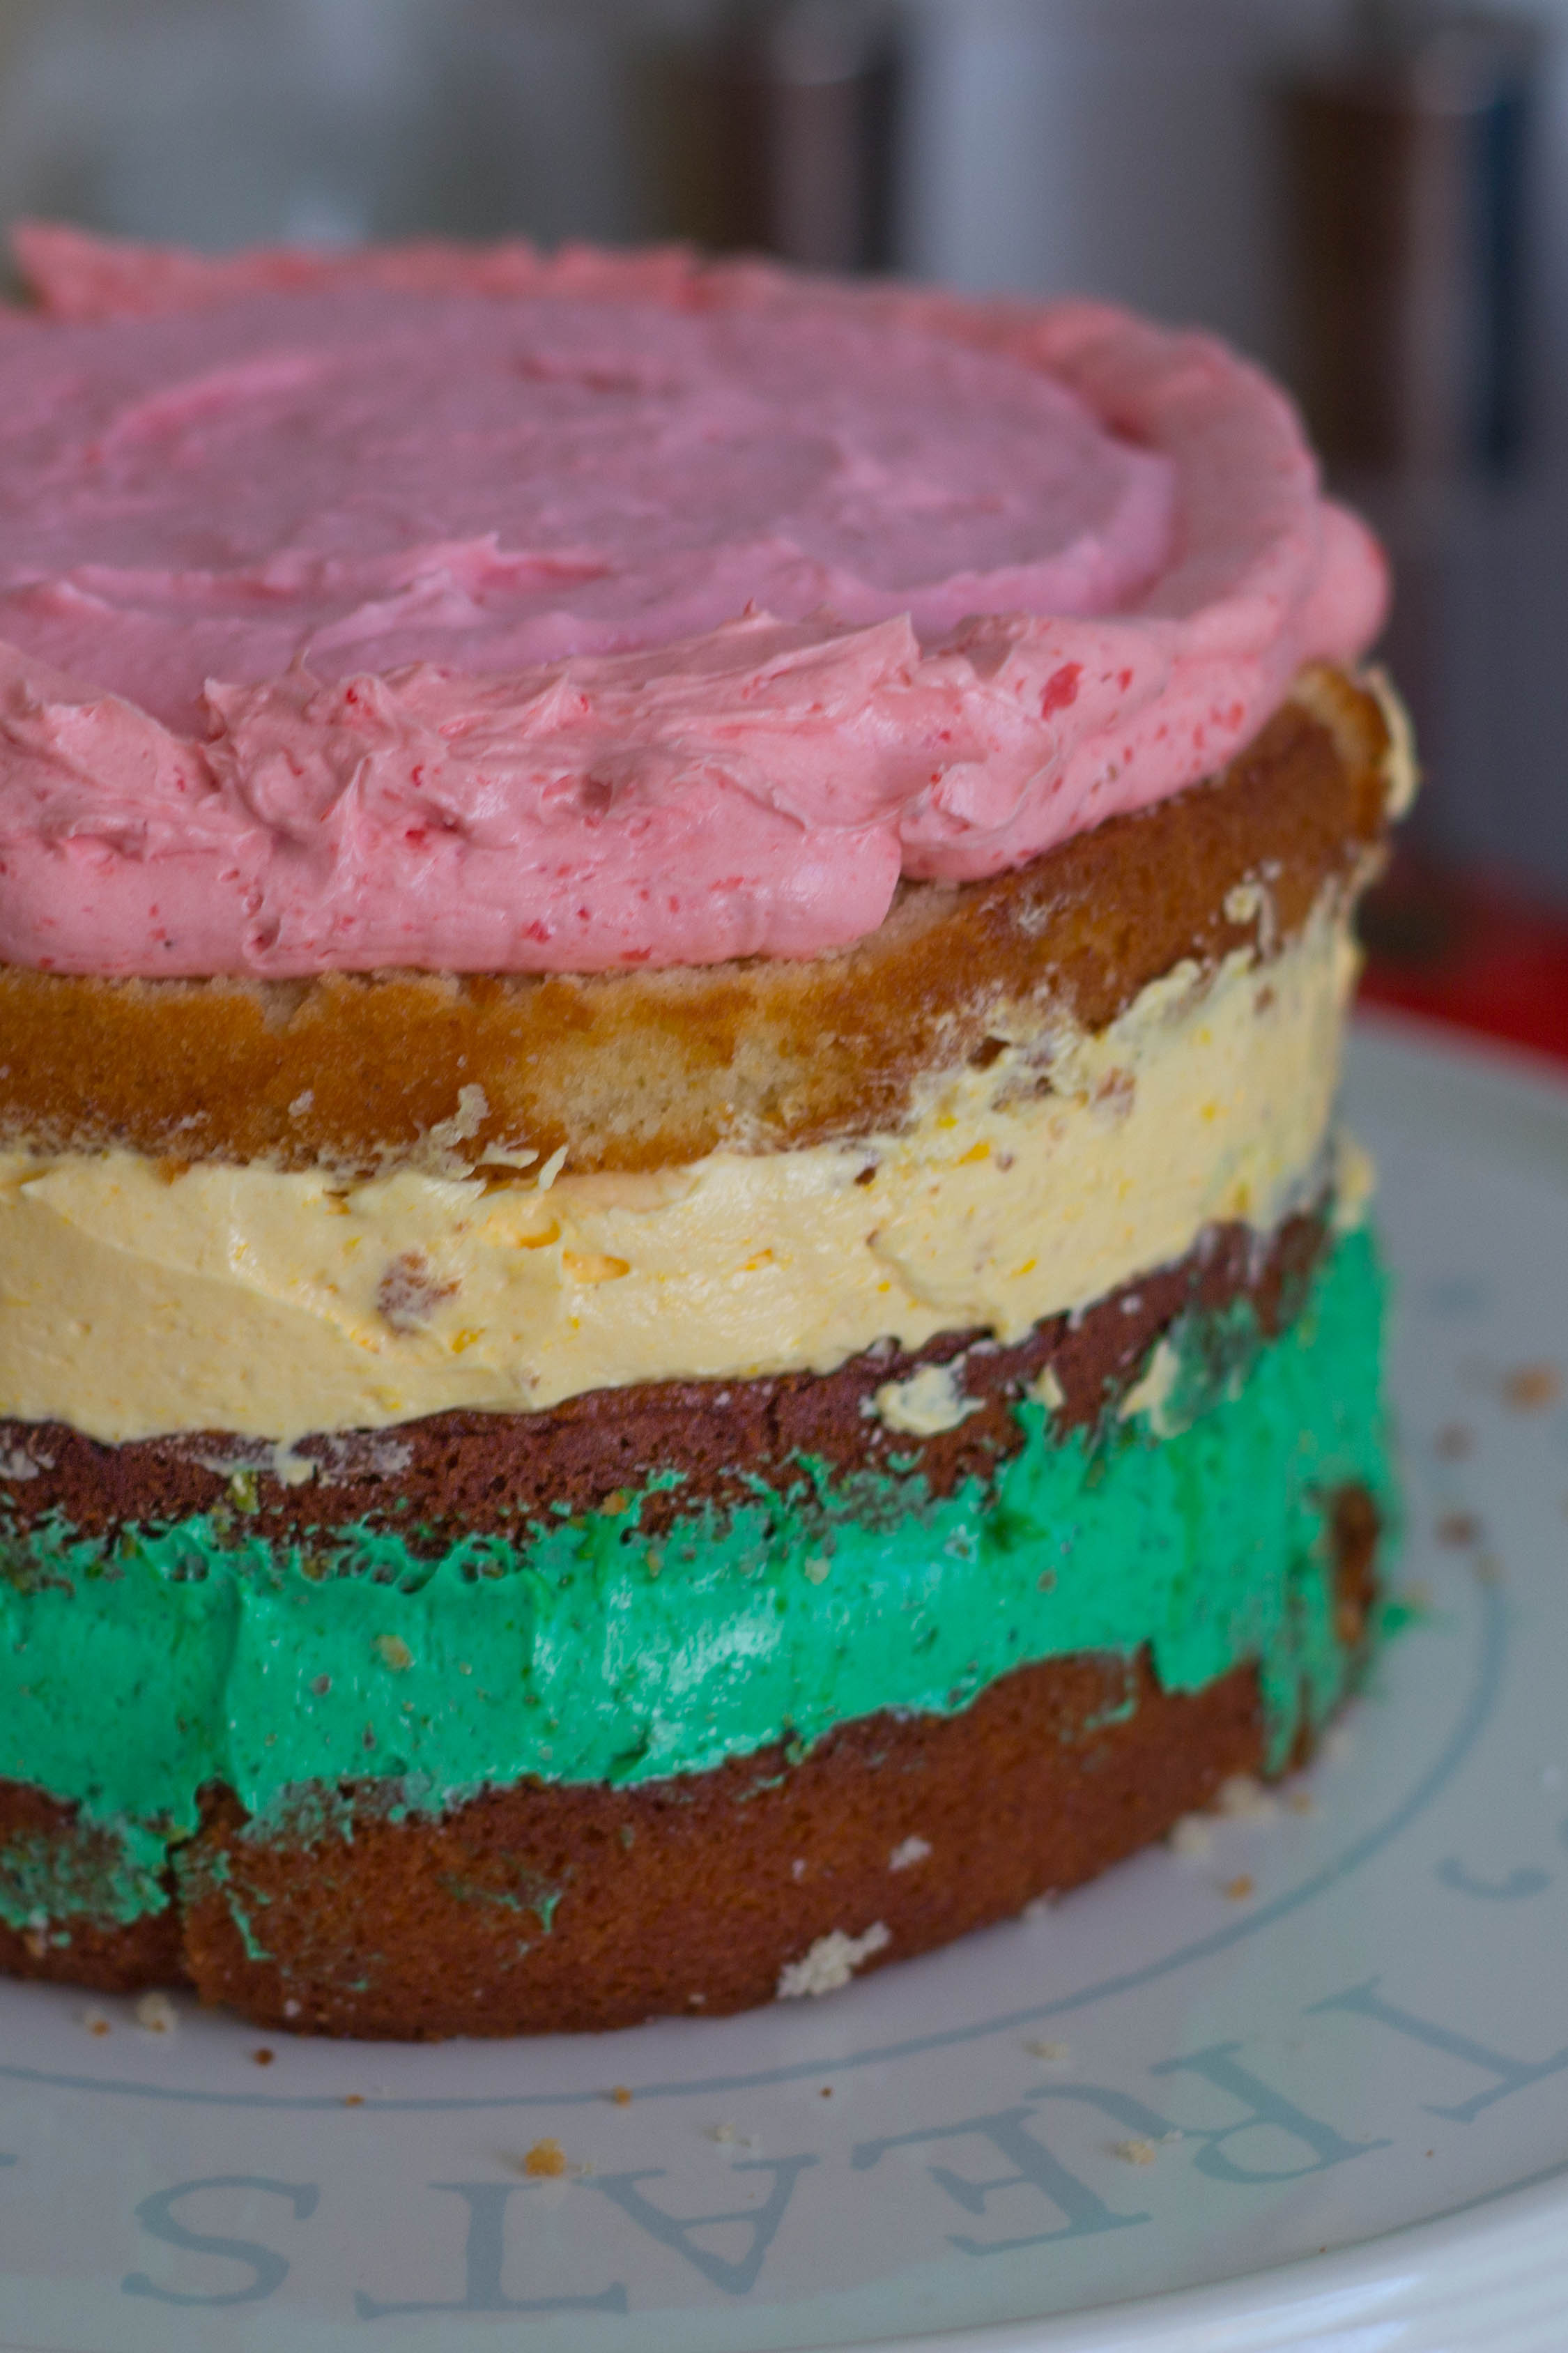
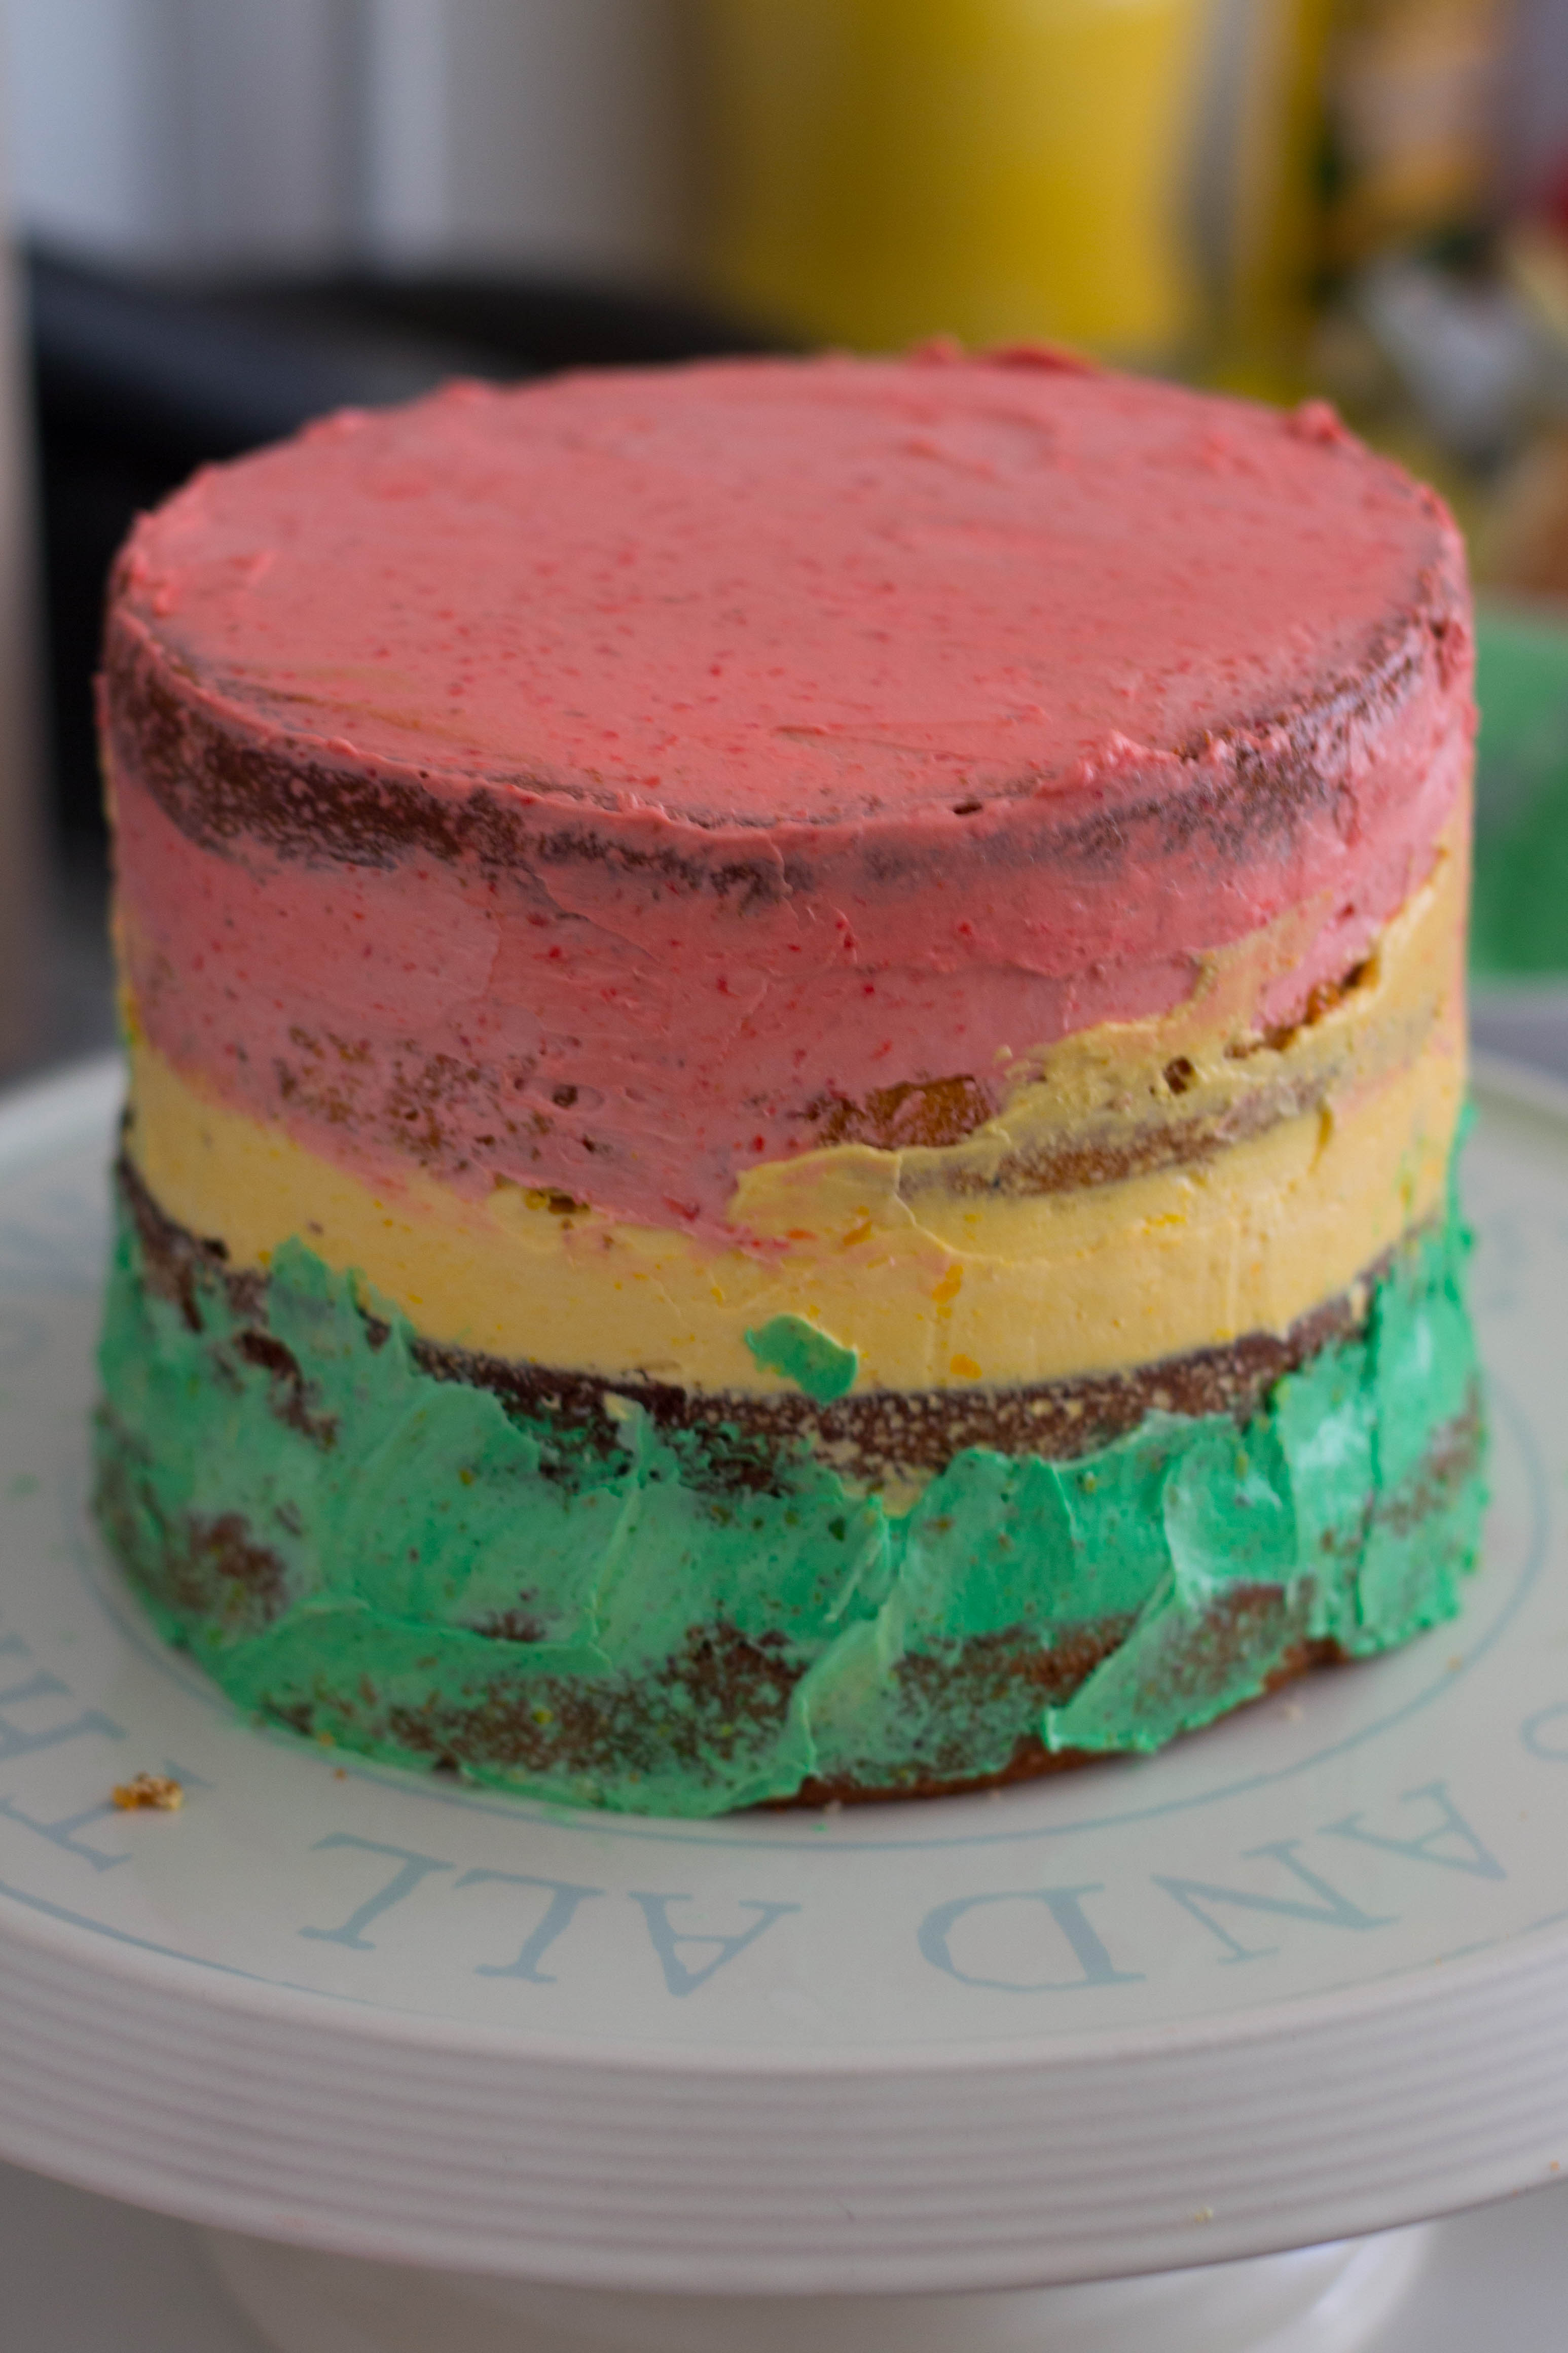
Crumb coat your cake using the pistachio, mango and strawberry buttercream only, to match up with the filled layers.
To frost, take small scoops of your purple buttercream using your palette knife and spread around the base of your cake. Smooth the finish by holding your palette knife vertically against the side of the cake and running the edge all the way around. Do this just once for now, we don’t want to remove too much icing yet.
Clean off your palette knife and repeat the process with the blue buttercream, adding enough so that the blue layer sits out slightly further than the purple layer below. Hold the edge of the knife to the side of the cake again and smooth the blue buttercream out to level with the purple. Clean off your palette knife again and repeat with your green and yellow buttercream, covering the entire top of the cake with the yellow.

Once your cake is covered, slowly smooth the icing with your palette knife by running the edge of the knife around the sides of your cake.
Clean off your palette knife before moving on to smoothing the top of your cake. Hold the knife horizontally and smooth across the surface in a circular motion. You will need to go back and forth between smoothing the sides and top of your cake to get the desired finish and colour contrast, but be sure to clean off your palette knife every time it breaks contact with your cake!
For the prickly effect, hold your palette knife vertically against the side of your cake again, but this time just touch the flat side to the surface of the buttercream and pull away directly. The buttercream will stick to the flat side of the palette knife, giving you the desired prickly texture on the surface of your cake. Move the palette knife to hover over the smooth surface of the cake and repeat. You should not need to clean your palette knife between movements, as long as you hold the knife at the same level all the way around, but if you do find the colours are blending too much, clean it off.
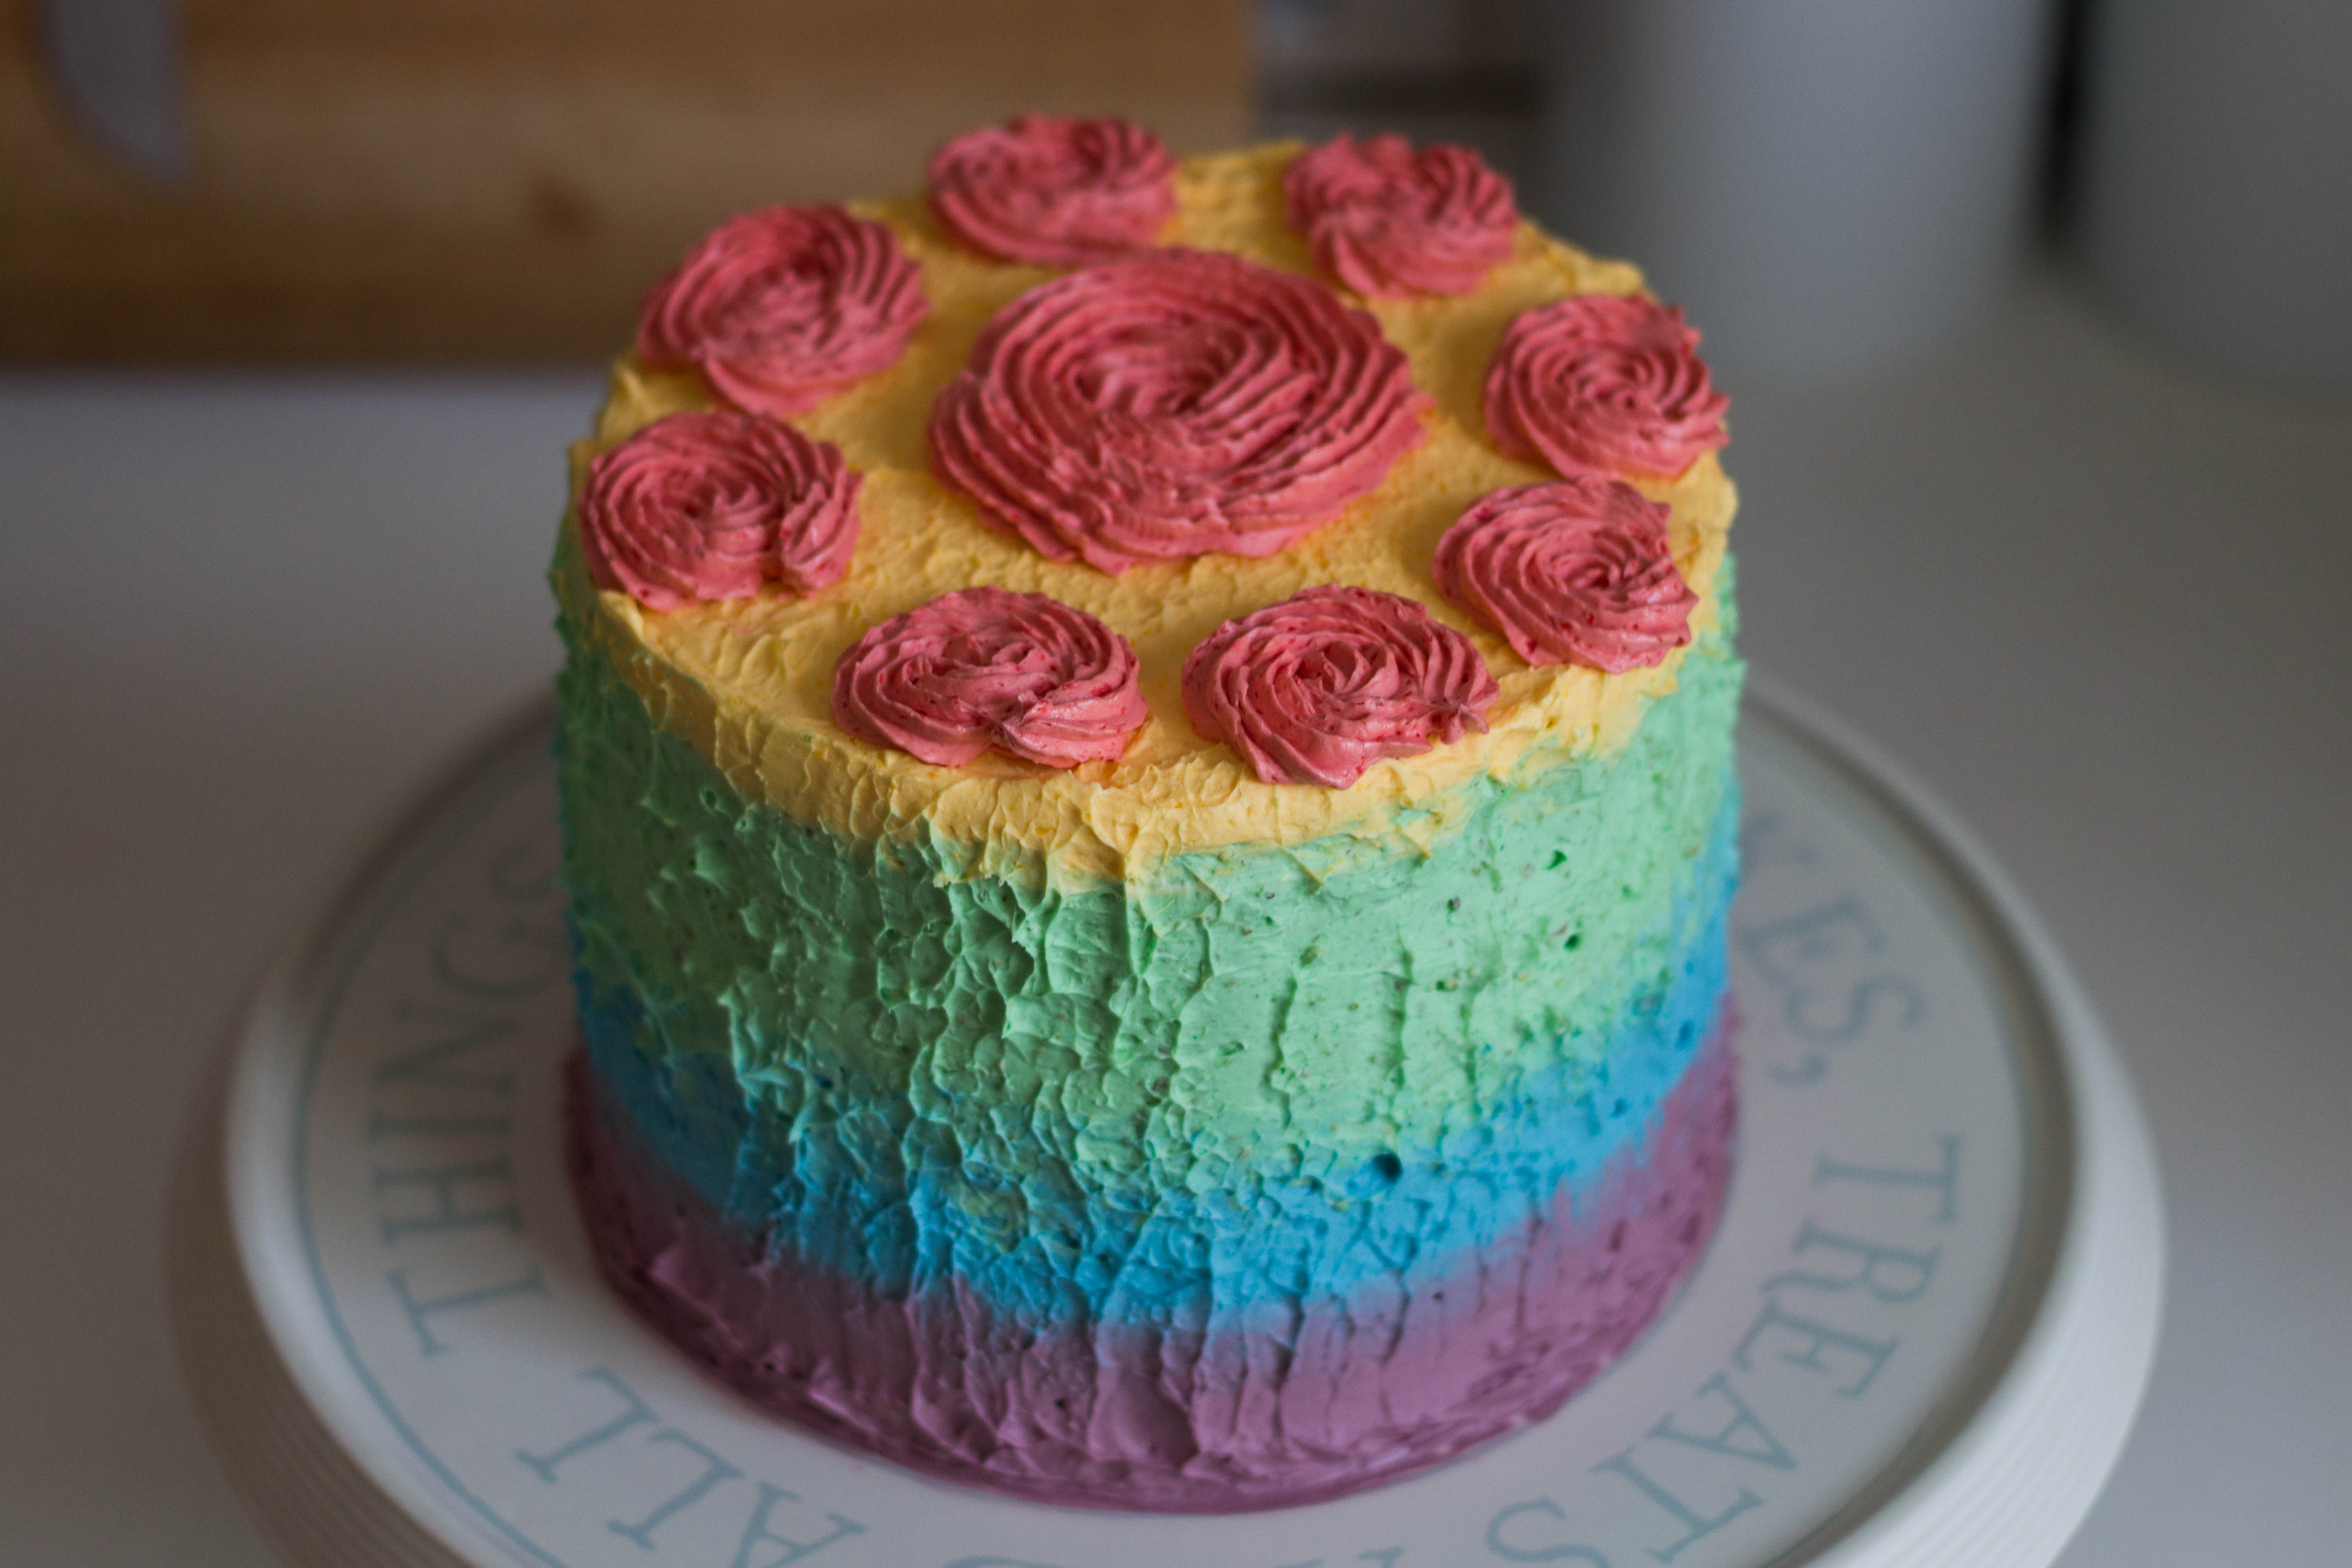
Finally, fill a piping bag fitted with an open star tip with the remainder of your strawberry buttercream, and, starting in the centre, pipe swirls around the top surface of your cake.

Enjoy… x
